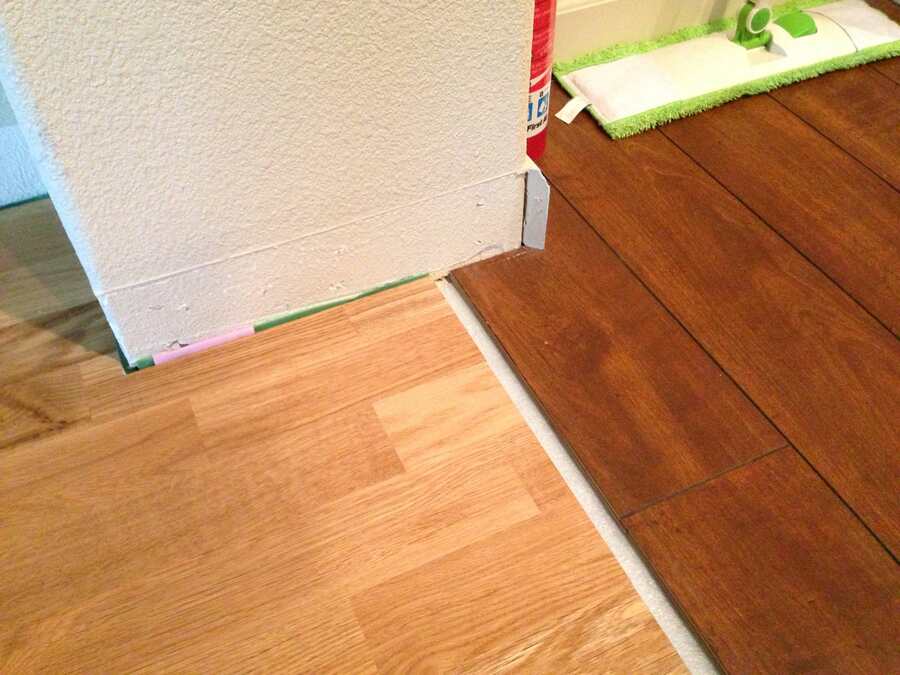
Hardwood floors are beautiful and can also differentiate rooms in your house. Installing or replacing a wooden floor is costly, so you might only put it in one room. If you need to complement the wood of the other floors, it may not look good if there are differences in color, width of planks, or finish. Rather than this, you can make it look purposeful by using different kinds of wood and particular connecting elements.
Moving from one wood floor to another could be challenging, but you can create a line seamlessly with the right equipment and ideas. This guide will show you How To Transition Between Two Different Wood Floors: T-molding, seam binders, custom cuts, etc. We will also advise you on the best method for your floors and the steps to follow and share some tips to ensure your project turns out great. Let’s go and transition Between those floors!
Importance of Transitions Between Two Different Wood Floors
When we have different wood floors next to each other, the key is to make them appear as if they are part of the same picture. We want our rooms to be smooth, not cut into pieces. A seamless move from one wooden floor to the next also does this for us. Not only does it make the visual flow of the room more pleasant, but it also creates a more unified and coordinated design.
Furthermore, they prevent us from stumbling and falling, which would lead to injuries. If we don’t have good transitions, it looks terrible and confusing. But done with purpose, it looks tidy and organized. Additionally, well-executed transitions guarantee that the flooring’s edges are well-protected and prevent accidents such as falls, extending its lifespan. So, think about transitions between rooms – they make the journey from one floor to the next easy and pleasant.
Methods to Transition Between Two Different Wood Floors
T-Molding Transition
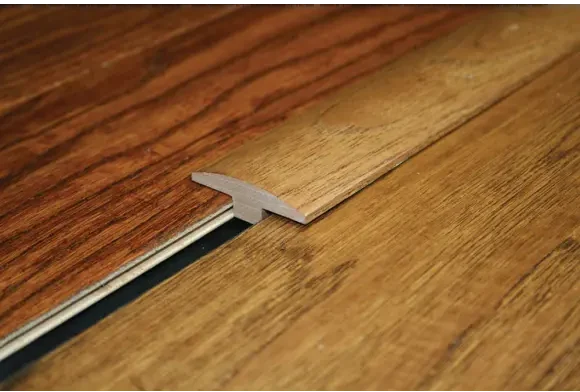
T-molding is an excellent way to connect two wood floors at the same level. It looks like a giant letter T and covers the space between the floors, filling in the gaps. Various wood options are available for T-molding to coordinate with your floors.
To install T-molding, leave a gap between floors slightly wider than the vertical part of the T, about 1/4 inch. Place the blade as close to the floor thickness as possible.
To install T-molding:
- Clean the gap between the floors properly to the molding stick.
- Use the miter saw to cut the T-molding to the size that matches the length of the area. Try it out for size first. Once you get comfortable, then you can hammer it.
- T put in T-molding where it should be set. Set the first part of the top part on the subfloor and nail it or screw it down with a drill.
- Complete the vertical part using finish nails (4-inch long common and square-head nails) on each floor. Gently tap with a nail punch as well.
- If you find any holes, fill them with wood putty to ensure a smooth and even finish.
- If you get them down correctly, t-moldings are suitable for seamlessly joining hardwood floors. This could involve selecting one wood type with coordinated colors or a similar choice.
Tips for T-Molding transitions:
- To accommodate dimensional changes due to seasonal variations, start by reducing the floorboards protruding from the T-molding by a couple of millimeters.
- Then, decide on a T-molding that is both in contrast and complementary to both remaining floors.
- Lastly, ensure a 0.5-inch (1.5 cm) gap between the door and the T-molding. You can fill this later with caulk and make things move around.
Threshold Transition
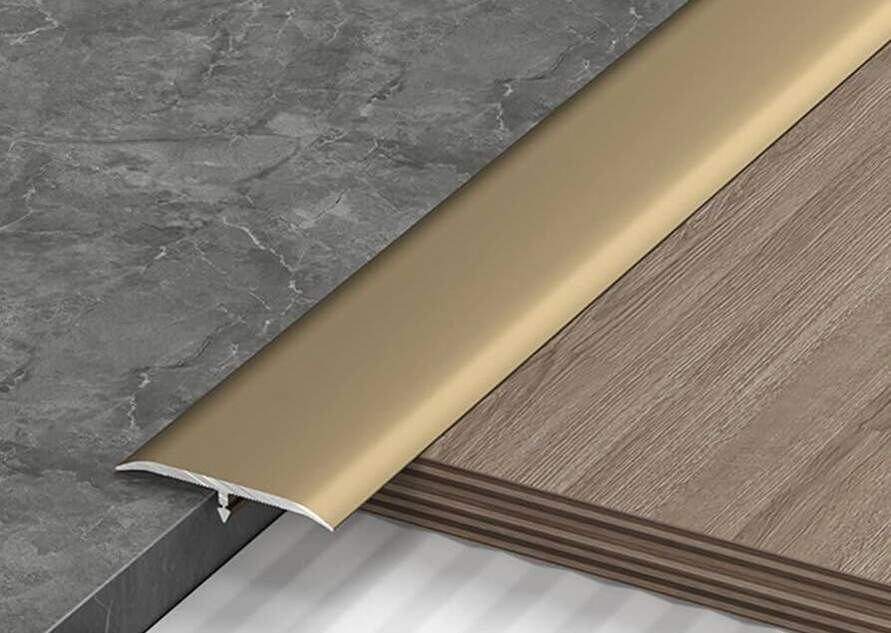
A threshold transition is like a bridge between two rooms with different wooden floors. It’s a flat strip that closes the gap between floors. This reduces the chance of tripping and gives a beautiful contrast from one room to the other. Consider it as an unseen connector between the levels of your house. Therefore, whatever next room you are entering, it will not give the slightest hint that you are stepping on a different kind of floor.
To Install Threshold Transition:
- Firstly, please measure the size of a threshold and cut it to the desired length.
- Clean the ground where you will install the threshold.
- Put this threshold between the floors and adjust it to sit correctly.
- Finally fix it with glue or nails.
- Ensure there are no gaps between the flooring and threshold, allowing for filling them with wood putty if necessary.
Tips for Threshold Transition
- Do not use the lines which could cause trips. Consequently, think over the threshold while choosing.
- Leave a small distance between the entryway and the floors. Later, you can fill this gap with caulk to accommodate expansion.
Border Transition
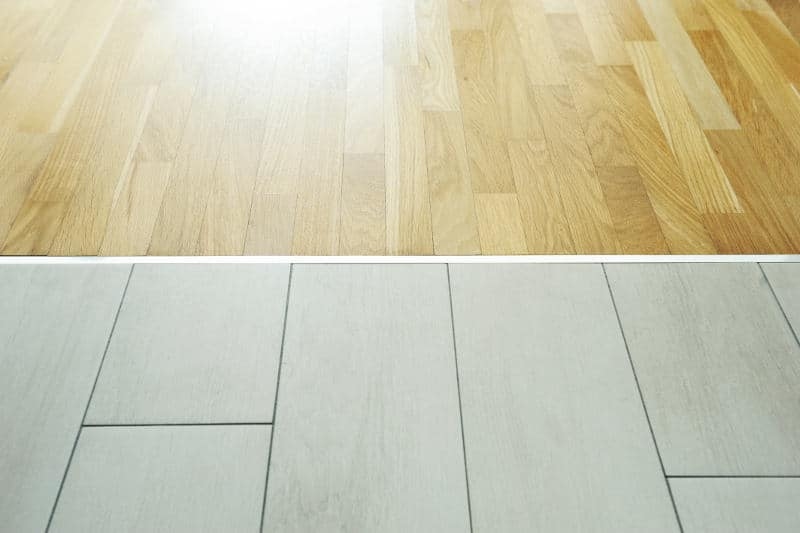
A border transition is like putting a particular frame between two wood floors. It’s a finishing strip that contributes to the area’s decorative features. You should take one or two boards in width to achieve this effect. Finally, you will place your boards inside this border and tie them to the flooring of the other room.
In this case, place the border across the other room. This creates a continuous movement without any gaps. Note that this method does not apply to tongue-and-groove-type flooring.
How to install:
- Measure and mark where you want the border to be.
- Make the border horizontal, with it being straight and even.
- The border should be secured with nails or glue.
- Install the boards at the border, aligning them tightly.
- Carry on the flooring from the next room to the border, ensuring it ends smoothly.
- Nail or glue the adjacent room’s flooring to the border.
- Run your fingers across the surface to feel for any gaps and fill them with wood putty to achieve a smooth surface.
Tips for Border Transition:
- Select the boards that go well with each other and lay them out to check if they are a good match.
- Be patient with this method, too. If the border is not perpendicular to the other boards, fixing it later won’t be easy.
Seam Binder
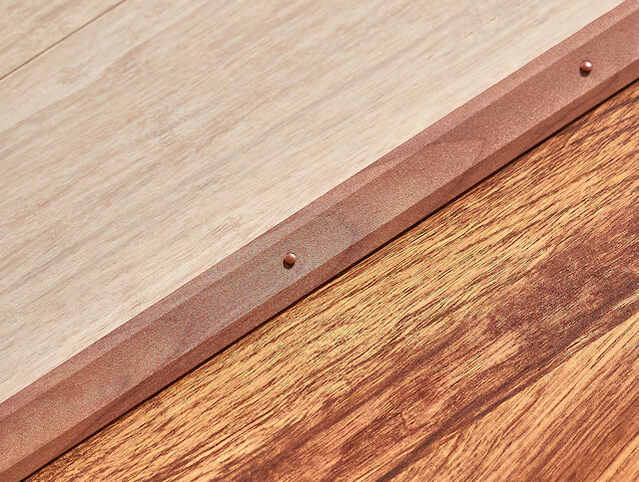
Seam binders, commonly known as flooring strips or divider strips, are thinner than T-moldings. Usually these strips are flat to match the floor and fit into the edges. The trim is a 2-inch wide metal or plastic strip to cover the gap between the floors. The strip allows a 1-inch space between the floor and each carpet row that helps prevent slipping and tripping. Seam binders can be found in various sizes and shapes to complement your flooring. They are easy to install and give you a quick solution for changing between floors.
Seam binders work best when the floors are level with no gaps and if you need the floor transitions to be inconspicuous.
How to install:
- Make sure that the floors are planned and free of debris. Use a vacuum to clean the space between the floors properly.
- Cut the seam binder to the correct size with a miter saw. Fit test and make sure the cuts are made to the correct size.
- Pre-drilling holes for finishing nails will prevent the wood from splitting. Space the nails approximately 8 to 12 inches apart.
- Position the plywood in the middle of the gap and nail it onto the subfloor. But you must be careful and not drive the nails through the flooring below.
- Cut the gap with wood filler to create an overlap in wood. Bring the rest of the joint edges at an even level.
Consider staining the unfinished wood edges of the cover to match your floor shade.
Tips for Seam Binder:
- In terms of seam binders, cut them with a miter saw for a precise cut to fit tightly.
- Be sure to sand the raw wood edges of the binder first to create a leveled surface where the color will be absorbed smoothly, and the result will be uniform.
Custom Transition Strip
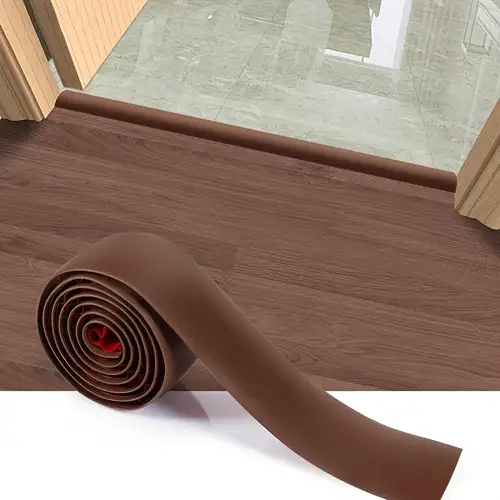
A custom transition strip is similar to a tailor-made solution for covering two different floors. It is specially designed to work with your unique layout, whether you have different height levels, curved transitions, or non-standard features. A custom transition strip is ideally for wood floors that are not the same height. It’s designed for your floors, so it fits seamlessly. Consider it a personal and solid link between your floors that guarantees you go from one room to another without any problem.
How to install:
- Consider the height gap between both floors by measuring it accurately.
- Transfer measurements onto a piece of wood at least four inches wider than the tallest flooring.
- Use a table saw to taper the wood from the height marks to narrow edges.
- Cut an interlocking tongue and groove pattern at the edge of the saw cut.
- Finish and stain the wood to match the floors that are already there.
- Before using the strip, drill holes and secure it to provide strength.
With your woodworking skills, you can add a classy finishing touch to tricky floor changes. Customizable options allow for artistic designs using metal, tile, stone, or other materials.
Tips for Custom Transition Strip
- Precise measurements should be taken to account adequately for the floor height difference.
- Try different metal, tile, or stone materials to make aesthetically pleasing custom transition strips.
Choosing the Proper Transition Method
When selecting the transitional method for your wood flooring, consider aspects such as the height difference of the floors, the type of wood flooring material, and your overall design style. Prepare the transitions accurately, take measurements step by step, and, after the first assessment, choose the best way to fit the conditions.
Consider whether you are for a smooth and almost unnoticed change or like visible borders, and the floors are more distinct instead. It would help if you also considered the technical issues, like the durability and maintenance of each transition mode.
Also Read: 9 Huge Common Mistakes When Installing Vinyl Plank Flooring
FAQs
What is a Floor Transition Strip?
A floor transition strip is a narrow piece of metal, wood, or plastic that covers the gap between two different levels and flooring materials.
What is an Alternative to Transition Strips?
An alternative to transition strips is a solution that requires techniques such as beveling or undercutting or no additional material. Generally, a smooth and invisible transition between various materials is built to create flooring.
How Much Gap Do You Need for Transition Strips?
For the transition strips, you usually need a gap of approximately 1/4 inch between the two types of flooring materials to allow for proper installation and account for the materials’ expansion and contraction.
Where Should Floor Transitions Be Placed?
Floor transitions should be placed where two different types or heights of flooring materials meet, such as doorways, thresholds, or areas where one room ends and another begins with other flooring.
Can I Use Caulk or Putty Instead of a Transition Strip?
Yes, caulk and putty can be substitutes for a transition strip in any given case. But they are not as long-lasting or visually appealing.
Conclusion
Every detail is crucial regarding interior design, including wood flooring transition color zones. One of the best ways to enhance the overall appeal of your living space is to know How To Transition Between Two Different Wood Floors and pick the proper techniques. Whether you choose a classic threshold or create a one-of-a-kind solution, the critical aspect is to ensure that these transitions serve their functions and add to the beauty of the wood floor design.
Also Read: Options for Which Direction to Install Vinyl Plank Flooring

