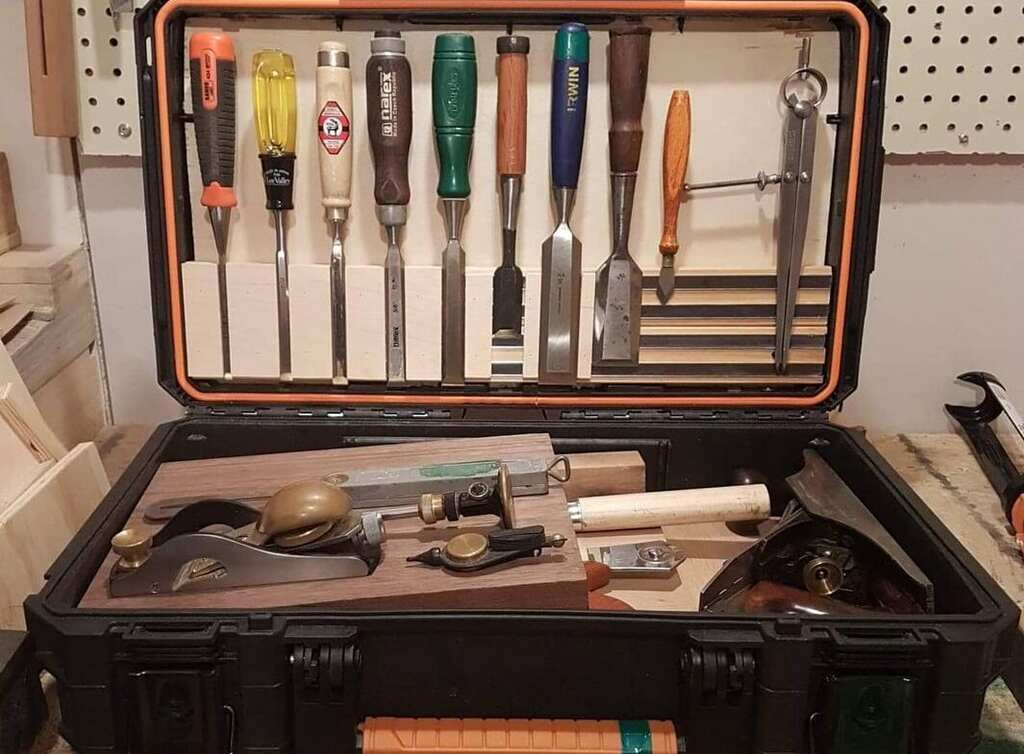
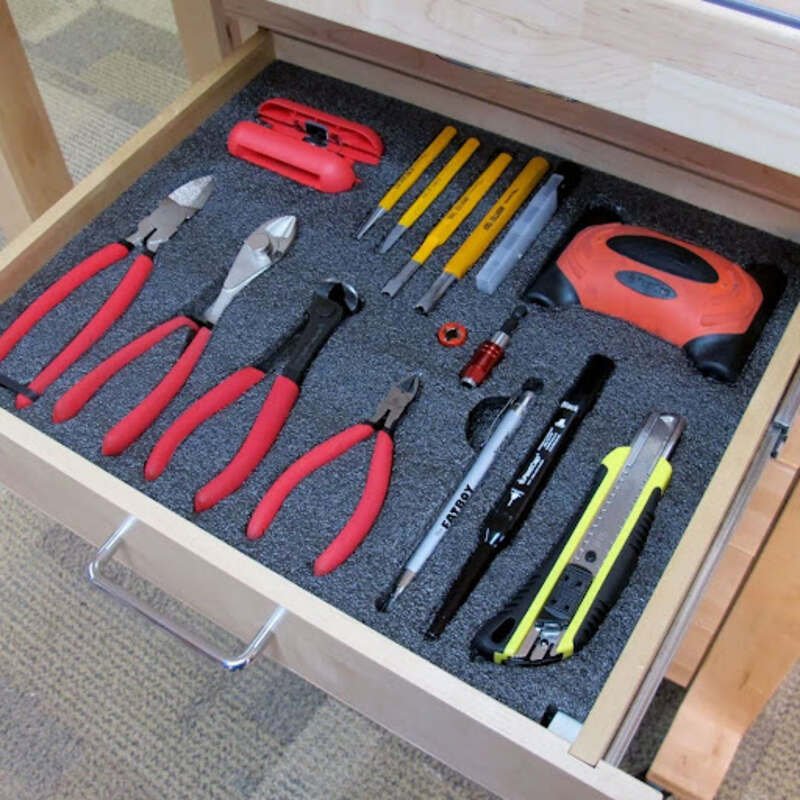
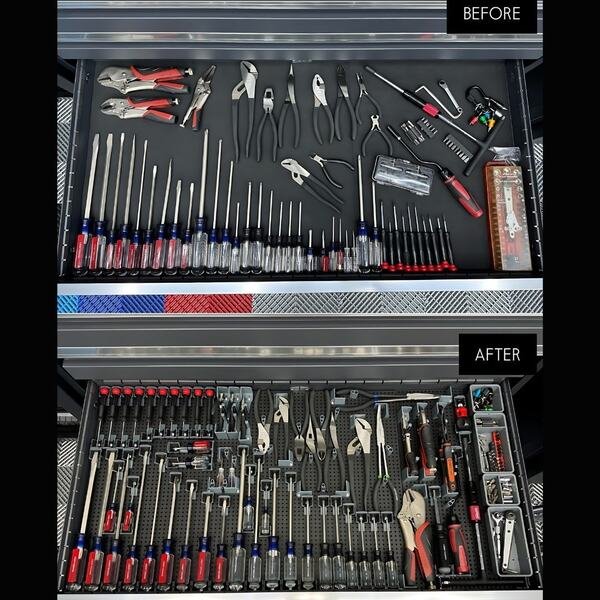
A homemade toolbox organization system helps keep your tools neat and easy to find. It saves time, reduces frustration, and makes every project smoother. By using foam inserts and other creative solutions, you can organize your tools effectively. The right setup ensures your toolbox stays tidy, and you’ll always know where each tool is.
To organize your toolbox, start by selecting the right foam and planning the layout. Make sure each tool fits snugly. Use techniques like precise foam cutting or adding color for visibility. These small details can greatly improve your workspace.
In this post, you’ll find step-by-step tips for organizing your toolbox, including layout, cutting methods, and advanced tricks like using heat for custom impressions.
DIY Toolbox Organization Ideas
Organizing your toolbox is simple with DIY solutions like foam inserts and color-coding. These methods improve efficiency, save time, and make tools easy to find while keeping your workspace tidy and organized.
Choosing the Right Foam for Tool Organization
Choosing the right foam for your toolbox is crucial. It protects your tools and keeps them organized.
Start with high-density foam. It holds its shape and supports various tool sizes. Measure your toolbox to determine the thickness you need. Thin foam is best for small tools, while thicker foam suits larger, heavier tools.
Cutting the foam precisely is important. Use a sharp utility knife or hot wire cutter for clean edges. Plan your layout and cut spaces for each tool. Ensure the tools fit snugly to prevent shifting.
Consider color-coded foam layers. This makes it easier to find missing tools and helps with organization. It also adds a visual appeal to your toolbox.
The right foam and proper arrangement will improve your workspace. A well-organized toolbox makes your work efficient and ready for any project.
Planning and Layout
Planning your tool layout is crucial for an organized toolbox. It helps maximize space and ensures each tool has its own place. A smart layout saves time and reduces clutter.
Start by laying your tools on a flat surface. Group them based on your workflow, such as placing wrenches together and screwdrivers in another section. Store frequently used tools in easily accessible spots.
After planning, transfer the layout to your toolbox. Mark tool positions before cutting foam, making adjustments if necessary. Use dividers or foam to separate sections, keeping tools stable and easy to find. Lastly Regularly review and adjust your layout as needed.
Foam Cutting Techniques for Perfect Fit
Cutting foam helps secure your tools and keeps them organized. It also protects them from damage. Precise cuts improve the look and function of your toolbox.
Start by measuring each tool and marking its outline on the foam. Use a sharp utility knife for clean, straight cuts. Go slowly to avoid mistakes. For complex shapes, try a hot wire cutter for smoother results.
Cut just deep enough for the tools to fit snugly. Test each fit before finalizing. This ensures the tools stay in place.
Finally, practice on scrap foam to refine your technique before cutting the final piece. This will result in a professional setup.
Maximizing Drawer Space
Maximizing drawer space is essential for organization and efficiency. It allows you to store more tools in less space and find them quickly. A well-organized drawer saves time and reduces clutter.
Use dividers to create sections for different tool types. Place larger tools at the bottom and smaller ones on top. This makes the best use of the drawer’s depth.
Stack tools vertically to utilize the drawer’s height. For varying tool sizes, use foam inserts with different levels. Nest tools with similar shapes to save space.
Regularly review and adjust your setup to improve organization.
Advanced Techniques for Foam Customization
Advanced foam customization techniques, including laser cutting and heat-based impressions, offer precision and flexibility. With the right tools and methods, you can achieve professional results for a variety of foam projects, ensuring high accuracy and functionality.
Using Thick Foam for Larger Tools
Thick foam offers added protection for tools and heavy equipment. It absorbs shocks and keeps everything safe. Choosing the right foam is essential. Higher density foam is needed for larger tools to handle weight and pressure without damage. Thick foam also absorbs impact from all angles.
You can cut the foam to fit your tools precisely using methods like laser cutting. This custom fit increases protection and durability. Additionally, foam helps keep tools organized. Foam inserts prevent tools from shifting or getting scratched, ensuring easy access.
In conclusion, thick foam is an excellent choice for tool protection and organization, extending equipment lifespan.
5S Guide for Efficiency
The 5S system enhances organization and efficiency through five steps: sorting, setting order, shining, standardizing, and sustaining. Applying this method to foam customization saves time and reduces waste.
Start by sorting foam materials. Separate what is needed from what isn’t, making it easier to find the right foam for each project. Next, organize the foam by size, density, and type for easy access.
Clean your work area regularly to keep tools and materials in good condition. Standardize processes for cutting, shaping, and storing foam.
Finally, sustain the system to ensure an organized workspace and improve productivity.
Carve Intricate Shapes with a Dremel
Carving shapes with a Dremel allows for precise, detailed work. It provides control over curves and edges, making it ideal for foam customization.
Start by choosing the right Dremel bit for your project. Secure the foam on a stable surface to prevent movement while carving. Use light pressure and carve in small sections. Begin with a rough outline and refine the details as you go.
Once the shape is carved, smooth rough edges with a sanding bit for a polished finish.
In conclusion, the Dremel tool is perfect for precise foam carving and detailed customization. It’s easy to use and produces professional results.
Heat-Based Tool Impressions
Heat-based tool impressions allow you to create detailed textures and patterns on foam. The heat softens the foam, making it easier to shape. This method is ideal for intricate foam designs.
Start by choosing a heat tool, such as a hot knife, embossing tool, or heated stamp. Set the right temperature for your foam. Too much heat can melt it, while too little won’t create a clear impression.
Press the heated tool onto the foam and apply gentle pressure. Move slowly to create clean lines and shapes. Let the foam cool, and the impression will hold its form.
In conclusion, heat-based impressions are ideal for custom foam designs.
Additional Tips for Organization
Staying organized improves efficiency and reduces clutter. Whether in your workspace, toolbox, or project area, labeling, color coding, and proper storage make a significant impact. These strategies ensure everything stays accessible and in order.
Using Color for Tool Identification
Using color for tool identification is an effective way to stay organized. It helps you find the right tools quickly, saving time and reducing errors.
Start by assigning a color to each tool category, such as blue for cutting tools, red for safety gear, and green for measuring tools. Apply the colors consistently by painting handles, using colored tape, or labeling storage bins. Choose bright, noticeable colors.
Always return tools to their designated spots. This keeps your workspace tidy and prevents tools from being misplaced. In summary, color coding improves efficiency and organization with minimal effort.
Adding Labels
Adding labels is another effective way to stay organized and find items quickly. Labels help identify tools, materials, and storage locations with ease, saving time and reducing confusion. Use clear, readable labels such as sticky tags or a label maker. Write the item’s name in bold letters for clarity.
Place labels consistently on containers, drawers, or tool handles so you know exactly where to look. To ensure durability, cover the labels with clear tape or use waterproof options. In short, labeling enhances organization and efficiency in your workspace, making it a simple yet valuable solution.
Conclusion
In conclusion, organizing your toolbox can improve work efficiency. Techniques such as color coding, labeling, and using foam inserts help keep tools in place. This saves time and protects your tools. We’d appreciate your thoughts on this topic. Do you have additional tips or hacks for organizing toolboxes? Share your insights to inspire others and enhance this article.


