
I love spending time outdoors, but scorching heat can make it unbearable. That’s when I built my first misting system. It was a game-changer.
A misting system creates a fine spray of water that cools the air around you. The tiny droplets evaporate quickly, dropping temperatures by 10-20 degrees. Pretty cool, right?
You can use it to cool your patio, water plants gently, or keep pets comfortable. The best part? It’s surprisingly affordable and simple to build.
I’ve helped dozens of friends create their systems. Most spend less than ₹1500 and finish in one afternoon. No special skills needed.
Ready to beat the heat? Let’s build something that will transform your outdoor space. Your family will thank you when summer hits hard.
What Is a Misting System?
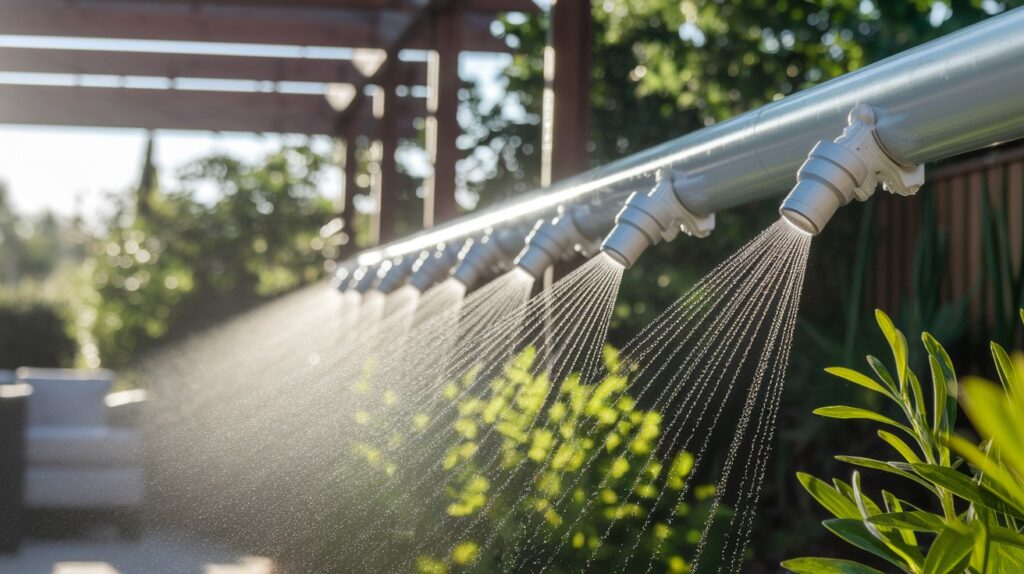
A misting system uses special nozzles to create extremely fine water droplets. These droplets are much smaller than regular sprinkler spray.
Here’s how it works: Water passes through tiny openings in the nozzles. This creates a fog-like mist that floats in the air. When these droplets hit warm air, they evaporate instantly.
This evaporation process removes heat from the surrounding area. It’s called evaporative cooling. The same principle your body uses when you sweat.
You can install these systems almost anywhere:
- Patios and decks
- Garden areas
- Pet runs
- Greenhouses
- Pool areas
- Outdoor dining spaces
Most people attach them to existing structures like fences, pergolas, or umbrella frames. Some build simple wooden frames just for the misting system.
They’re popular because they use less water than sprinklers. Plus, they require minimal upkeep once installed.
What You’ll Need
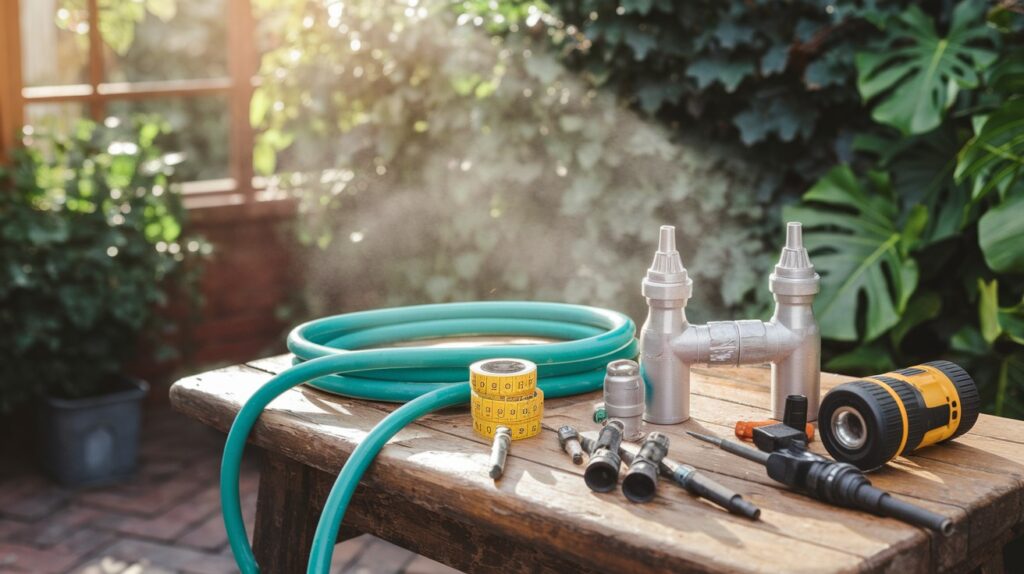
Materials:
- Flexible garden hose or PVC pipe (½ inch diameter)
- Misting nozzles (brass or stainless steel recommended)
- Hose connectors and adapters
- Hose clamps or heavy-duty zip ties
- Teflon tape for threaded connections
- End cap for hose termination
Tools:
- Electric drill
- Drill bits
- Measuring tape
- Permanent marker
- Scissors or a pipe cutter
- Adjustable wrench
Most hardware stores carry these items. You might find complete kits, but building from scratch costs less. I prefer buying components separately because you get better quality parts.
Step-by-Step Guide to Building Your DIY Misting System
Step 1: Plan Your Setup
Walk around your intended area with a measuring tape. Think about where you want the cooling effect most.
Consider these factors:
- Wind direction (mist should blow toward seating areas)
- Water source location
- Mounting points (fences, posts, or overhead structures)
- Electrical outlets (if using timers or pumps)
Sketch a rough layout. Mark where each nozzle will go. I recommend spacing nozzles 18-24 inches apart for even coverage.
Count how many nozzles you need. This determines your hose length and materials cost.
Step 2: Cut and Lay Out the Tubing
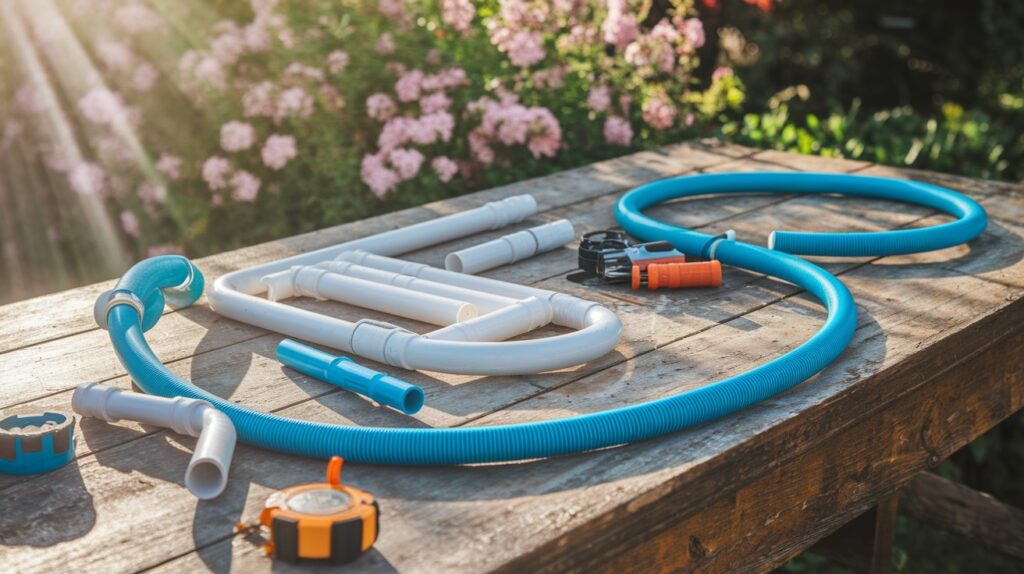
Measure and cut your hose or PVC pipe to the planned lengths. Add a few extra inches for connections.
Lay everything out on the ground first. This helps you visualize the final setup before drilling holes.
Mark each nozzle location with a permanent marker. Double-check your spacing. It’s easier to adjust now than after drilling.
If using multiple hose sections, plan where you’ll connect them. T-connectors work well for branching systems.
Step 3: Drill Holes and Install Nozzles
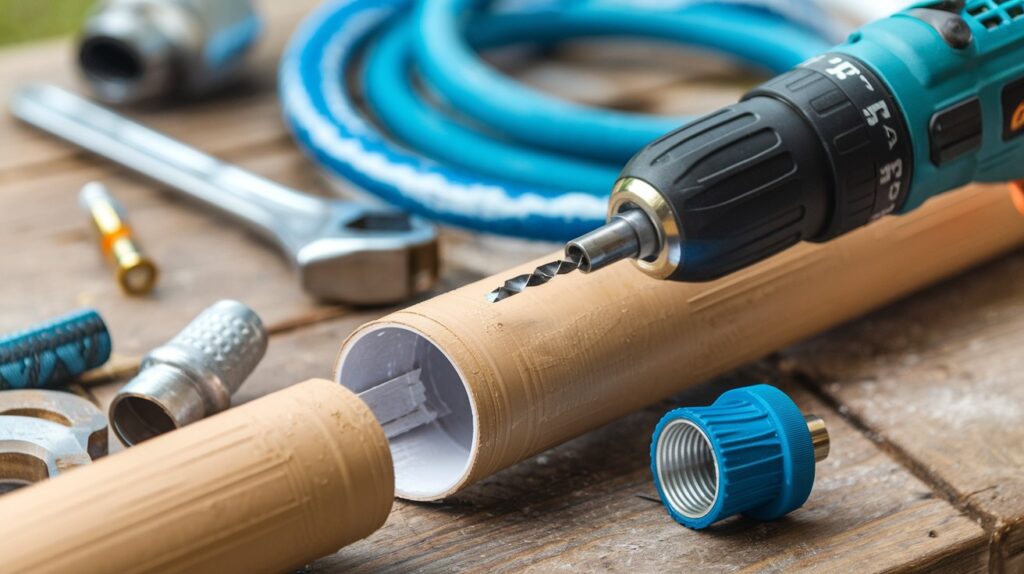
Use a drill bit slightly smaller than your nozzle threads. This ensures a tight fit.
Drill slowly to avoid cracking the hose. Clean out any plastic debris from the holes.
Most misting nozzles have built-in threads. Just screw them in by hand, then tighten gently with pliers.
Don’t overtighten. You might crack the hose or strip the threads.
Test each nozzle by hand to make sure it’s secure but not overly tight.
Step 4: Connect to Water Supply
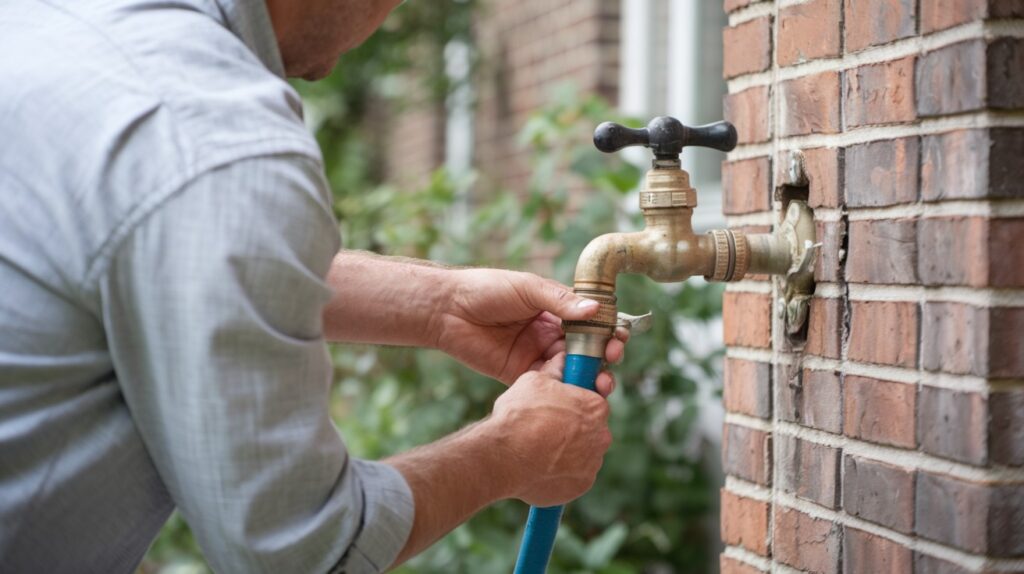
Attach the appropriate connector to your water source. Most outdoor faucets use standard garden hose threads.
Wrap Teflon tape around all threaded connections. This prevents leaks and makes connections easier to remove later.
If your system is long, consider adding a shut-off valve near the beginning. This gives you better control over water flow.
Install an end cap at the far end of your system. This prevents water from flowing out of the end.
Step 5: Mount and Secure the System
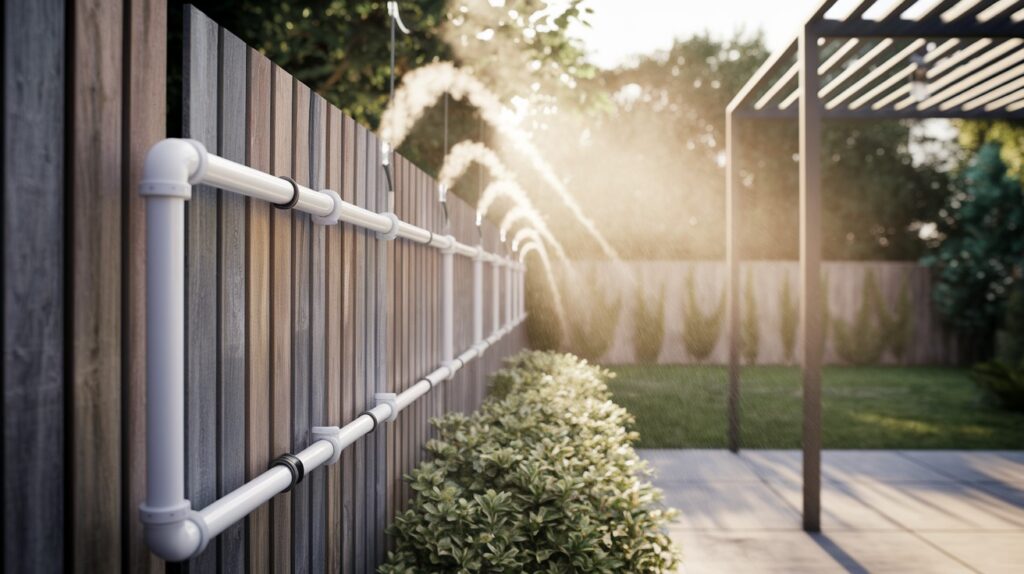
Use zip ties, hose clamps, or mounting brackets to attach your system to fences, posts, or overhead structures.
Space your attachment points every 3-4 feet. This prevents sagging and keeps nozzles pointed in the right direction.
Make sure everything is level. Uneven mounting can cause some nozzles to work poorly.
Leave some slack in the system. Rigid mounting can cause cracks when temperatures change.
Step 6: Test and Adjust the Mist
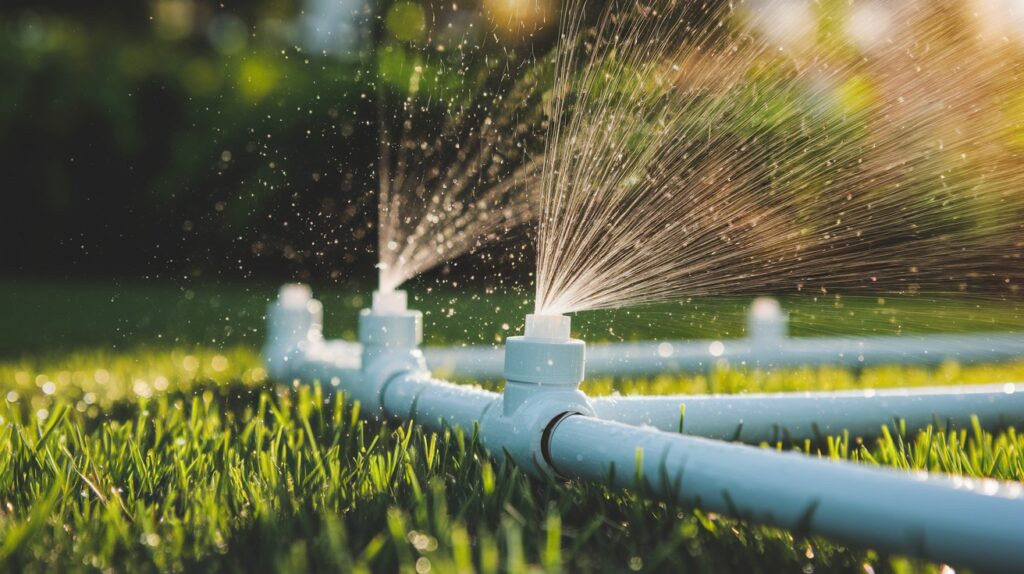
Turn on the water slowly. Start with low pressure to check for obvious leaks.
Gradually increase pressure while watching all connections. Fix any leaks before running at full pressure.
Check each nozzle’s spray pattern. They should produce fine, even mist. If some spray differently, they might be clogged or loose.
Adjust nozzle angles if needed. Point them slightly upward for better mist distribution.
Tips to Make It More Efficient
- Add an automatic timer. This prevents overwatering and saves money. Set it to run during the hottest parts of the day.
- Install a simple filter. Even clean-looking water contains minerals that clog nozzles. A basic garden hose filter costs under ₹200.
- Choose high-pressure nozzles. They create a finer mist that evaporates more effectively. Look for ones rated at 35-50 PSI.
- Position for airflow. Gentle breezes help distribute the mist better. Avoid completely enclosed areas where mist can’t circulate.
- Use stainless steel nozzles. They last longer and resist mineral buildup better than plastic ones.
- Consider water pressure. Low pressure creates large droplets that don’t cool effectively. High pressure wastes water. Find the sweet spot.
Common Mistakes to Avoid
Spacing nozzles incorrectly: Being too far apart leaves dry spots. Too close together wastes water and creates puddles.
Skipping the leak test: Always test thoroughly before final mounting. Fixing leaks on an installed system is frustrating.
Using cheap connectors: They fail quickly and cause constant dripping. Spend a little more for quality brass fittings.
Ignoring water pressure requirements: Check your home’s water pressure. Most misting systems need at least 30 PSI to work properly.
The mounting is too low: Install at least 7 feet high for good mist distribution. Lower mounting creates wet spots instead of cooling.
Forgetting about wind: Strong winds blow the mist away before it can cool the air. Choose calmer locations or add windbreaks.
Maintenance and Care
- Test water pressure first – you need at least 30 PSI for proper misting.
- Space nozzles 18-24 inches apart for even coverage without puddles.
- Drill holes slightly smaller than nozzle threads for tight, leak-free fits.
- Use Teflon tape on all threaded connections to prevent drips.
- Mount at least 7 feet high so the mist spreads properly.
- Clean nozzles monthly with white vinegar to remove mineral buildup.
- Add a garden hose filter to prevent clogs and reduce maintenance.
- Install a timer to run during peak heat hours automatically.
Conclusion
Building a DIY misting system is one of the most rewarding outdoor projects you can tackle. I’ve watched friends transform their patios from unusable hot zones into comfortable retreats.
The cooling effect is immediate and impressive. Your plants will love the gentle hydration, too. Even pets appreciate having a cool spot during the summer heat.
Best of all, you’ll save hundreds compared to professional installation. Most people spend under ₹1500 and complete everything in one weekend.
Start small if you’re nervous. You can always expand later. I began with just four nozzles on my deck. Now I have systems throughout my yard.
Take photos when you’re done. Share them with friends or post online. You might inspire someone else to beat the heat. And trust me, once neighbors see your cool oasis, they’ll want building tips too.
Frequently Asked Questions
How much does it cost to build a DIY misting system?
Typically between ₹500–₹2000, depending on materials and size. Basic patio systems cost less, while whole-yard installations cost more.
Can I run the misting system from a regular garden tap?
Yes, most setups work with standard hose pressure. You need at least 30 PSI for proper misting, which most homes provide.
What type of nozzles should I use?
Brass or stainless-steel misting nozzles work best for durability and fine mist. Avoid plastic nozzles as they clog easily and don’t last long.
How often should I clean the nozzles?
Once a month, or more often in hard water areas. Soak them in white vinegar overnight to dissolve mineral deposits.
Is a pump necessary for a DIY misting system?
Not for small patio systems, but larger setups may benefit from a low-pressure pump. Most home water pressure is sufficient for basic cooling systems.