
Ready to tackle your bathroom renovation but worried about demo costs? You’re not alone. Many homeowners choose DIY demolition to save serious money and gain hands-on experience with their homes.
While a professional demo can cost $1,500-$5,000, doing it yourself typically runs just $200-$500 in tools and disposal fees.
Before you grab that sledgehammer, though, let’s talk safety. Proper protective gear, understanding what’s behind those walls, and knowing when to call professionals can save you from costly mistakes or injuries.
This guide walks you through each step of bathroom demolition, from initial prep to final cleanup.
You’ll learn the right order for removal, which tools you actually need, and most importantly, how to do it safely and efficiently.
What to Know Before Starting
Before starting, understand that a bathroom demo involves planning for dust, debris, and potential surprises.
Check if permits are needed and consider your home’s age, as houses built before 1978 may contain asbestos or lead requiring professional removal.
Bathroom demo difficulty ranges from moderate to challenging, depending on your space. Removing fixtures is straightforward, but tile and drywall removal requires more effort.
The hardest part involves plumbing and electrical connections. Know when to call professionals for gas lines, load-bearing walls, or complex electrical work.
Most DIY bathroom demos take 1-3 days. Small powder rooms finish in one weekend, while larger bathrooms take longer.
Timeline depends on room size, fixture count, and whether you work alone. Plan extra time for unexpected issues like water damage and cleanup, which most homeowners underestimate.
What Tools and Supplies Do You Need?
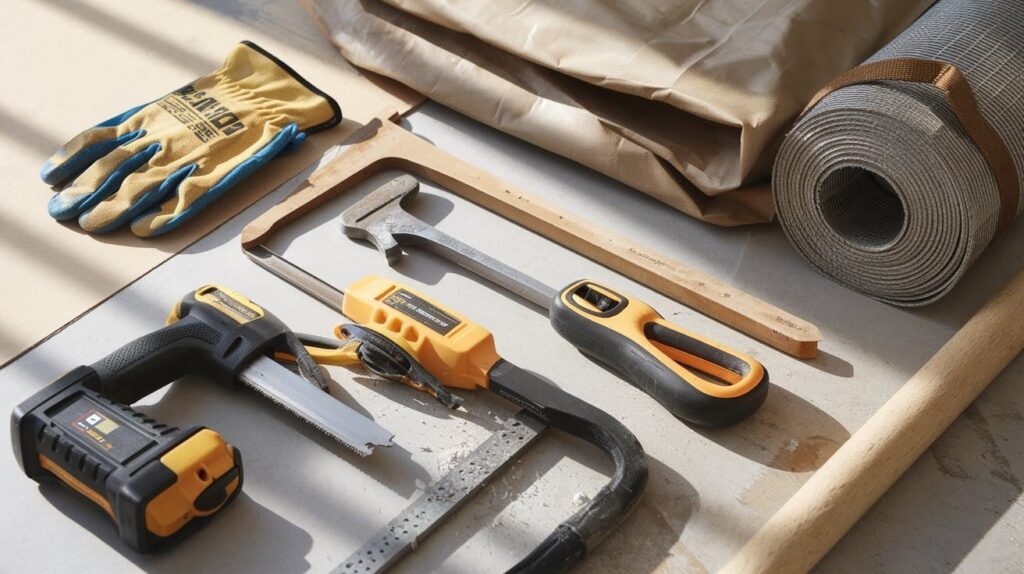
Heavy-duty gloves protect hands from sharp edges, splinters, and rough surfaces during demolition work.
Keep dust, debris, and particles out of your eyes while breaking down walls and fixtures.
Cuts through pipes, studs, and large sections quickly, making major demolition tasks much more efficient.
Removes trim, fixtures, and stubborn materials without damaging surrounding areas you want to keep intact.
Breaks through tile, drywall, and other materials with controlled force for major demolition work tasks.
Heavy-duty bags hold large amounts of debris and keep your workspace organized throughout the demo.
Step-by-Step Bathroom Demolition Guide
This is going to be the easiest steps you’ll ever find:
Step 1: Prepare the Space
Shut off water, electricity, and ventilation to prevent accidents. Drain water lines by running faucets and flushing toilets until empty. Remove mirrors, shelves, and accessories.
Seal vents and cover adjacent floors with drop cloths to control dust spread.
Step 2: Remove the Vanity and Sink
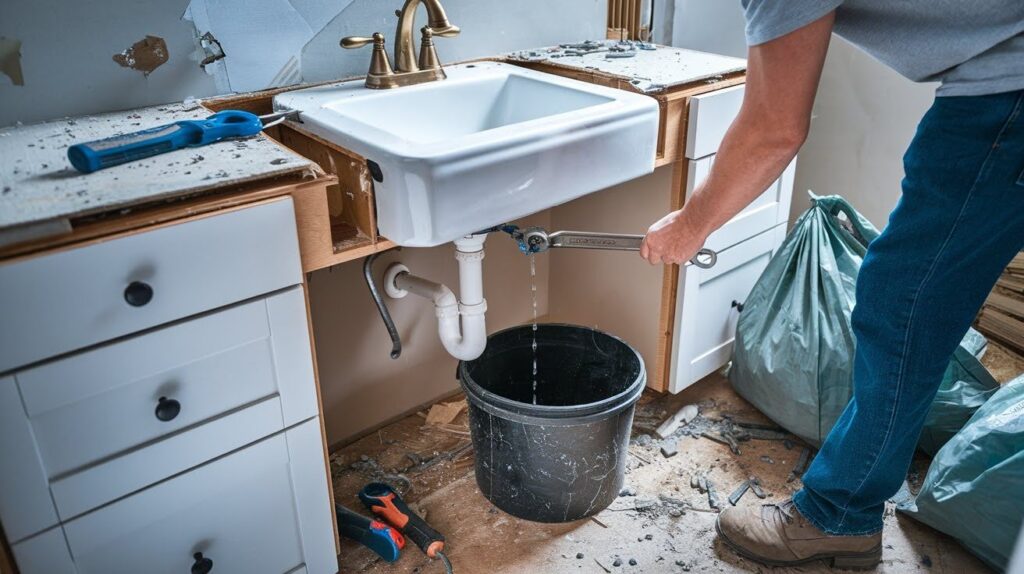
Disconnect water supply lines and P-trap with a wrench, using a bucket to catch water. Detach the sink from the countertop and remove the countertop.
Pry out the vanity cabinet by removing wall screws and any attached backsplash. Bag debris immediately.
Step 3: Take Out the Toilet
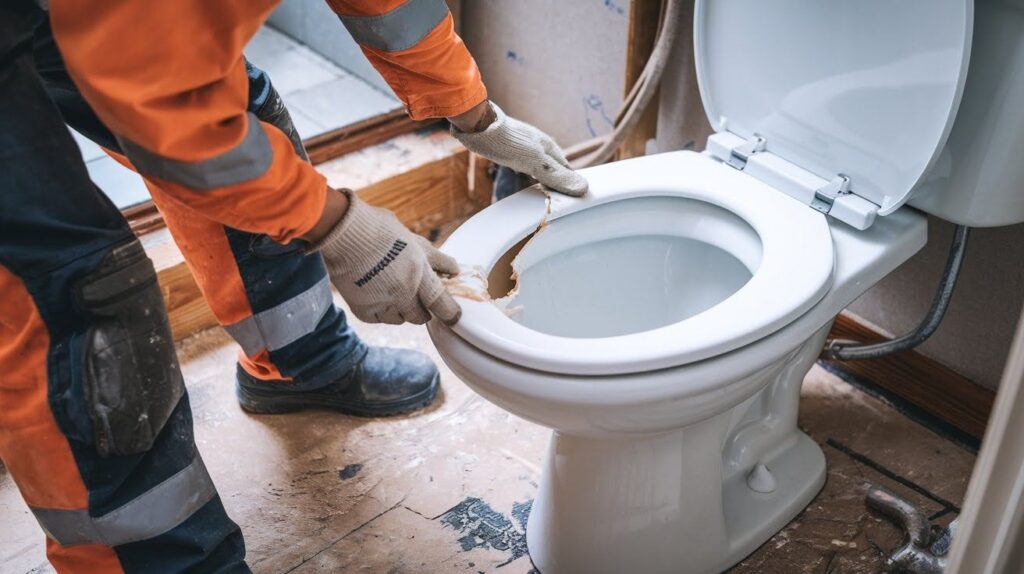
Turn off the water supply and flush to empty the tank and bowl. Disconnect the supply line and remove the tank by unscrewing the connecting bolts.
Remove bowl by unscrewing floor bolts, rock gently to break wax seal, then lift straight up. Plug the drain to prevent sewer gases.
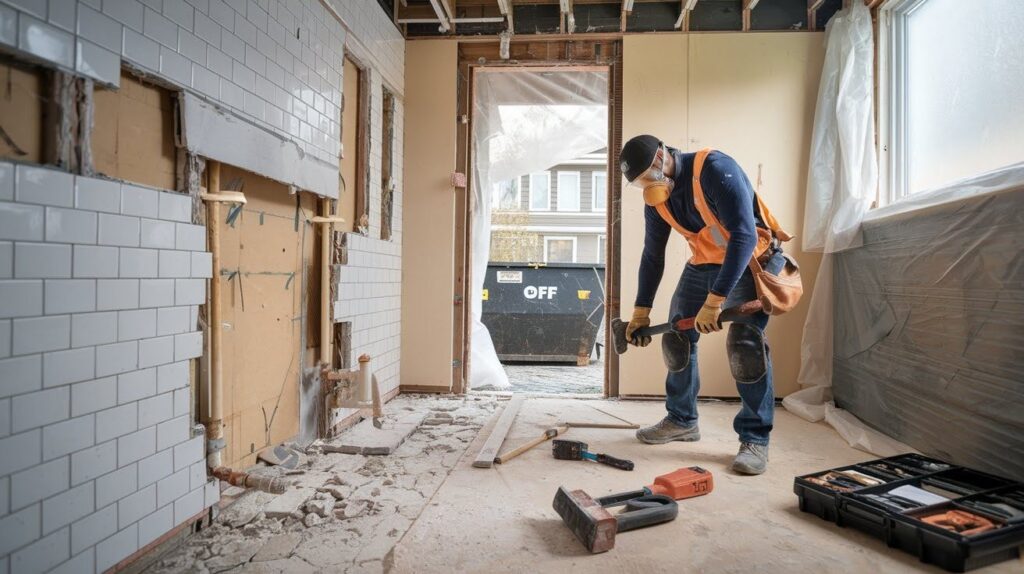
Step 4: Demo Floor and Wall Tile
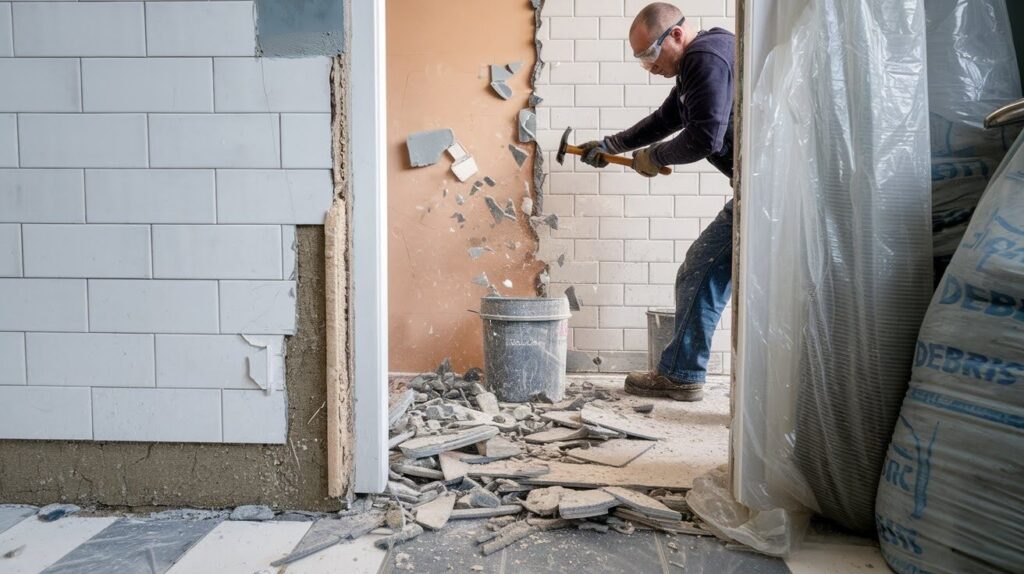
Test for lead paint or asbestos in pre-1978 homes. Break tile starting from edges using hammer and chisel, working systematically across surfaces.
Remove the underlying mortar and cement board. Bag sharp tile pieces immediately for safety.
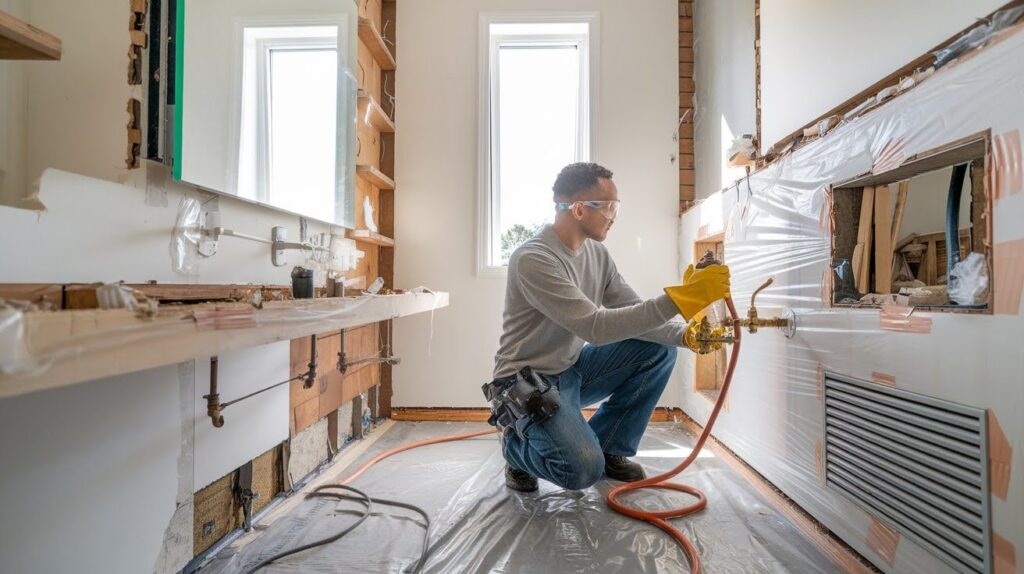
Step 5: Remove the Shower or Bathtub
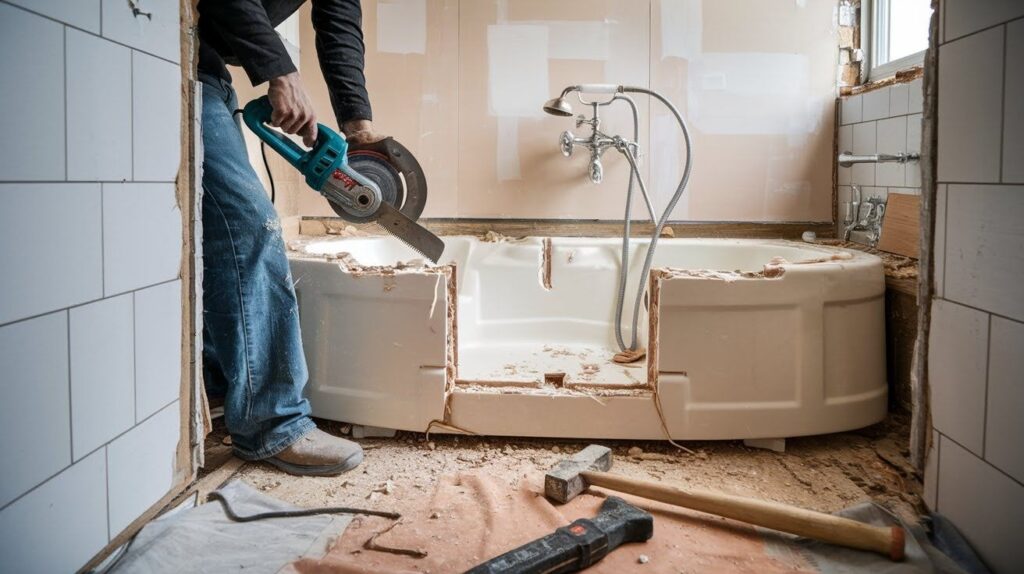
Disconnect all plumbing fixtures and water supply valves. Cut away the surrounding drywall or tile with a reciprocating saw.
Break cast iron tubs into smaller pieces with a sledgehammer. Cut fiberglass units into sections. Remove the shower pan or base last.
Step 6: Clean and Prep for Remodel
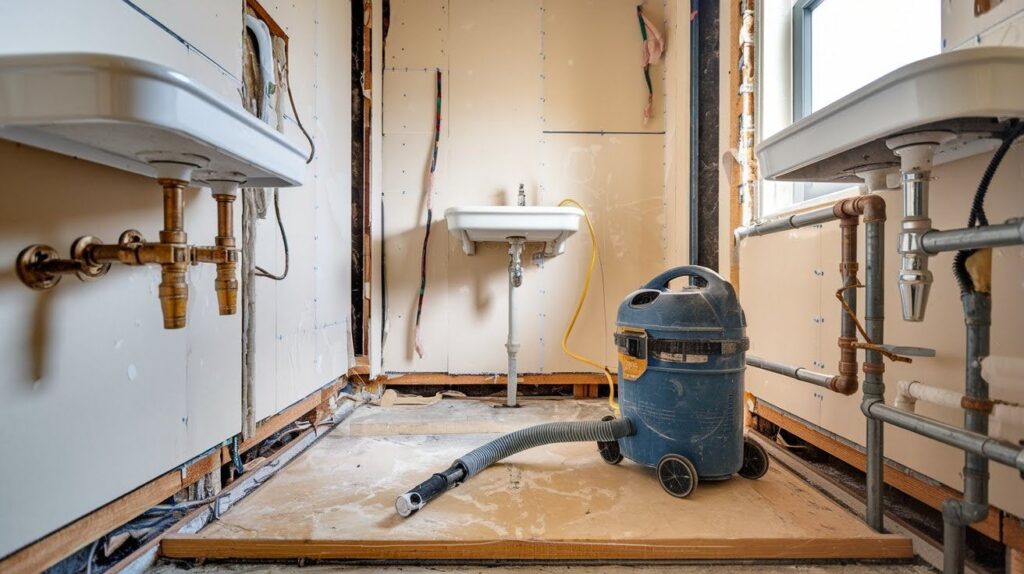
Vacuum all dust and debris from the space, including corners and crevices. Wipe down walls and subfloor with a damp cloth to remove fine particles.
Inspect plumbing and electrical systems for damage or existing problems before starting reconstruction.
Pro Tips for a Safe and Efficient Demo
- Wear Safety Gear at All Times: Never skip protective equipment, even for quick tasks. Injuries happen in seconds with sharp debris.
- Work in Sections to Avoid Overwhelm: Complete one area before moving to the next to stay organized and prevent chaos.
- Use Proper Lifting Techniques for Heavy Items: Bend knees, not back, and get help with heavy fixtures to prevent injury.
- Plan Disposal Before You Start: Rent a dumpster or arrange pickup services ahead of time to avoid debris buildup.
- Celebrate Each Milestone to Stay Motivated: Acknowledge completed steps to maintain energy and momentum throughout the project.
After Demolition: What’s Next?
Thoroughly inspect framing, subfloor, and plumbing for damage or issues that need repair before reconstruction. Check for damaged studs, soft subfloor spots, and plumbing leaks or corrosion.
This is your best opportunity for upgrades while the walls are open. Consider adding electrical outlets, upgrading water lines, or installing blocking for grab bars.
Making changes now is much easier than after the walls are closed.
Plan your remodeling sequence carefully. Typical order includes rough plumbing and electrical, drywall, flooring, tiling, vanity installation, painting, and fixture installation.
Having a clear plan prevents mistakes and ensures smooth progress.
Conclusion
DIY bathroom demolition can save you thousands of dollars, but success depends on careful planning and prioritizing safety above speed.
You’ve learned the proper sequence, essential tools, and safety measures that separate successful projects from costly disasters.
Most homeowners with basic DIY skills can handle a bathroom demo when they follow these steps and know their limits.
The key is taking your time, wearing protective gear consistently, and calling professionals for complex plumbing or electrical issues.
Now that you’ve cleared the space and inspected what’s behind those walls, you’re ready for the exciting part, designing and building your dream bathroom.
The hard work of demolition is behind you. Time to start creating the space you’ve always wanted, one careful step at a time.
Frequently Asked Questions
How much does it cost to demo a bathroom yourself?
DIY demo costs $200-500 for tools and disposal. Professional services charge $1,500-5,000, making DIY a major money saver.
Do I need permits to demolish my bathroom?
Basic demo usually doesn’t require permits. Check locally if moving plumbing, electrical, or removing structural walls.
What’s the hardest part of bathroom demolition?
Tile removal and plumbing disconnections are typically most challenging. Heavy cast iron fixtures often need to be broken into pieces.
How do I dispose of demolition debris?
Rent a dumpster or arrange bulk pickup services. Donate usable fixtures to reduce waste and disposal costs.
Should I hire professionals for any demo work?
Yes, for gas lines, electrical panels, asbestos, lead, or load-bearing walls. Safety issues require professional expertise.