
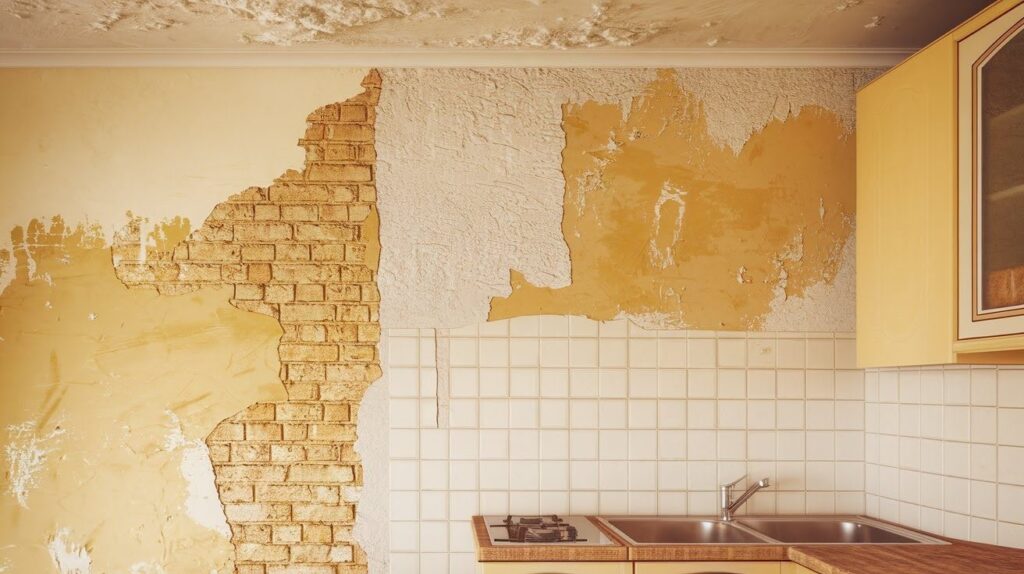
Nothing’s more annoying than watching your fresh paint job start flaking off the walls. I get it, you spent time and money making your space look great, and now it’s literally falling apart.
Here’s the thing: peeling paint doesn’t happen randomly. There’s always a reason behind it. And once you know what’s causing the problem, you can fix it for good.
In this article, I’ll walk you through the most common reasons paint peels. We’ll cover everything from moisture problems to surface prep mistakes. I’ll also show you how to spot these issues early and prevent them from happening again.
I’ve helped hundreds of homeowners solve this exact problem. Trust me, with the right knowledge, you can stop playing the endless cycle of paint, peel, repeat.
Let’s figure out what’s going wrong with your walls.
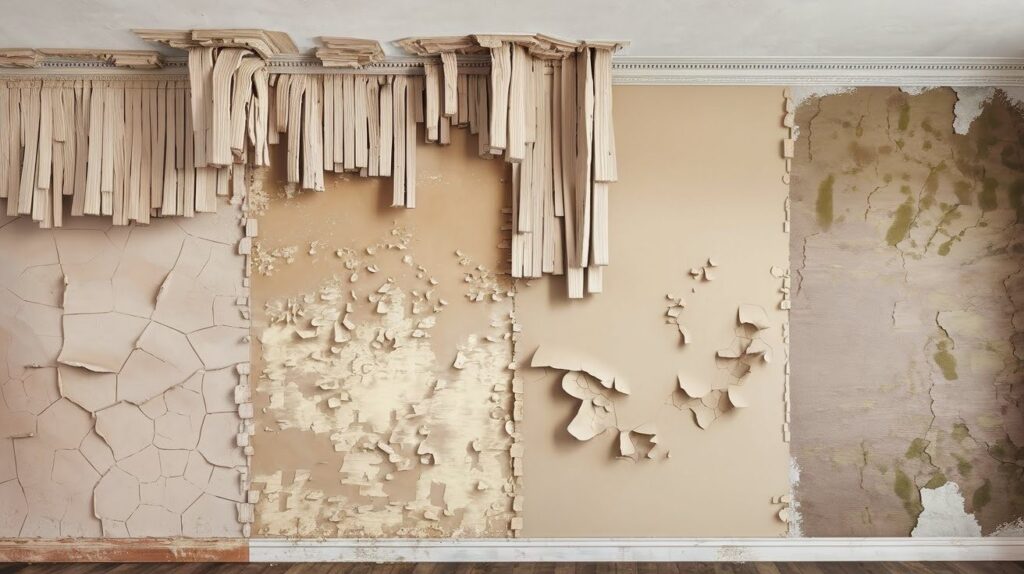
Common Reasons for Paint Peeling
Most paint peeling comes down to what’s underneath your fresh coat, and trust me, your walls can be pickier than you think.
Calcimine Paint on Ceilings
Old calcimine paint acts like a barrier that blocks new paint from sticking properly.
You know those old ceilings that look chalky or powdery? That’s probably calcimine paint. This stuff was popular decades ago, but it’s your enemy now.
When you apply new paint over it without proper prep, the calcimine just pushes the new paint right off. It’s like trying to stick tape to powder, it’s not happening.
Improper Surface Preparation
Skipping the boring prep work almost always leads to peeling paint later.
I see this mistake all the time. People get excited about the fun part (picking colors and rolling paint) and rush through the prep.
But here’s what happens: if you don’t prime properly or paint over bumpy, uneven surfaces, your paint has nothing solid to grab onto. It’s like building a house on shaky ground.
Painting Over Dirty Surfaces
Dust, grease, and grime create an invisible barrier between your paint and the wall.
Even surfaces that look clean can have a thin layer of cooking grease, dust, or oils from everyday living. Paint can’t bond to dirt, it can only stick to the dirt. When that dirt eventually breaks down or gets wiped away, your paint goes with it.
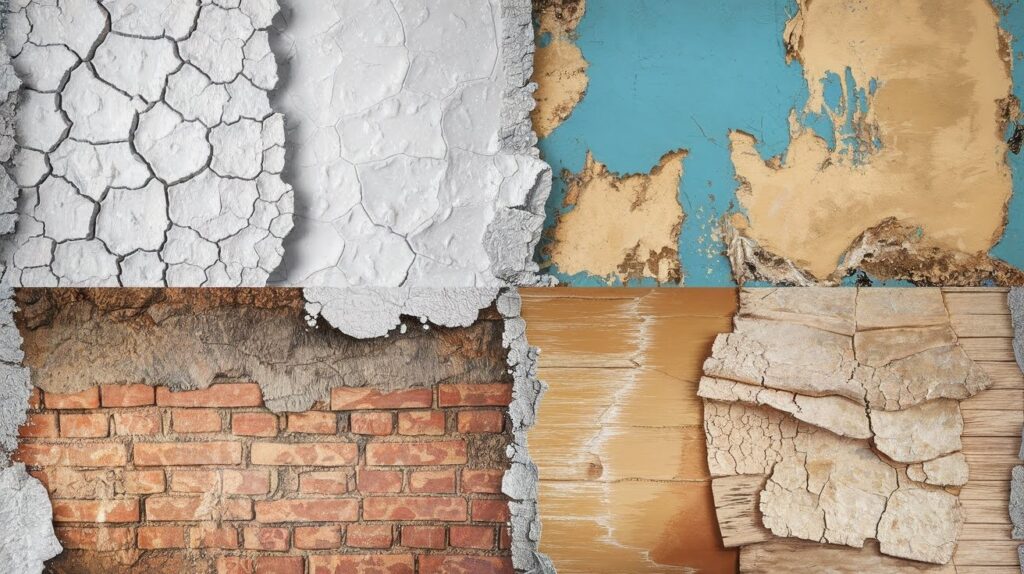
Environmental Factors

Your home’s environment can be paint’s worst enemy – moisture, heat, and even too much dryness will make your paint give up.
Water Damage
Water gets behind paint and breaks the bond between your paint and the wall.
I’ve seen this countless times. A small roof leak, a burst pipe, or even just high humidity seeps behind your paint layer. Once water gets back there, it’s game over. The paint loses its grip and starts bubbling up like a blister. Even after you fix the water problem, that damaged paint won’t magically stick back down.
High Humidity Levels
Trapped moisture from poor air circulation creates the perfect storm for paint failure and mold.
Bathrooms and basements are the usual suspects here. When humid air can’t escape, it condenses on your walls. This constant moisture weakens paint over time. Plus, you might start seeing those gross black spots – that’s mold growing under your paint. Not exactly the look you were going for.
High Temperatures
Extreme heat makes paint dry too fast and weakens how well it sticks to surfaces.
Paint needs time to properly bond with your wall. When it’s blazing hot, paint dries before it can form a strong connection. Think of it like trying to glue something together when the glue dries instantly, you don’t get a solid bond.
High Sunlight Exposure
Direct sun creates a cycle of expanding and shrinking that eventually breaks paint loose.
That south-facing wall gets hammered by sun all day. The constant heating and cooling makes your wall expand and contract like it’s breathing. Over time, this movement cracks the paint and breaks its hold on the surface.
Extreme Dryness
Super dry conditions prevent paint from forming the strong bond it needs with your wall.
Just like too much moisture is bad, so is too little. Paint needs some humidity to cure properly. In bone-dry conditions, paint can’t develop its full strength. It ends up sitting on top of your wall instead of really grabbing onto it.
Application Errors
Sometimes the problem isn’t your walls or the weather, it’s how the paint got on there in the first place.
Using Too Many Layers of Paint
Thick, heavy layers of paint eventually get too heavy and start pulling away from the wall.
I get it – you want good coverage. But slapping on coat after coat creates problems. All that paint weight starts working against you, especially on ceilings. Gravity doesn’t care how pretty your color is. When paint gets too thick, it can’t hold its own weight and starts sagging or peeling off in chunks.
Mixing Different Paint Types
Oil-based and latex paints have different chemistries that don’t play nice together.
This is like trying to mix oil and water. If you put latex paint over old oil-based paint (or vice versa) without the right prep, they won’t bond. The two types expand and contract differently too. So even if it looks fine at first, you’ll see peeling later as the layers separate.
Incorrect Paint or Primer Choice
Using the wrong products for your specific surface creates weak spots that fail over time.
Not all paints are created equal. Interior paint on exterior walls? Bad idea. Wrong primer for your surface type? Also bad. I’ve seen people use regular paint in high-moisture areas when they needed specialty products. Your paint job is only as strong as the weakest link.
Improper Application Methods
Rushing through application with thin coats or wrong tools sets you up for peeling problems.
Thin, skimpy coats don’t give you proper coverage or protection. Using the wrong brush or roller can create uneven application that leads to weak spots. And don’t get me started on people who skip the second coat to save time. That’s just asking for trouble down the road.
Paint Quality Issues
Not all paint is created equal, and sometimes the paint itself is the reason your walls are falling apart.
Low-quality Paint Brands
Cheap paint lacks the ingredients needed to stay flexible and stick properly as it ages.
Look, I understand wanting to save money. But bargain paint is usually bargain paint for a reason. The cheaper stuff often has less of the good binders and resins that keep paint stuck to your walls. Over time, it gets brittle and just can’t handle normal house movement. You end up repainting sooner anyway, so you don’t really save anything.
Using Expired Paint
Old or spoiled paint separates and clumps, creating an uneven surface that won’t stick properly.
That half-empty can sitting in your garage for three years? It’s probably not doing you any favors. Expired paint often separates or gets chunky. Even if you stir it back together, the chemistry has changed. It won’t spread evenly or bond like fresh paint does. You’re basically setting yourself up for peeling before you even start.
Exposure to Corrosive Substances
Acidic or harsh chemicals eat away at paint bonds and cause rapid breakdown.
This happens more than you’d think. Cleaning products, salt air near the ocean, or even certain fertilizers can attack your paint. The chemicals literally break down the bonds that hold paint to your wall. I’ve seen paint peel off in sheets after exposure to strong cleaners or acidic substances.
Paint Coat Too Old
Paint naturally loses its grip strength over the years, making it easier for new layers to pull away.
Even good paint doesn’t last forever. After 10 or 15 years, that old paint layer starts getting weak and chalky. When you apply new paint over it, you’re only as strong as what’s underneath. If the base layer is failing, your fresh paint will come right off with it.
How to Fix Peeling Paint
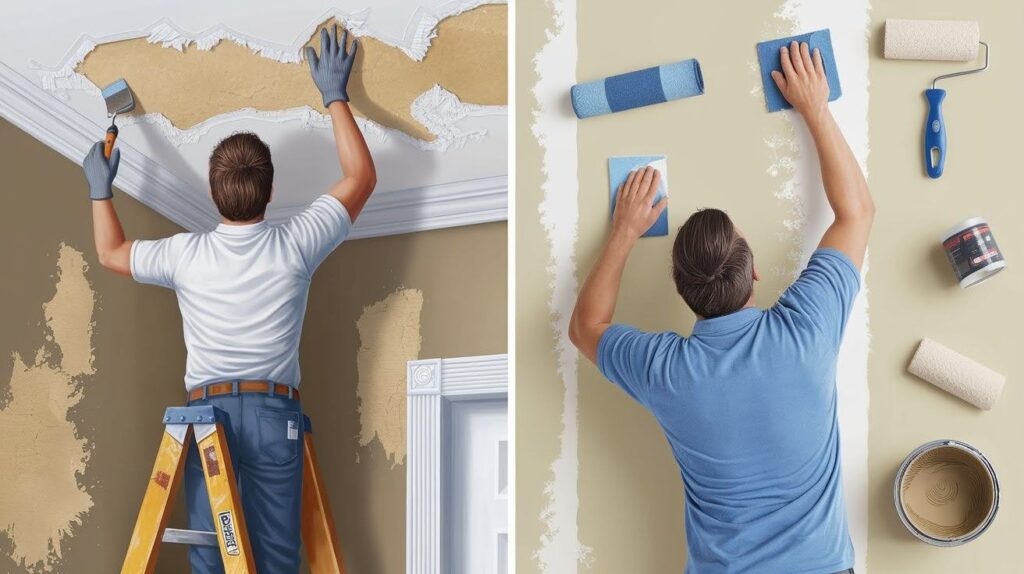
Good news – peeling paint isn’t permanent, and you can absolutely fix it yourself with the right approach.
Fixing a Peeling Ceiling
Here’s exactly how to get your ceiling looking solid again from start to finish.
First, scrape off all the loose paint. I use a putty knife and go gentle – you don’t want chunks falling in your eyes. Get everything that’s flaking or bubbling. Don’t worry about being perfect here, just get the stuff that’s already giving up.
Next, patch any holes or cracks with spackling compound. Let it dry completely – rushing this step will bite you later. Sand the patched areas smooth once they’re dry.
Now comes the important part: prime everything. Don’t skip this. Use a high-quality primer that’s designed for your ceiling type. This gives your new paint something solid to grab onto.
Finally, apply two coats of ceiling paint. The first coat seals everything up, and the second gives you that nice, even finish. Wait for the first coat to dry completely before adding the second.
Fixing Peeling Paint on Drywall
Wall repairs follow the same basic pattern but with a few extra steps to handle the surface properly.
Start by scraping away all the peeling paint. Work carefully around the edges so you don’t damage the good paint that’s still stuck. Use fine-grit sandpaper to smooth out any rough spots where the old paint came off.
Check for any dents or holes in the drywall underneath. Fill these with spackling paste and let them dry. Sand everything smooth – your wall should feel even when you run your hand over it.
Clean the area with a damp cloth to remove dust from sanding. Let it dry completely. Apply primer to all the bare spots. This is critical – bare drywall will soak up paint unevenly if you skip primer.
Finish with two coats of your chosen wall paint. Roll on the first coat, let it dry, then add the second. Take your time with this – good coverage now prevents future peeling problems.
How to Prevent Paint from Peeling
The best way to deal with peeling paint is to stop it from happening in the first place – and it’s easier than you think.
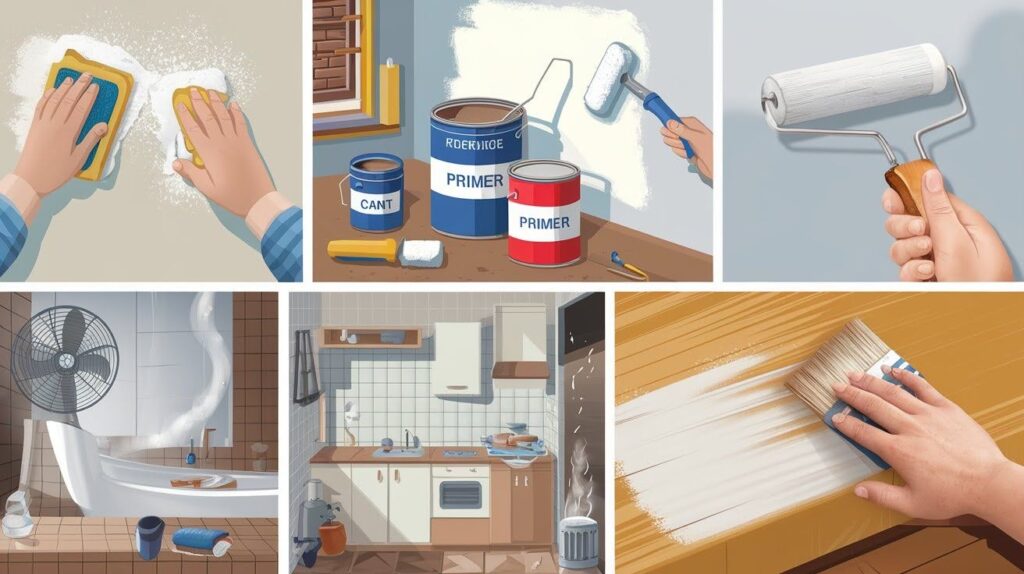
Proper Surface Prep and Cleaning
Clean surfaces and good prep work are your first line of defense against future peeling problems.
I can’t stress this enough – prep is everything. Start by washing your walls with mild soap and water. Get rid of grease, dust, and any grime that’s built up over time. Let everything dry completely before you even think about opening that paint can.
Sand any glossy surfaces lightly so your new paint has something to grip. Fill holes and cracks properly. Don’t rush through this part – every minute you spend on prep saves you hours of fixing peeling paint later.
Choosing the Right Paint and Primer
Match your products to your specific surface and room conditions for the strongest possible bond.
Not all paints work everywhere. Bathroom walls need moisture-resistant paint. Exterior surfaces need paint that can handle weather. Kitchen walls deal with grease and heat, so they need tougher paint too.
Always use primer, especially on bare surfaces or when switching paint types. Think of primer as the glue that holds everything together. Skipping it is like trying to build a house without a foundation.
Maintaining Optimal Humidity and Temperature Levels
Keep moisture and temperature swings under control to protect your paint job long-term.
Install exhaust fans in bathrooms and kitchens. These pull humid air out before it can damage your paint. Keep your house temperature reasonably steady – wild swings make walls expand and contract, which cracks paint over time.
If you live somewhere super dry, a humidifier can actually help your paint last longer. Just don’t go overboard, you want comfortable levels, not a jungle.
Applying Protective Coatings
Extra protection like polyurethane or wax gives high-wear areas an extra shield against damage.
In areas that get lots of touching, cleaning, or moisture, consider adding a clear protective coat over your paint. Polyurethane works great in kitchens and bathrooms. Wax gives a nice finish in living areas while protecting the paint underneath.
These coatings take the beating instead of your paint. When they start wearing down, you can reapply them without having to repaint the whole wall.
Quick Tips to Prevent Paint Peeling
- Clean walls thoroughly before painting, soap, water, and time to dry
- Always use primer, especially on bare surfaces or when changing paint types
- Sand glossy surfaces lightly so new paint can stick properly
- Choose paint made for your specific room (bathroom, kitchen, exterior)
- Install exhaust fans in humid areas like bathrooms and kitchens
- Keep house temperature steady – big swings crack paint over time
- Scrape off all loose paint before applying new coats
- Don’t paint over dirty, greasy, or dusty surfaces
- Avoid putting too many thick layers of paint on walls or ceilings
- Never mix oil-based and latex paints without proper prep
- Check paint expiration dates – old paint doesn’t stick well
- Let each coat dry completely before adding the next one
- Use quality paint – cheap paint often peels sooner
- Add protective clear coats in high-touch areas
- Fix water leaks immediately to prevent moisture damage
- Don’t paint in extreme heat, cold, or humidity
Conclusion
Peeling paint doesn’t have to be a recurring nightmare in your home. Now that you know the main causes, from surface prep mistakes to environmental factors, you can tackle this problem head-on.
Remember, investing in quality materials and taking time for proper preparation pays off big time. Good primer, decent paint, and thorough surface cleaning prevent most peeling issues before they start.
If you’re dealing with extensive peeling or aren’t comfortable with the repair process, don’t hesitate to call a professional painter. They have the experience to spot problems you might miss and the tools to fix them right the first time.
Your walls will thank you for the extra care, and you’ll save money in the long run by avoiding repeated paint jobs.
Frequently Asked Questions
Can I paint over peeling paint?
No, you should never paint over peeling areas. The new paint will just peel off along with the old layer, making your problem worse.
How long should I wait between coats of paint?
Most paints need 2-4 hours between coats, but check your paint can for specific timing. Rushing this step often leads to peeling problems later.
Why does paint peel in bathrooms more than other rooms?
Bathrooms have high humidity and poor ventilation, which weakens paint over time. The constant moisture gets behind the paint and breaks its bond with the wall.
Is primer really necessary for every paint job?
Yes, especially on bare surfaces, when changing paint types, or covering stains. Primer creates the strong foundation your topcoat needs to stick properly.
How do I know if my old paint contains lead?
Homes built before 1978 likely have lead paint, which requires special handling. Test kits are available at hardware stores, or hire a professional for testing and safe removal.