
Your townhouse backyard feels too small. You want a beautiful outdoor space but don’t know where to start. I get it. Small yards are tricky.
I’ve worked on townhouse backyards, changing them from cramped afterthoughts into gorgeous retreats. My people love their new spaces so much they spend more time outside than inside.
This article shows you exactly how to maximize your small yard. You’ll learn:
- Smart layouts that make tiny spaces feel huge
- Space-saving furniture that serves double duty
- Privacy solutions that actually work
- Expert tips I only share with paying clients
Your problem? Limited space. My solution? Proven strategies that turn every square foot into something amazing. By the end of this guide, you’ll have a clear plan to create the townhouse backyard you’ve always wanted.
Ready? Let’s start.
Smart Layouts for Small Townhouse Yards
The key to a great townhouse backyard starts with the layout. Think vertical, not just horizontal.
1. Multi-Level Decking for Defined Zones
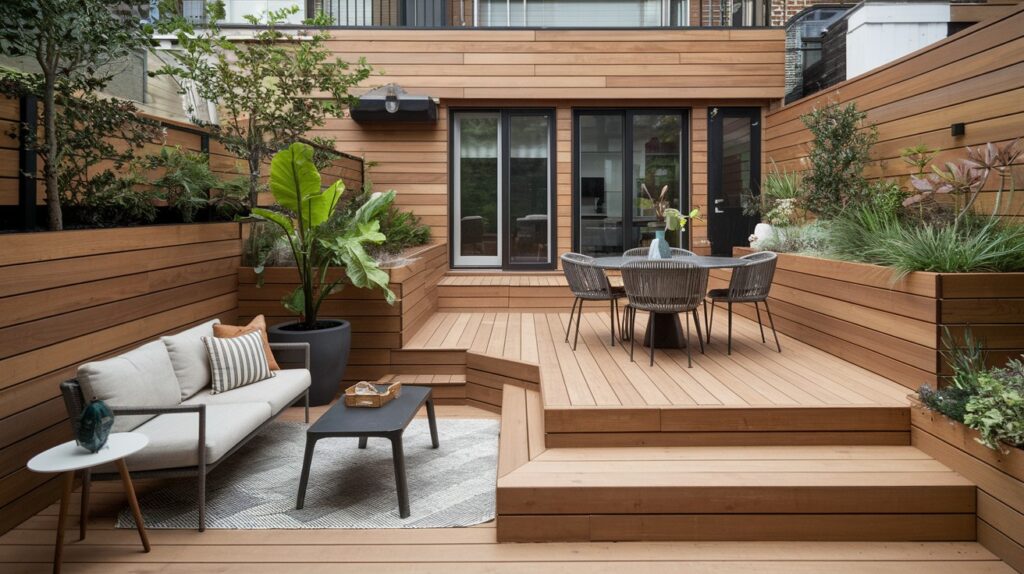
Most townhouse owners think their yard is just one flat space. That’s a missed opportunity.
Different levels create the illusion of separate rooms without walls. Your guests will feel like they’re moving through a much larger area.
Key elements for multi-level success:
- Main deck 6 inches above ground level
- Dining area another 4-6 inches higher
- Plant beds at varying heights for visual interest
- Use the same decking material throughout for cohesion
I installed this system in my neighbor Sarah’s 10×15 yard last spring. She went from avoiding her backyard to hosting weekly dinner parties. Her guests always ask how she made such a small space feel so spacious.
2. Built-In Bench Seating with Hidden Storage
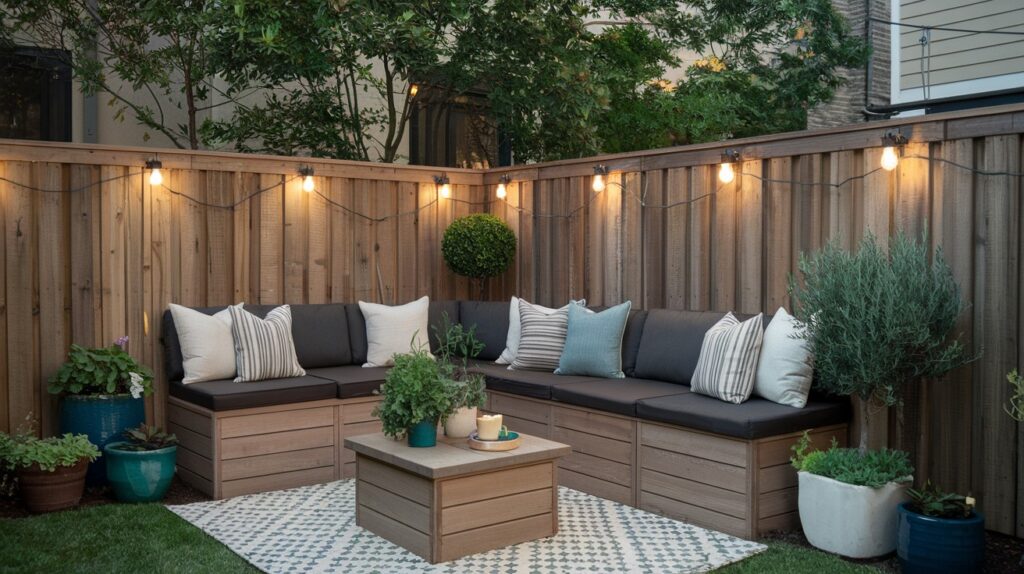
Separate outdoor furniture eats up precious space fast. Built-in seating solves two problems at once.
You’ll seat more people while hiding all your outdoor clutter. No more tripping over garden tools or searching for cushions.
Storage bench essentials:
- Build 18 inches high for comfortable seating
- Include drainage holes in the bottom
- Use cedar or composite materials for weather resistance
- Add soft-close hinges to prevent slamming
My client Mike built these along his entire back fence. He now seats 10 people comfortably in a space that barely fit 4 chairs before. Plus, his wife loves that all the pool toys finally have a home.
3. Vertical Gardens to Save Floor Space
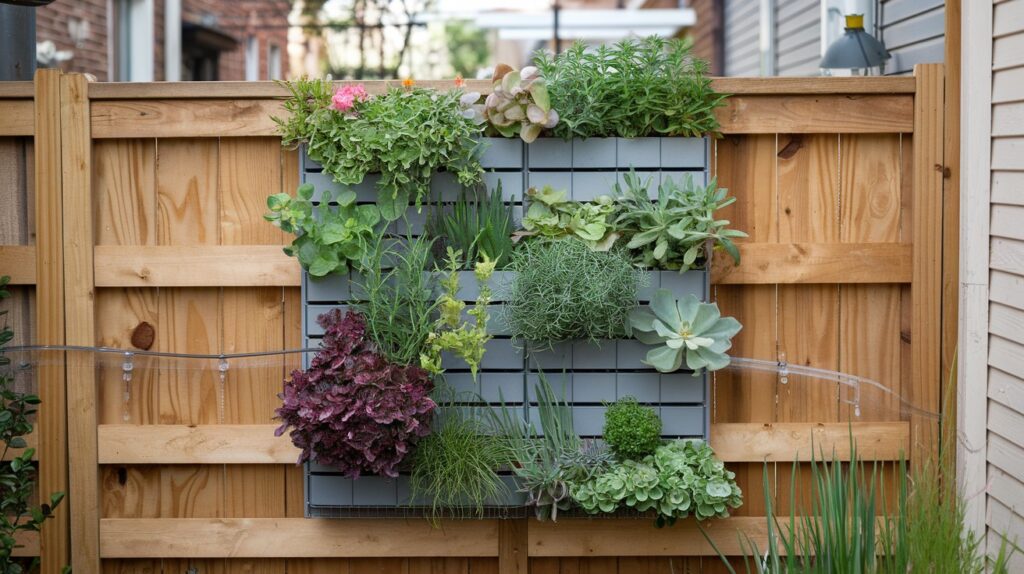
Think your walls are just boundaries? Think again.
Vertical space is your secret weapon for growing more plants without losing precious floor area. You can triple your garden space without expanding your yard.
Vertical garden success tips:
- Choose lightweight containers to prevent wall damage
- Install drip irrigation for easy maintenance
- Mix plant heights and textures for visual appeal
- Use a grid system for professional-looking arrangement
I helped Jennifer transform her stark fence into a living wall last year. She went from zero gardening space to growing 30 different plants. Her herb wall alone saves her $50 monthly on groceries.
4. Paver Pathways with Green Filler
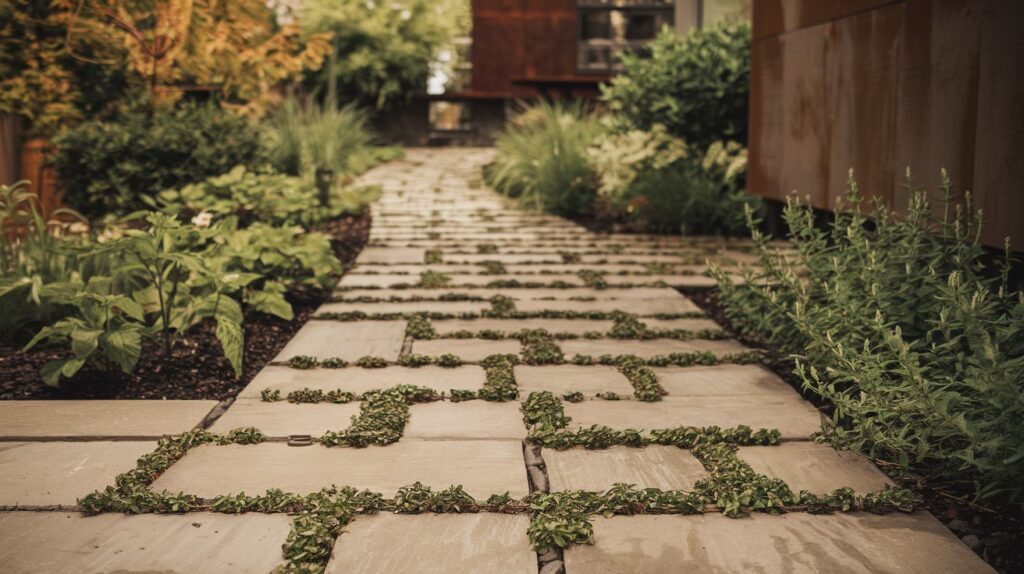
Solid concrete feels harsh and makes small spaces look even smaller. Smart pathway design does the opposite.
Breaking up hard surfaces with soft plantings tricks the eye into seeing more space. Plus, it adds natural beauty that concrete alone never could.
Pathway design principles:
- Use 12×12 inch pavers for the best scale
- Leave 2-3 inches between pavers for plants
- Choose moss or low-growing thyme for filler
- Create gentle curves instead of straight lines
Last month, I replaced a client’s concrete slab with this paver system. The same 8×20 space now feels twice as large. Her 6-year-old daughter loves hopping from stone to stone like a game.
5. Zen-Inspired Minimalist Layout
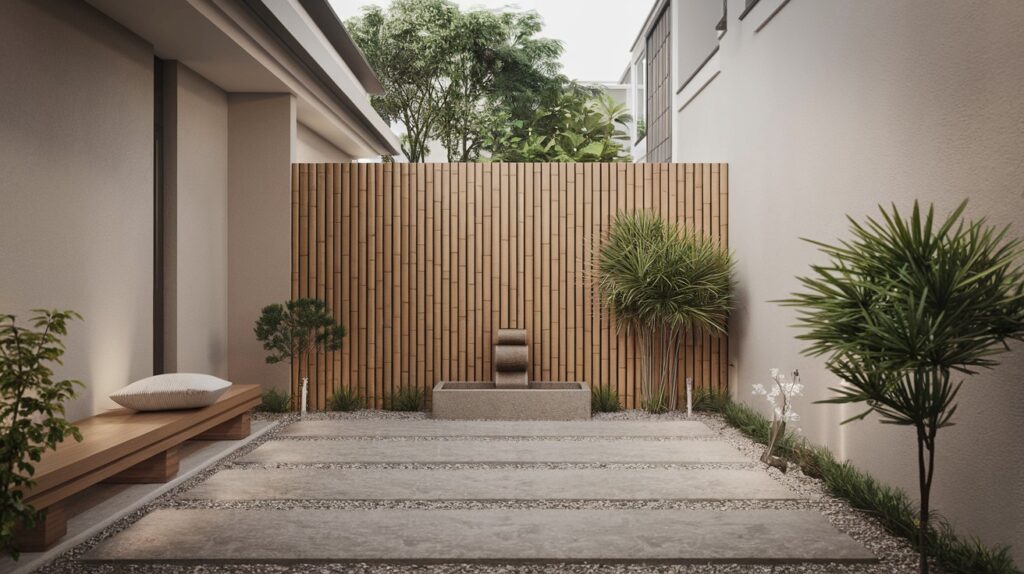
More stuff doesn’t equal more style. In small spaces, less really is more.
A calm, uncluttered design makes your yard feel like a peaceful retreat. Your stressed mind will thank you every time you step outside.
Minimalist yard essentials:
- Limit yourself to 3 main focal points maximum
- Choose a neutral color palette with one accent color
- Use clean geometric lines in hardscaping
- Include one water feature for sound
I designed a zen yard for my stressed-out lawyer friend Tom. Three elements: bamboo screen, gravel meditation area, small fountain. He now spends 30 minutes outside every morning instead of rushing straight to work.
Space-Saving Furniture & Features
Smart furniture choices can double your usable space. Here’s what actually works.
6. Fold-Down Furniture for Versatility
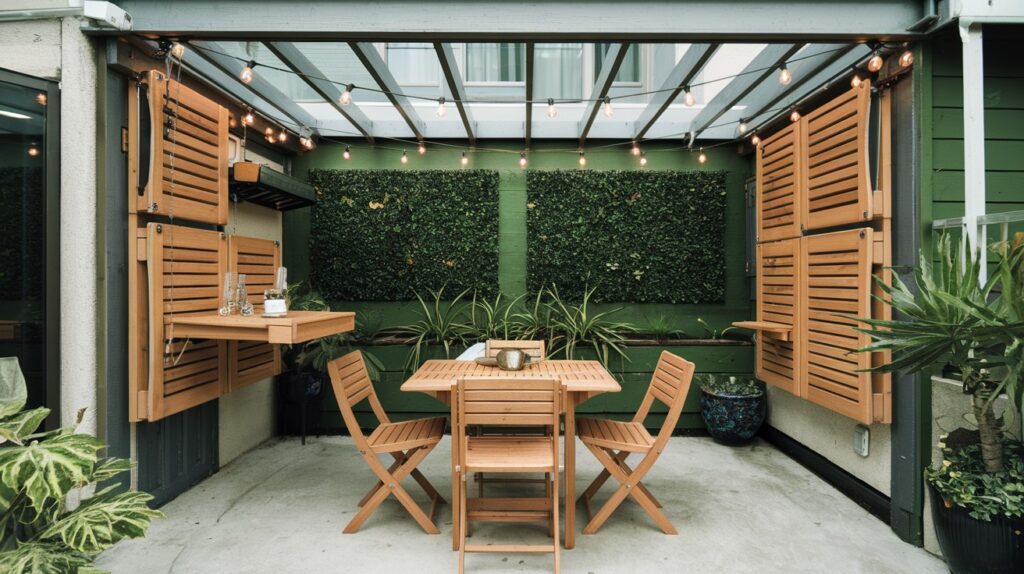
Most townhouse owners buy furniture that takes up space 24/7. That’s wasteful thinking.
Wall-mounted pieces that fold away give you flexibility to use your space differently throughout the week. Dinner party on Saturday, kids’ play area on Sunday.
Fold-down furniture must-haves:
- Heavy-duty hinges rated for outdoor use
- Locking mechanisms to keep pieces secure when up
- Weather-resistant materials like teak or aluminum
- Simple mounting system for easy installation
My client Rachel installed a fold-down dining table last summer. She transforms her 8×10 patio from intimate morning coffee spot to dinner party space for six in under two minutes. Her teenage kids use the open space for homework when the weather’s nice.
7. Bistro Set for Two
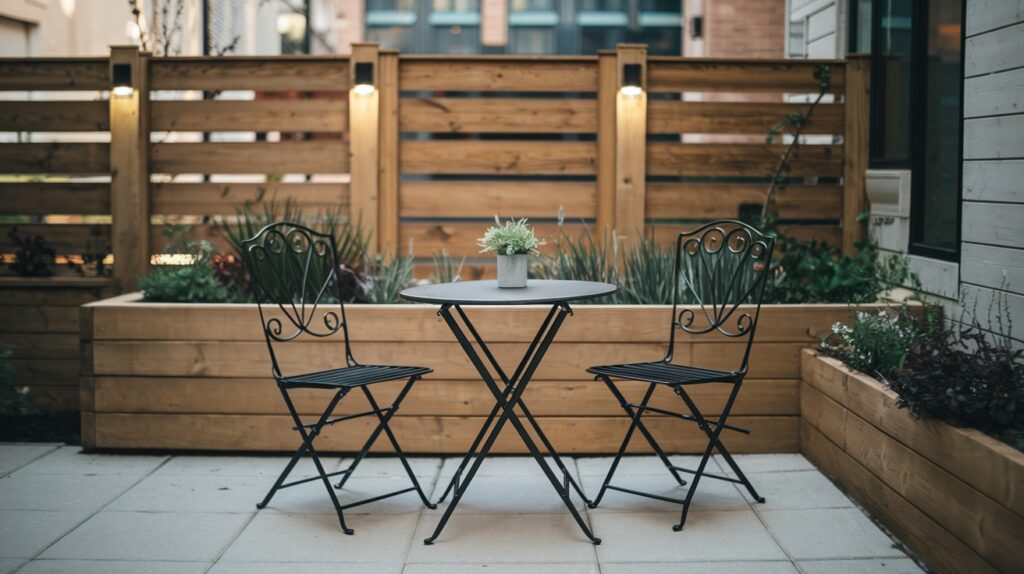
Big furniture makes small spaces feel cramped. Scale matters more than you think.
A perfectly sized bistro set creates an intimate dining experience without overwhelming your yard. Sometimes cozy beats spacious.
Bistro set selection guide:
- Table diameter: 24-30 inches maximum
- Chair height: 30 inches for standard comfort
- Materials: Powder-coated steel or aluminum for durability
- Style: Choose pieces that complement your home’s architecture
I convinced my friends Mark and Lisa to downsize from their 6-person table to a bistro set. They actually eat outside more often now because the space feels purposeful instead of crowded. Their morning coffee ritual has become their favorite part of the day.
8. Wall-Mounted BBQ Station
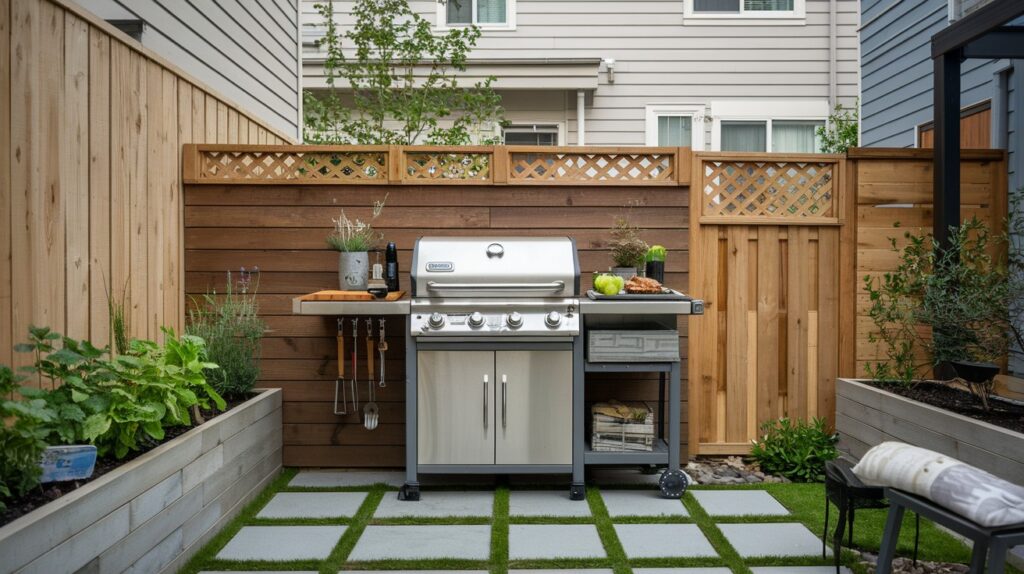
Floor-standing grills hog valuable space and create awkward traffic flow. Smart mounting solves both problems.
You’ll gain precious square footage while creating a proper outdoor cooking zone. Your guests can actually move around while you’re grilling.
BBQ station setup essentials:
- Mount grill 36 inches from ground for comfortable cooking
- Include fold-down prep surface for food prep
- Add hooks underneath for grilling tools
- Install weatherproof electrical outlet for accessories
I helped my neighbor Dave mount his grill last spring. He gained enough floor space to add a small herb garden right next to his cooking area. Now he grabs fresh rosemary and thyme while his steaks are cooking.
9. Built-In Planters with Seating Edges
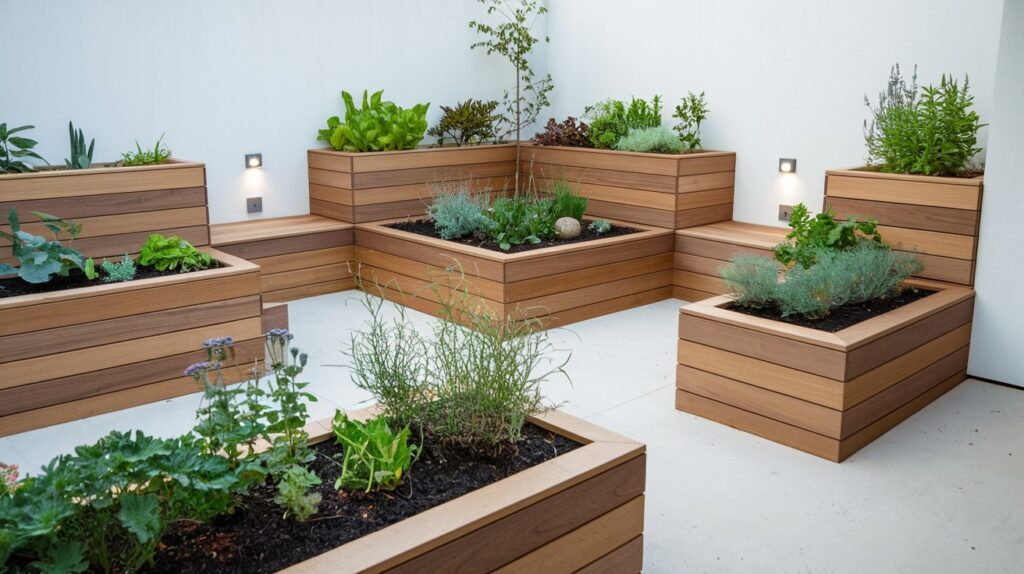
Separate planters and benches waste space and money. Smart design combines both functions.
You’ll create natural boundaries while providing extra seating for parties. Plus, built-ins always look more expensive than they actually cost.
Planter-bench design specs:
- Height: 18 inches for comfortable seating
- Width: 16 inches minimum for healthy plant roots
- Length: Match to your space constraints
- Drainage: Include weep holes every 2 feet
My client Jennifer built these along her property line. She now has seating for 12 people and grows enough vegetables to supply her family’s salads all summer. Her neighbors constantly ask for her landscaper’s number.
10. Storage Benches or Outdoor Ottomans
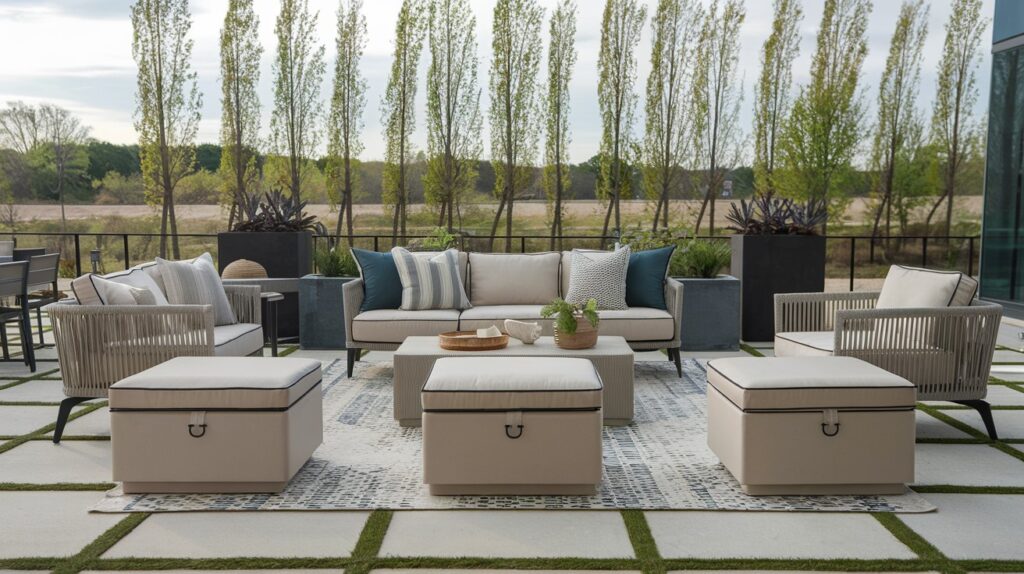
Clutter kills the peaceful vibe of small outdoor spaces. Hidden storage keeps things organized.
Every piece of furniture should earn its place by serving multiple functions. Storage ottomans give you seating, footrests, and organization in one compact package.
Storage furniture selection criteria:
- Waterproof construction to protect contents
- Cushioned tops for comfortable seating
- Easy-lift lids for frequent access
- Neutral colors that won’t date quickly
I installed three storage ottomans in my own small yard. They hold everything from pool toys to gardening supplies while providing extra seating when we entertain. My wife loves that the space stays clutter-free even with two young kids.
Privacy and Shade Solutions
Townhouse yards often lack privacy. These solutions fix that problem fast.
11. Privacy Screens with Planters
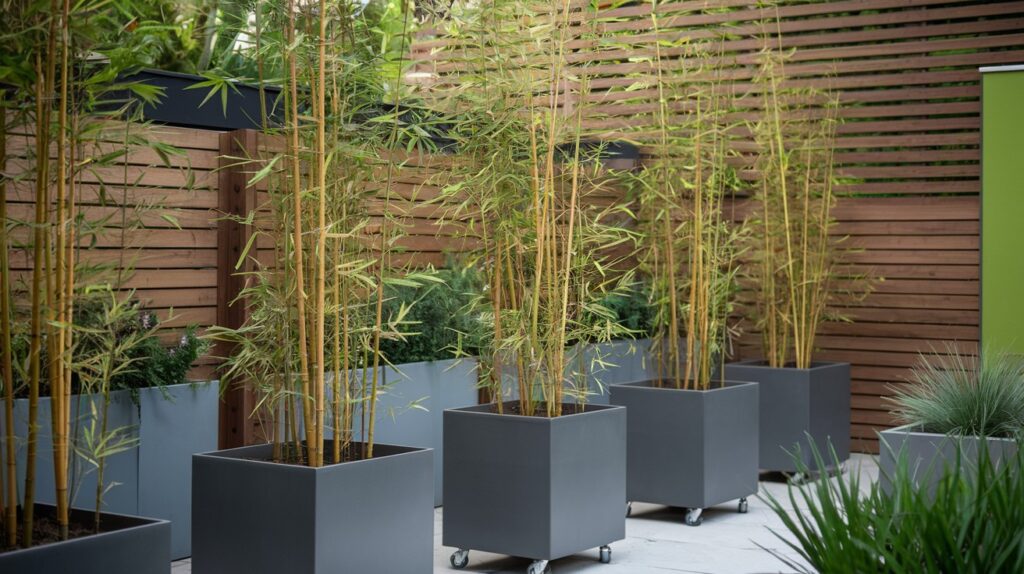
Ugly fences and nosy neighbors ruin the peaceful vibe you’re trying to create. Traditional privacy solutions look harsh and artificial.
Combining screening with beautiful plants gives you privacy that actually enhances your space. You’ll block unwanted views while creating a living wall of beauty.
Privacy planter specifications:
- Use containers at least 24 inches deep for root growth
- Choose fast-growing plants like bamboo or ornamental grasses
- Space planters 12 inches apart for complete coverage
- Include casters on bottom for easy seasonal rearrangement
My client Susan was tired of her neighbor watching her family barbecues. We installed bamboo planters along her fence line. Now she has complete privacy plus a gorgeous green backdrop. Her neighbor actually thanked her because it improved his view too.
12. Outdoor Curtains or Drop Cloth Screens
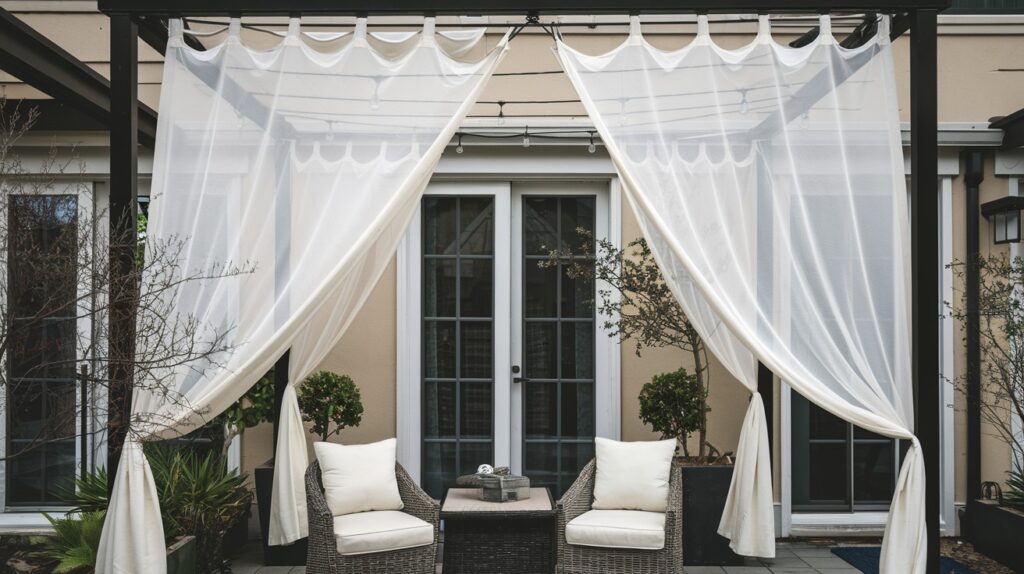
Solid privacy walls make small spaces feel like prison yards. You need privacy that breathes.
Curtains give you control over your privacy and light levels throughout the day. Open them for morning sun, close them for intimate evening dinners.
Outdoor curtain installation guide:
- Use marine-grade hardware that won’t rust
- Choose fade-resistant outdoor fabrics
- Install on tracks or cables for easy movement
- Weight hems with outdoor-rated chain for wind resistance
I helped my friend Carlos install curtains around his hot tub area. He can now enjoy privacy when needed but open them up to feel connected to his garden. His wife says it’s like having an outdoor room that changes with their mood.
13. Mini Pergola for Shade and Structure
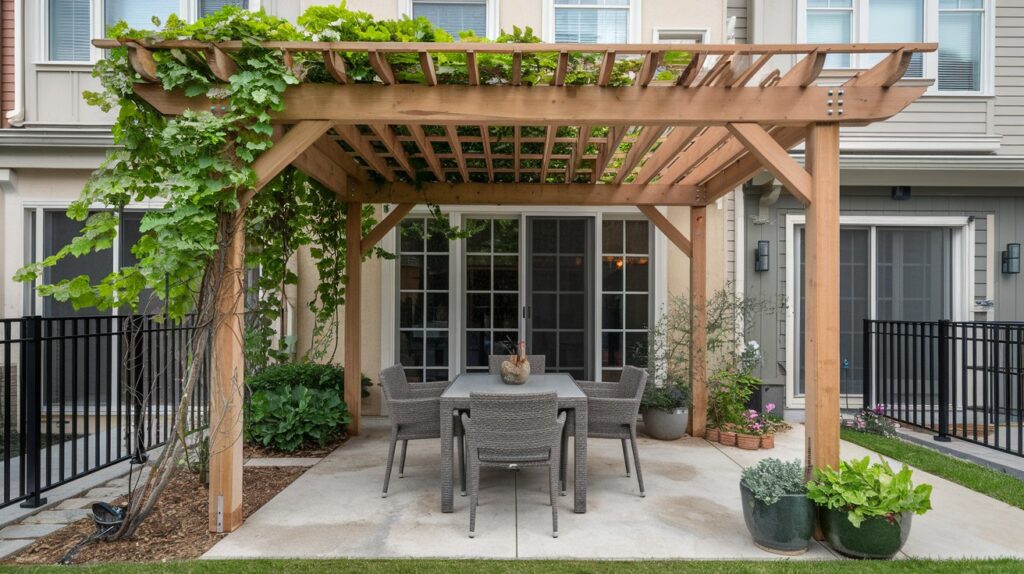
Most townhouse yards lack architectural interest. Everything sits at ground level with no vertical elements.
A small pergola creates an outdoor room feeling while providing much-needed afternoon shade. It’s like adding a ceiling to your outdoor space.
Pergola design essentials:
- Size it 2 feet larger than your seating area on each side
- Use 8-foot posts for proper proportion in small spaces
- Choose cedar or composite materials for longevity
- Add climbing vines for natural shade and beauty
Last year, I built a 10×10 pergola for my clients the Johnsons. Their bare patio became an outdoor dining room. They’ve hosted three family celebrations there since installation, and everyone asks about their “outdoor restaurant.”
14. Overhead Shade Sails or Awnings
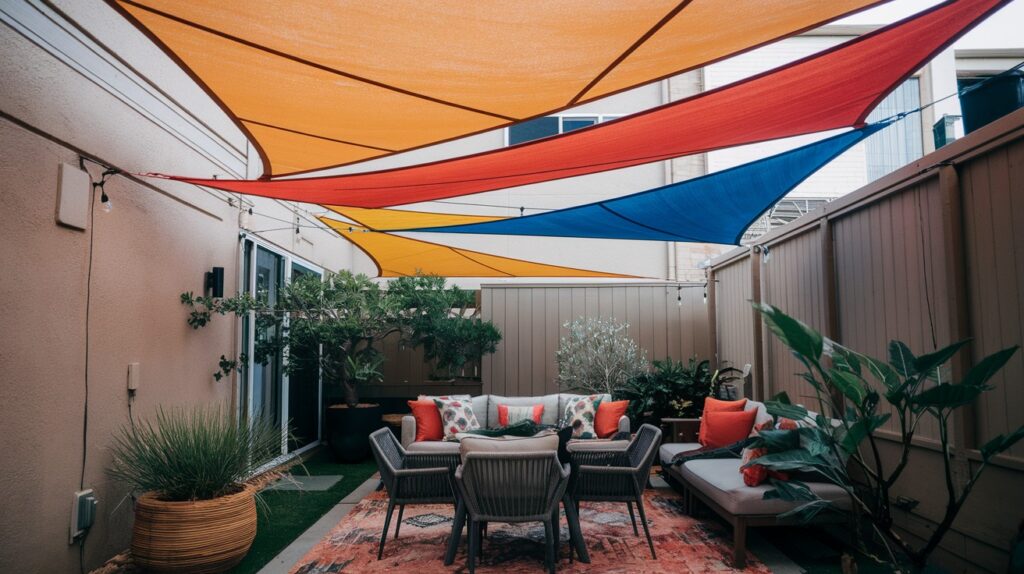
Traditional pergolas cost thousands and take weeks to build. Sometimes you need shade solutions that work immediately.
Shade sails install in one afternoon and cost a fraction of permanent structures. They block harsh sun while creating dynamic geometric shapes overhead.
Shade sail success factors:
- Choose triangular shapes for the most wind resistance
- Install at different heights for visual interest
- Use contrasting colors to make a design statement
- Ensure proper tension to prevent sagging and flapping
My neighbor Jim installed three overlapping shade sails over his deck. The afternoon sun that used to make his space unusable is now completely blocked. His kids can play outside during the hottest part of summer days.
15. Strategic Planting for Natural Screening
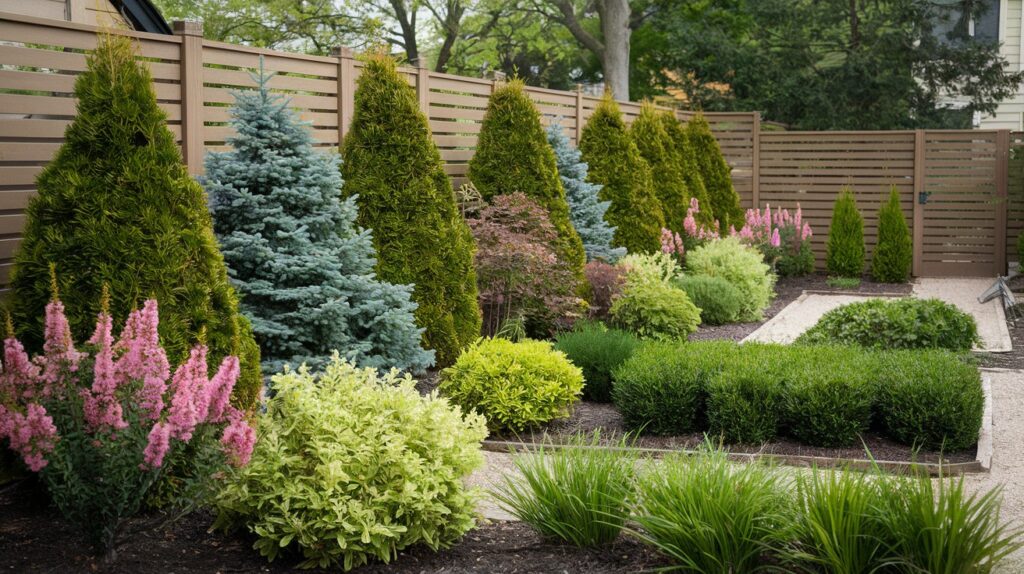
Buying mature privacy trees costs thousands and many don’t survive transplanting. Strategic planting with smaller plants works better.
The right plants in the right spots create natural privacy that grows more beautiful each year. Nature makes the best privacy fence.
Natural screening plant selection:
- Choose evergreens for year-round privacy
- Plant in staggered rows for fuller coverage
- Mix heights and textures for visual appeal
- Include flowering varieties for seasonal color
I helped my client Maria plant a privacy border using 3-gallon shrubs instead of expensive mature trees. Three years later, her screen is 8 feet tall and gorgeous. She spent $300 total while her neighbor paid $3,000 for mature trees that half died the first winter.
Stylish Landscaping in Tight Spaces
Small yards need a big impact. These landscaping tricks deliver.
16. DIY Raised Garden Beds
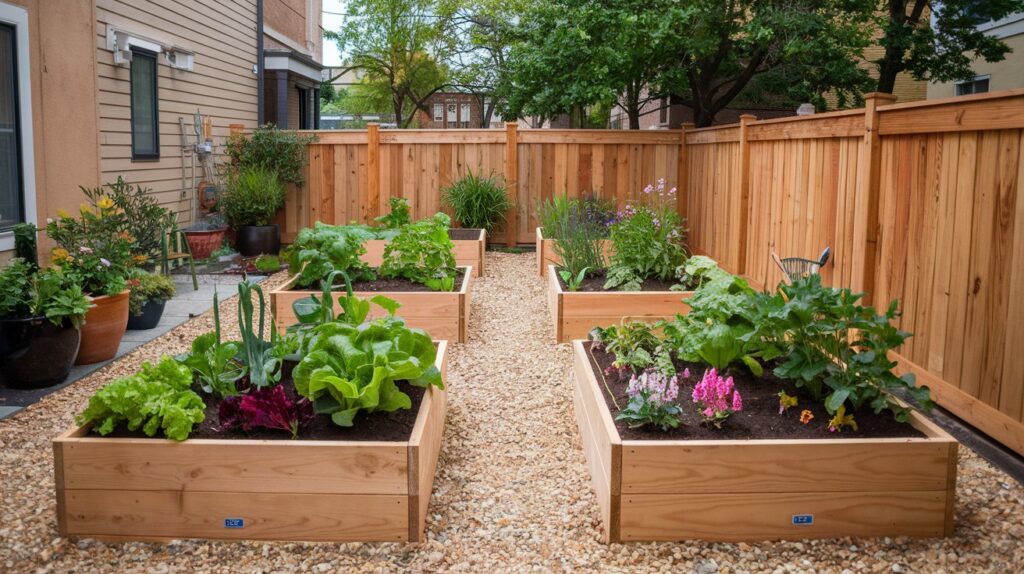
Ground-level gardens in townhouse yards often fail due to poor soil and drainage issues. Most developers use cheap fill dirt that plants hate.
Raised beds give you complete control over soil quality while creating organized growing spaces. Your vegetables will actually thrive instead of just surviving.
Raised bed construction basics:
- Build 4×4 or 4×8 foot sections for easy reach
- Use untreated cedar boards for food safety
- Fill with quality soil mix (1/3 compost, 1/3 peat, 1/3 vermiculite)
- Add hardware cloth at bottom to prevent pests
I built raised beds in my own yard after years of failed ground-level gardens. My tomato harvest tripled the first year. My kids now actually eat vegetables because they helped grow them. The neat, organized look also increased our home’s curb appeal significantly.
17. Container Gardening with a Theme
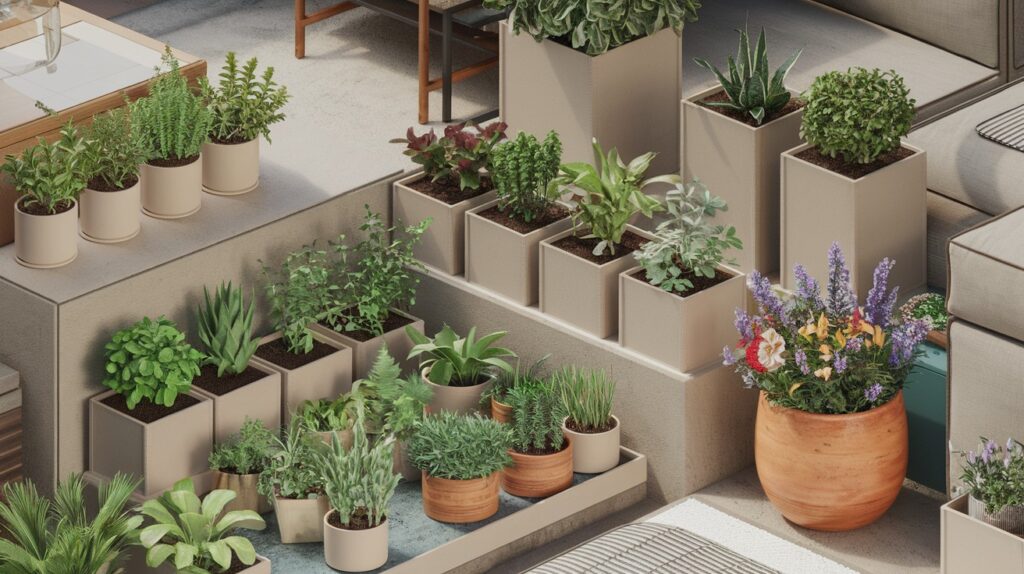
Random pots scattered around make small spaces look messy and unplanned. Cohesive design creates visual calm.
Themed container arrangements give you the impact of a full garden in minimal space. Your eye sees organized beauty instead of scattered chaos.
Container theming strategies:
- Choose pots in the same color family but different sizes
- Group plants by water needs for easier maintenance
- Use odd numbers (3, 5, 7) for most pleasing arrangements
- Include one statement piece as a focal point
My client Rebecca changed her chaotic collection of mismatched pots into three themed groupings: herbs by the kitchen, flowers by the seating area, and succulents by the entrance. Visitors now compliment her “professional landscaping” instead of asking when she’ll get around to organizing her plants.
18. Tiered Plant Stands or Ladder Shelves
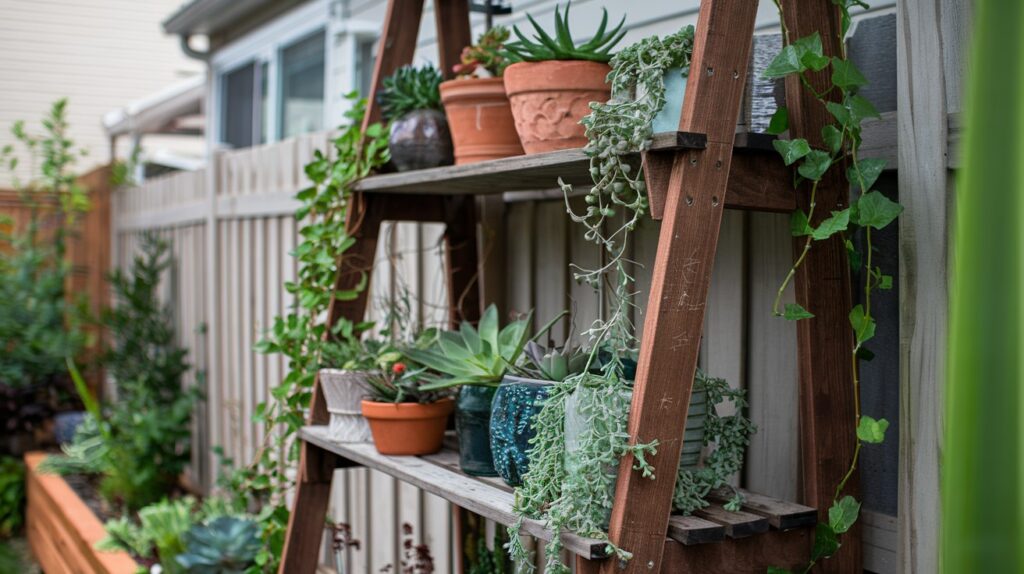
Flat arrangements waste vertical growing potential. Everything at ground level creates a boring, one-dimensional look.
Multiple levels let you display more plants while creating depth and visual interest. It’s like turning your yard into a living sculpture.
Tiered display guidelines:
- Use weathered wood or metal for outdoor durability
- Arrange plants with tallest in back, shortest in front
- Include trailing plants to soften hard edges
- Group by sun requirements for plant health
I repurposed an old wooden ladder in my friend Tom’s narrow side yard. He went from having space for 6 plants to displaying 20 in the same footprint. His boring walkway became an Instagram-worthy plant gallery that stops neighbors in their tracks.
19. Artificial Turf for Easy Green Appeal
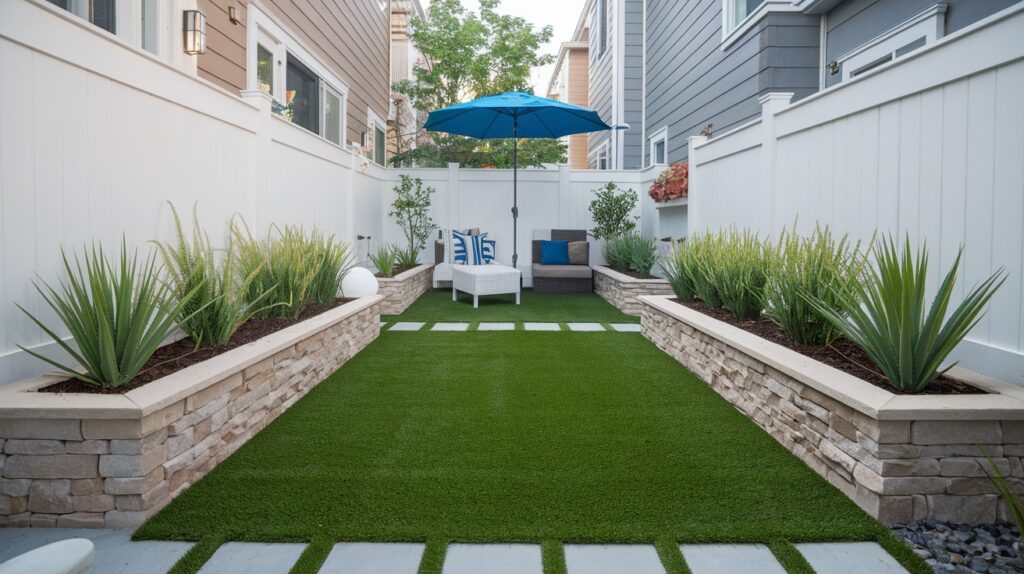
Natural grass in small, shaded townhouse yards often looks patchy and brown. Constant watering and maintenance becomes a weekend chore.
High-quality artificial turf gives you perfect green space year-round with zero maintenance. You’ll actually use your yard instead of constantly working on it.
Artificial turf selection criteria:
- Choose multi-colored blades that mimic real grass
- Look for UV protection to prevent fading
- Ensure proper drainage backing
- Include antimicrobial treatment for pet areas
My busy executive client Paul installed artificial turf after his third failed grass attempt. Two years later, it still looks perfect while his neighbors struggle with brown patches. His kids finally have a reliable play surface, and he gained back his weekends.
20. Vertical Water Features or Wall Fountains
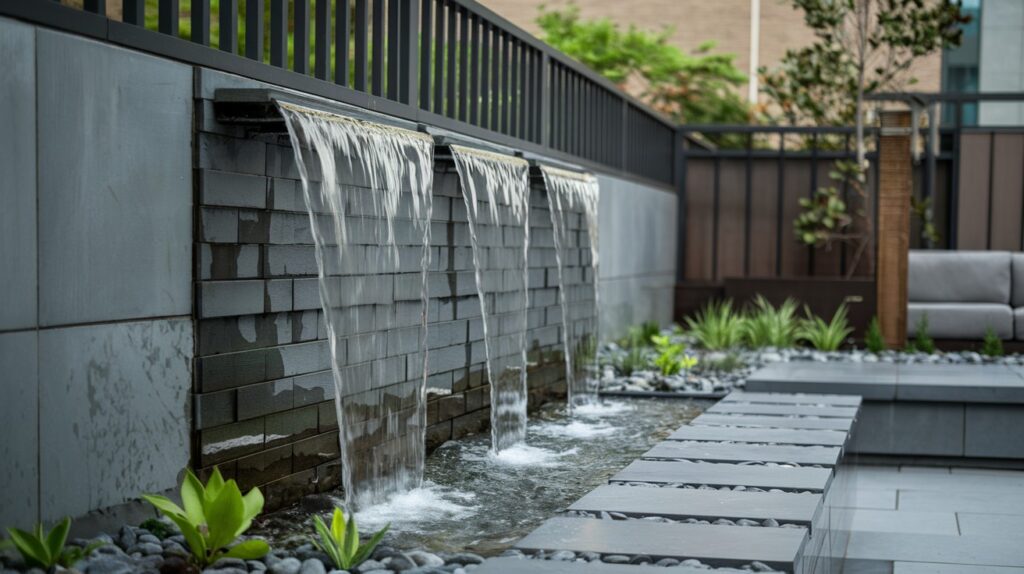
Ground-level water features eat up precious space and often become maintenance headaches. Wall-mounted options solve both problems.
Vertical fountains provide the calming sound of water without sacrificing floor space. They also mask annoying street noise with peaceful water sounds.
Wall fountain installation tips:
- Choose self-contained units for easy installation
- Include timer controls for energy efficiency
- Position near seating areas for maximum enjoyment
- Use LED lighting for nighttime drama
I installed a copper wall fountain for my stressed-out neighbor Sarah. The gentle water sounds now mask the busy street noise that used to make her yard unusable. She meditates there every morning and says it’s better than expensive therapy sessions.
Lighting & Mood Enhancers
Good lighting extends your outdoor season. Here’s how to do it right.
21. String Lights for Magical Vibes
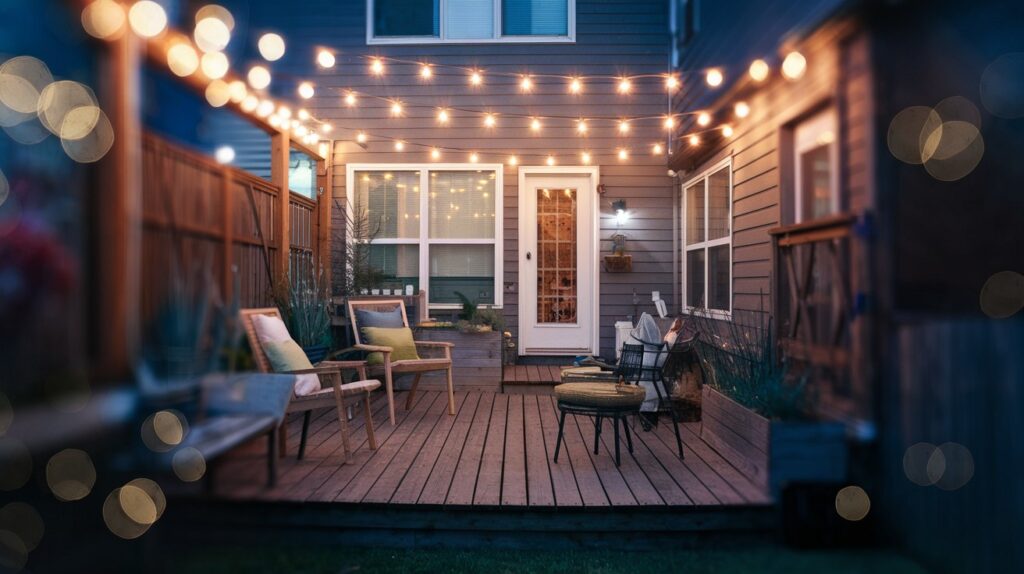
Most outdoor lighting is either too bright for ambiance or too dim to be useful. Finding the sweet spot transforms evening entertaining.
Warm LED string lights create a restaurant-quality atmosphere in your own backyard. Your space becomes a magical retreat as soon as the sun sets.
String lighting installation secrets:
- Use warm white (2700K) LEDs for cozy ambiance
- Hang in overlapping zigzag patterns for even coverage
- Include dimmer switches for mood control
- Choose commercial-grade lights for weather resistance
Last summer, I helped my friend Lisa install string lights for her daughter’s graduation party. The change was so dramatic that neighbors asked if she hired a professional lighting designer. Now she entertains outside three times more often because evenings feel special instead of dark and uninviting.
22. Solar Lanterns and Smart Path Lights
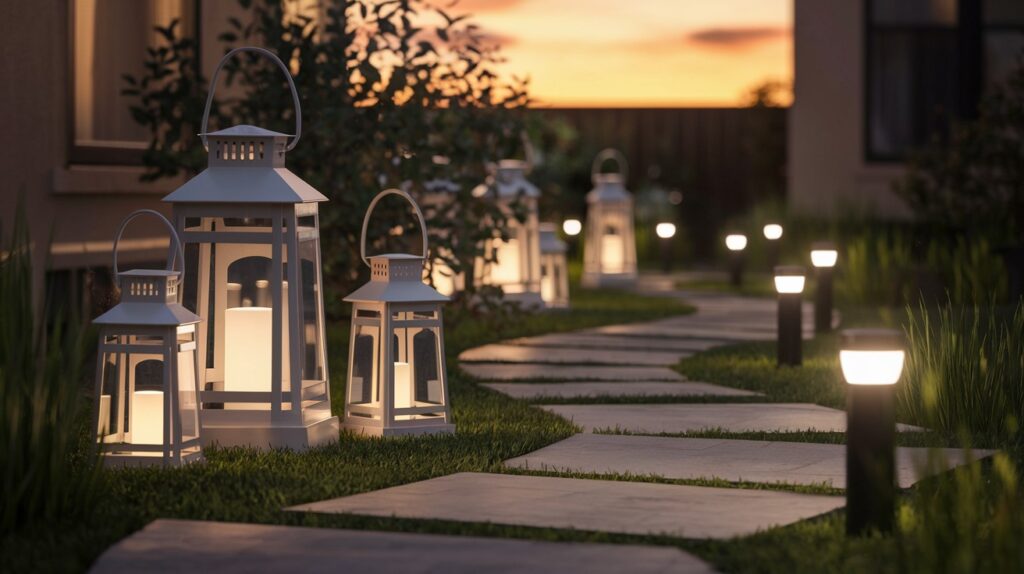
Extension cords and electrical work complicate simple lighting projects. Solar options eliminate wiring while providing reliable illumination.
Quality solar lights charge all day and provide 8+ hours of evening light. No monthly electric bills or complicated installations required.
Solar lighting best practices:
- Position panels for maximum sun exposure (6+ hours daily)
- Choose lights with replaceable batteries for longevity
- Include motion sensors for security and energy savings
- Group lanterns in odd numbers for visual appeal
My client James installed solar path lights along his winding walkway. His previously treacherous evening trips to the garbage became safe and pleasant. The automatic on/off feature means he never worries about remembering to turn lights on or off.
23. Motion-Sensor LED Lighting
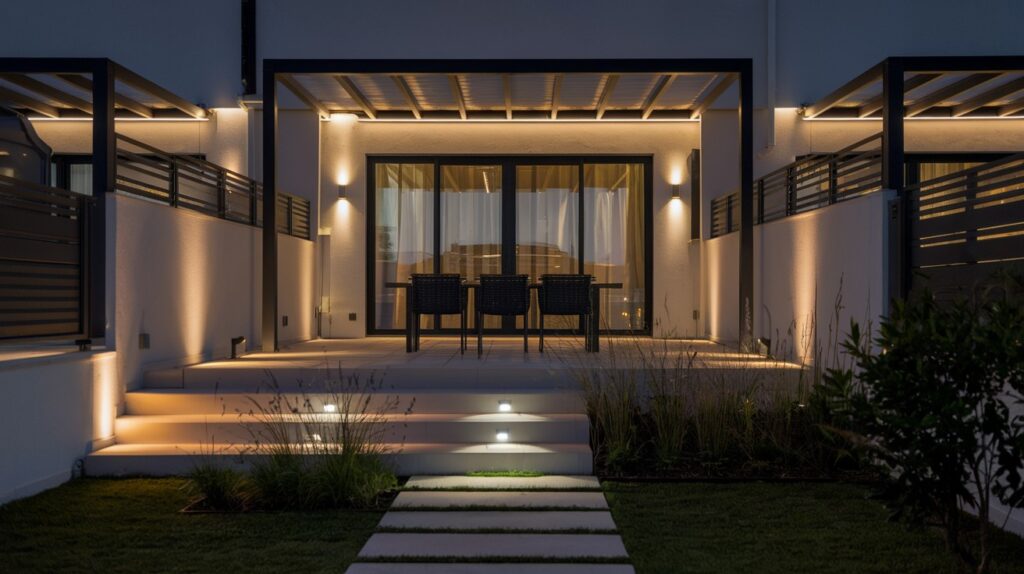
Security lighting often ruins outdoor ambiance with harsh, prison-yard brightness. Smart sensors provide safety without destroying the mood.
Modern motion sensors can distinguish between small animals and people, reducing false alarms. You get security lighting that only activates when actually needed.
Motion sensor setup guidelines:
- Adjust sensitivity to ignore cats and small animals
- Set timer for 3-5 minute automatic shutoff
- Choose warm-colored LEDs instead of harsh white
- Position to avoid triggering from street traffic
I installed motion sensors for my elderly neighbor Mrs. Chen after she fell on her dark patio. The gentle warm light provides safety without disturbing her peaceful evening garden time. She feels secure moving around her yard after dark for the first time in years.
24. Reflective Surfaces to Add Depth and Brightness

Small, dark spaces feel cramped and unwelcoming. Strategic reflection can double the apparent size and brightness of your yard.
Mirrors, metallic surfaces, and glossy finishes bounce light around your space while creating illusions of expanded space. It’s optical magic that costs almost nothing.
Reflection placement strategies:
- Position mirrors to reflect garden views, not neighbor’s windows
- Use metallic planters to bounce light upward to plants
- Include glossy tiles or surfaces near seating areas
- Angle reflective surfaces to catch and redirect sunlight
My client Diana added a large outdoor mirror behind her small seating area. Visitors consistently ask about her “other garden area” because the reflection creates the illusion of a second space. Her 10×12 patio now feels like a much larger outdoor room.
Cozy Touches for Year-Round Enjoyment
These details turn your yard from functional to fabulous.
25. Portable Fire Pit for Warm Gatherings
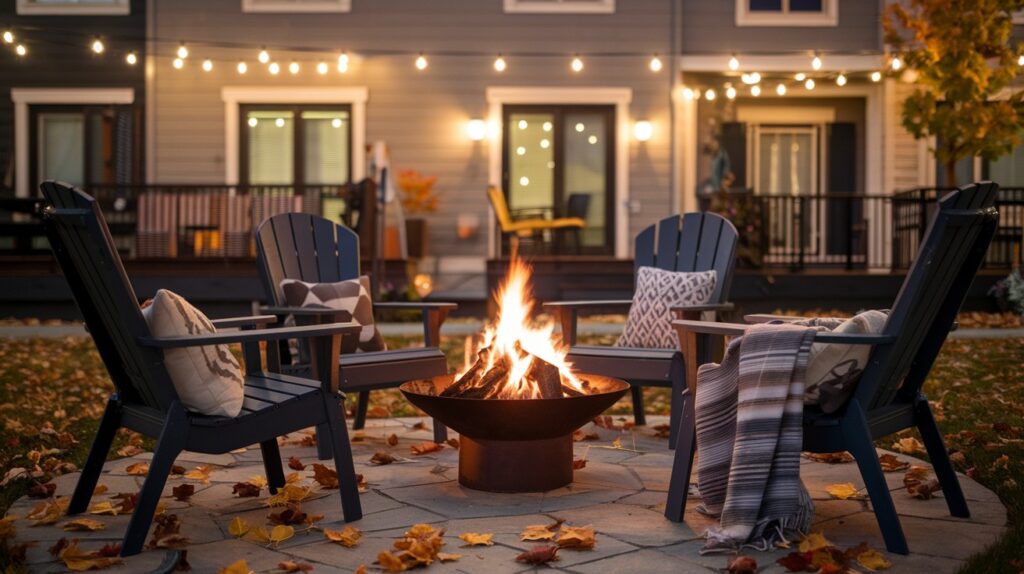
Fixed fire features take up space year-round but only get used seasonally. That’s poor space planning in small yards.
Portable propane fire pits give you cozy gathering spots when you want them and storage flexibility when you don’t. Your space adapts to the seasons and your needs.
Portable fire pit selection guide:
- Choose propane over wood for clean, controllable flames
- Look for models under 50 pounds for easy moving
- Include safety features like automatic shutoff valves
- Select styles that complement your existing furniture
My neighbors Mike and Kelly bought a portable fire pit for their tiny patio. Fall became their favorite season as friends gathered for evening conversations they never had before. They store it in their garage during summer to maximize deck space for other activities.
26. Pet-Friendly Turf Zones
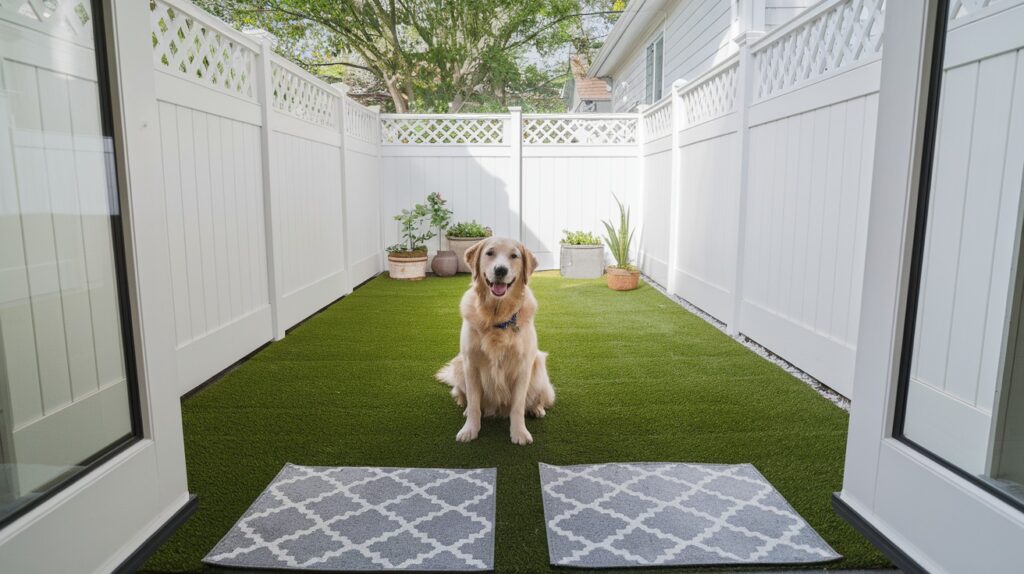
Dog owners know the struggle: muddy paws, dead grass spots, and smelly yard areas. Traditional solutions rarely work long-term.
Designated pet areas with artificial turf or special grass varieties solve multiple problems at once. Your pets stay clean while your yard stays beautiful.
Pet area design specifications:
- Use antimicrobial artificial turf designed for pets
- Include proper drainage underneath to prevent odors
- Size area at least 6×6 feet for larger dogs
- Add washable outdoor rugs around edges for paw cleaning
I helped my client Jennifer create a pet zone after her two labs destroyed her natural grass. The artificial turf cleans easily with a hose, never gets muddy, and looks green year-round. Her dogs love having a consistent surface to play on regardless of weather.
27. Outdoor Rug and Cozy Textiles
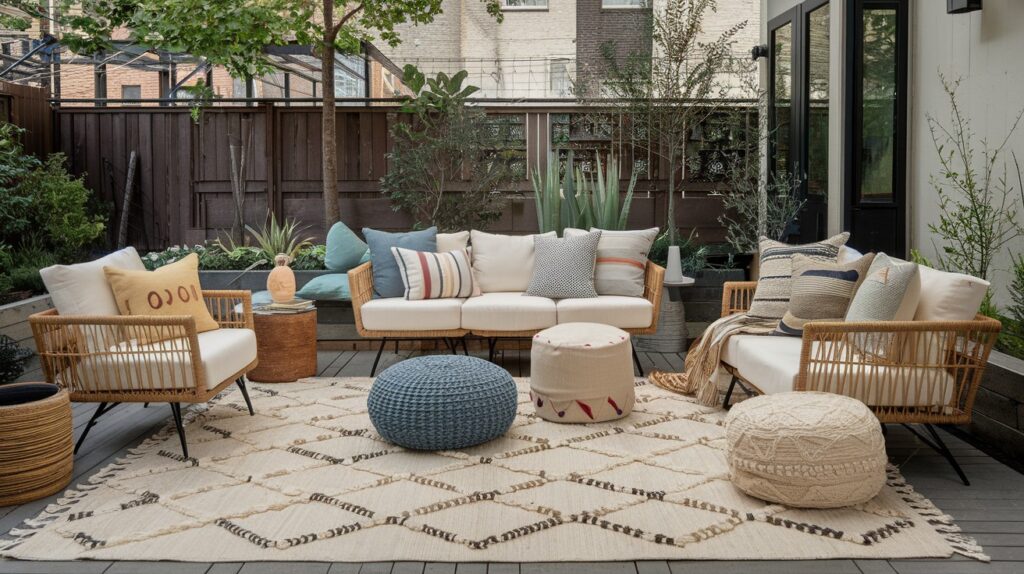
Hard surfaces make outdoor spaces feel cold and unwelcoming. Soft textures create the comfort factor that makes people want to linger.
Weather-resistant textiles bring interior comfort to outdoor spaces while defining seating areas and adding color. Your patio starts feeling like an outdoor living room.
Outdoor textile selection criteria:
- Choose solution-dyed acrylic fabrics for fade resistance
- Look for quick-dry materials that shed water
- Select patterns that camouflage dirt and stains
- Include storage solutions for seasonal protection
My client Sandra added a large outdoor rug and colorful pillows to her previously stark concrete patio. Her family went from barely using the space to eating dinner outside most evenings. The soft textures made the hard surfaces feel welcoming and comfortable.
28. DIY Vertical Herb Wall
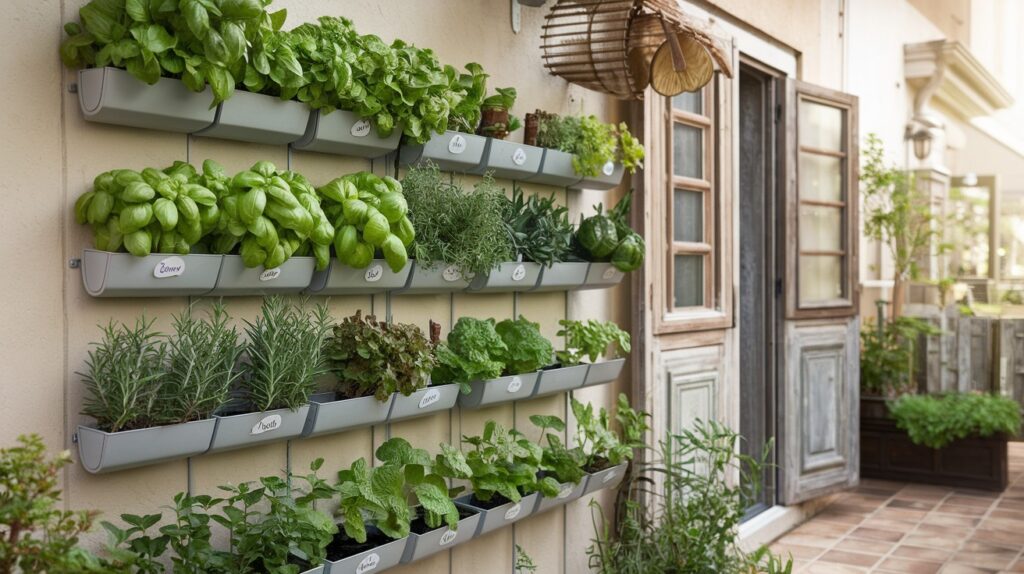
Store-bought herbs cost $3-4 per package and often go bad before you use them. Growing your own saves money while ensuring freshness.
A vertical herb wall by your kitchen door puts fresh flavors within arm’s reach while saving precious ground space. Cooking becomes more enjoyable when ingredients are steps away.
Herb wall construction basics:
- Use pocket planters or repurposed pallet systems
- Position within 10 feet of kitchen for convenience
- Include drip irrigation for consistent watering
- Choose herbs you actually cook with regularly
I built a vertical herb wall right outside my kitchen door three years ago. My grocery bill dropped noticeably, and my cooking improved dramatically with constant access to fresh basil, rosemary, and thyme. Guests always comment on how professional the setup looks and how good everything smells.
Expert Tips to Maximize Every Inch
- After designing hundreds of small yards, here’s what I’ve learned:
- Measure twice, buy once. Know your exact dimensions before shopping.
- Choose multipurpose items whenever possible. Every piece should serve at least two functions.
- Go vertical with plants, storage, and features. Your walls are valuable real estate.
- Light colors make spaces feel larger. Choose pale furniture and light-colored hardscaping.
- Create sight lines through your space. Avoid blocking views with tall furniture or plants.
- Use the rule of three. Group plants and decorative items in odd numbers.
- Maintain scale. Oversized furniture makes small spaces feel cramped.
Common Townhouse Backyard Mistakes to Avoid
Don’t make these expensive errors:
Mistake #1: Buying furniture before measuring your space.
Mistake #2: Planting trees that will outgrow your yard in five years.
Mistake #3: Installing permanent features without checking HOA rules.
Mistake #4: Choosing high-maintenance plants if you’re busy.
Mistake #5: Ignoring drainage issues before adding hardscaping.
Mistake #6: Using only ground-level planting instead of going vertical.
Mistake #7: Buying cheap furniture that won’t last two seasons.
Your Dream Townhouse Backyard Starts Now
Small spaces don’t limit your style. They challenge your creativity.
You now have 28 proven ideas to change your townhouse backyard. From smart layouts to cozy lighting, every strategy works in tight spaces.
Start with one project. Pick the idea that excites you most. Maybe it’s string lights for evening ambiance. Or a vertical herb garden by your kitchen door.
Don’t try to do everything at once. Master one area, then move to the next.
I’ve watched hundreds of homeowners create amazing outdoor spaces using these exact techniques. Your yard has incredible potential. You just needed the right roadmap.
Take action today. Your family will thank you when you’re hosting dinner parties under the stars next month.
Time to build your backyard paradise.
Frequently Asked Questions
How much space do I need for a seating area in my townhouse backyard?
You need just 6×6 feet for a comfortable seating area for four people. A bistro set for two fits in a 4×4 foot space perfectly.
What’s the biggest mistake people make with small backyard lighting?
They use too many small lights instead of fewer, larger fixtures. Three well-placed lights create better ambiance than ten tiny ones scattered around.
Can artificial turf really look natural in a townhouse yard?
High-quality artificial turf with varied blade heights looks incredibly realistic. Choose turf with brown “thatch” mixed in for the most natural appearance.
How do I keep my vertical garden healthy without daily maintenance?
Install a drip irrigation system with a timer for consistent watering. Choose drought-tolerant plants like succulents and herbs that thrive with minimal care.
Should I match my backyard style to my home’s interior design?
Your outdoor space should complement your home but doesn’t need to match exactly. Carry over 2-3 colors from inside to create a cohesive flow between spaces.