
Ready to build your own storage solution without breaking the bank?
A shed on skids might be exactly what you need. Think of it as a portable building that sits on wooden runners instead of a concrete foundation.
Here’s the thing: you don’t need to pour cement or get permits in most areas.
Want to move it later? No problem. The skids let you relocate your shed with a truck or tractor.
Your wallet will thank you, too. Building on skids costs way less than traditional foundations. Plus, you can start using your shed the same day you finish it.
Sounds good so far? Let me show you how to build one that’ll last for years.
Why Build a Shed on Skids?
Before we get into the materials list, let’s talk about why a shed on skids is such a smart choice.
Portability: Move your shed later with a truck or tractor. No permanent foundation means you can relocate it anywhere on your property.
Affordability: Skip expensive concrete foundations and save hundreds of dollars. You’ll spend money on quality materials instead of costly groundwork.
Simplicity: Build directly on skids without heavy equipment or advanced skills. Most homeowners can handle this project with basic tools.
Speed: Start using your shed the same day you finish building. No waiting for concrete to cure or scheduling contractors.
Need storage for garden tools, lawn equipment, or seasonal items? A skid shed is a budget-friendly way to add extra space quickly.
Tools and Materials You’ll Need
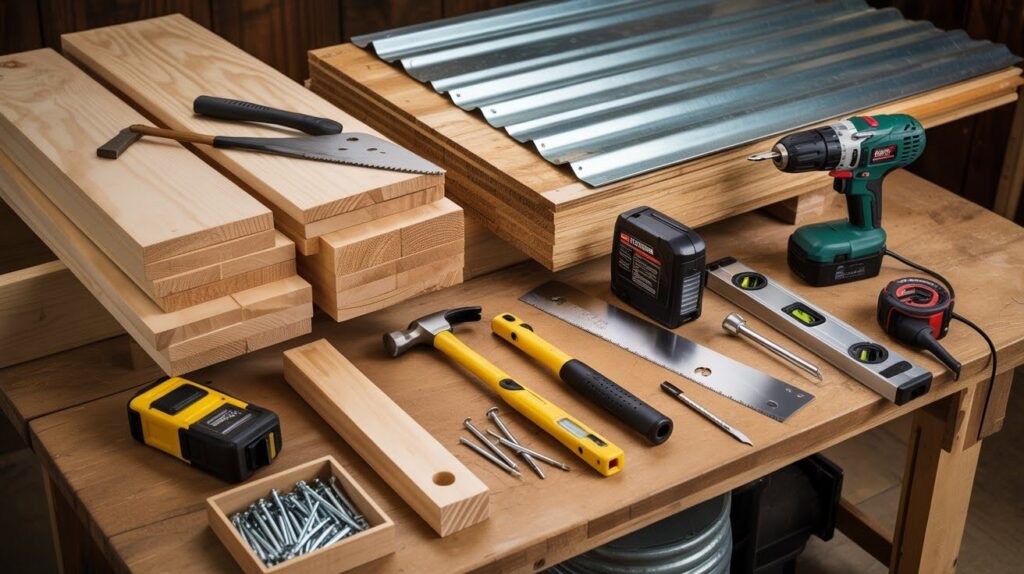
Grab Your Tool Belt. Don’t worry. You probably already own most of these tools.
Your Must-Have Tools:
- Hammer (any basic one works)
- Saw (circular or hand saw)
- Drill with bits
- Level (4-foot minimum)
- Tape measure (25-foot recommended)
Shopping List for Materials:
- Start with pressure-treated lumber for your skids. This stuff resists rot and bugs.
- You’ll need plywood or OSB for walls and flooring. OSB costs less but plywood lasts longer.
- Roofing material comes next. Metal sheets work great and install fast.
- Don’t forget fasteners. Get galvanized screws and nails. They won’t rust.
Pro tip: Buy 10% extra materials. Trust me on this one. You’ll need them for mistakes and adjustments.
Ready to start building?
5 Easy Steps to Build a Shed on Skids
A simple breakdown of the complete building process from site preparation to final finishing touches for your DIY shed project.
Step 1: Get Your Site Ready
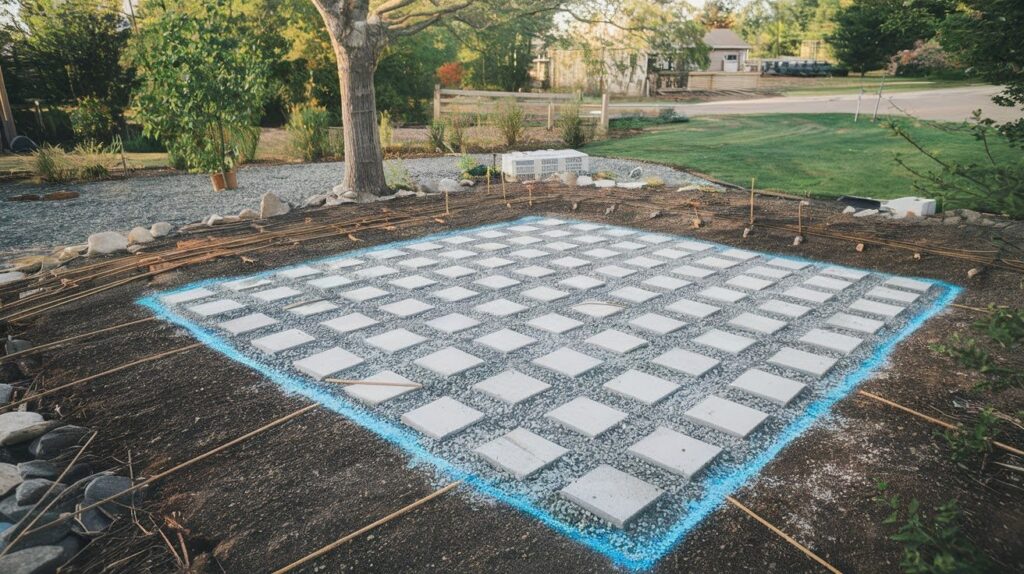
Find a spot that drains well. Nobody wants a soggy shed.
Walk around your yard after it rains. See where water pools? Avoid those areas. Clear out rocks, sticks, and weeds. You want a clean workspace.
Mark your shed outline with spray paint or stakes. This helps you stay on track. Lay down gravel or set concrete blocks every few feet. This keeps your skids off the ground.
Step 2: Position Your Skids
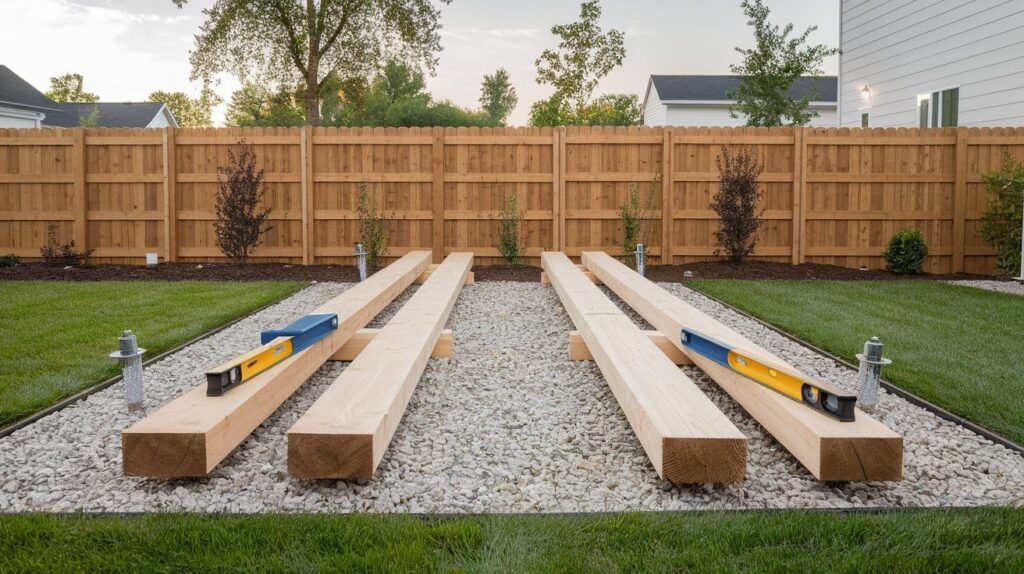
Size matters here. Use 4x4s for small sheds. Go with 6x6s for bigger builds.
Space your skids 4 feet apart maximum. Closer is better for heavy loads. Check each skid with your level. Adjust with shims if needed.
Live in a windy area? Anchor those skids with metal brackets or stakes. This prevents your shed from shifting during storms.
Step 3: Create Your Floor Base
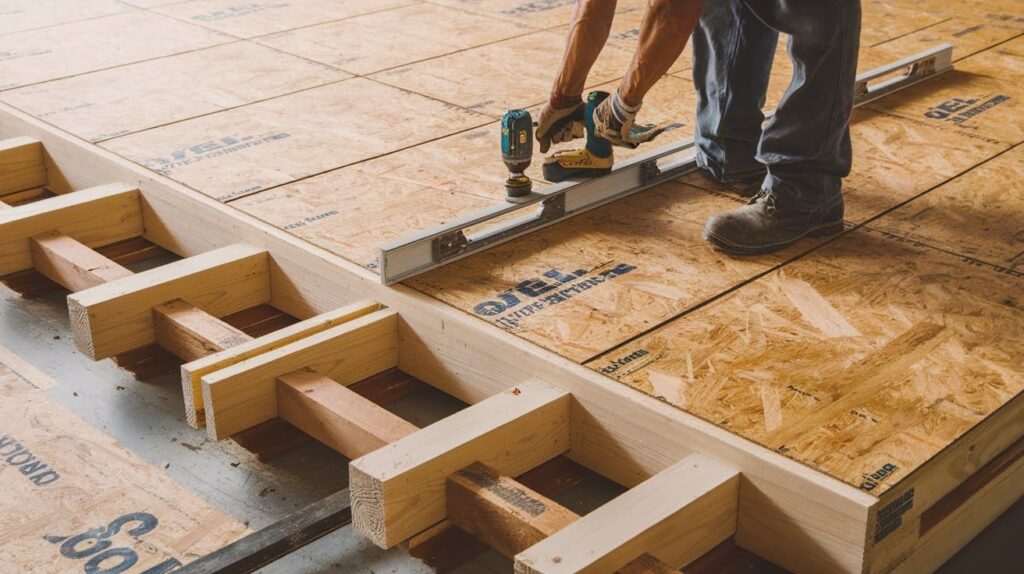
Install joists across your skids. Use 2x8s for strength.
Add blocking between joists. This stops bouncing when you walk inside. Screw down your plywood or OSB sheets. Start from one corner and work across.
Leave small gaps between sheets. Wood expands in humidity. Check everything twice with your level. A solid floor makes the rest easier.
Step 4: Build Your Structure
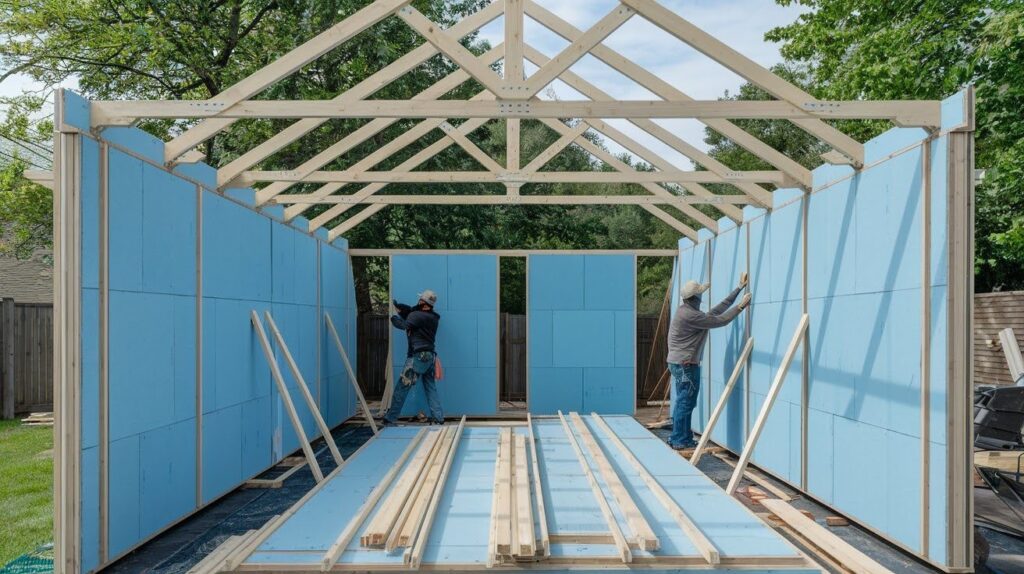
Assemble wall panels on the ground first. Way easier than building up high.
Raise each wall and brace it in place. Get a friend to help here. Install your roof trusses or cut rafters. Double-check your measurements.
Add roof sheathing, then your metal roofing or shingles. Work methodically. Rush this step and you’ll regret it later.
Step 5: Add the Finishing Touches
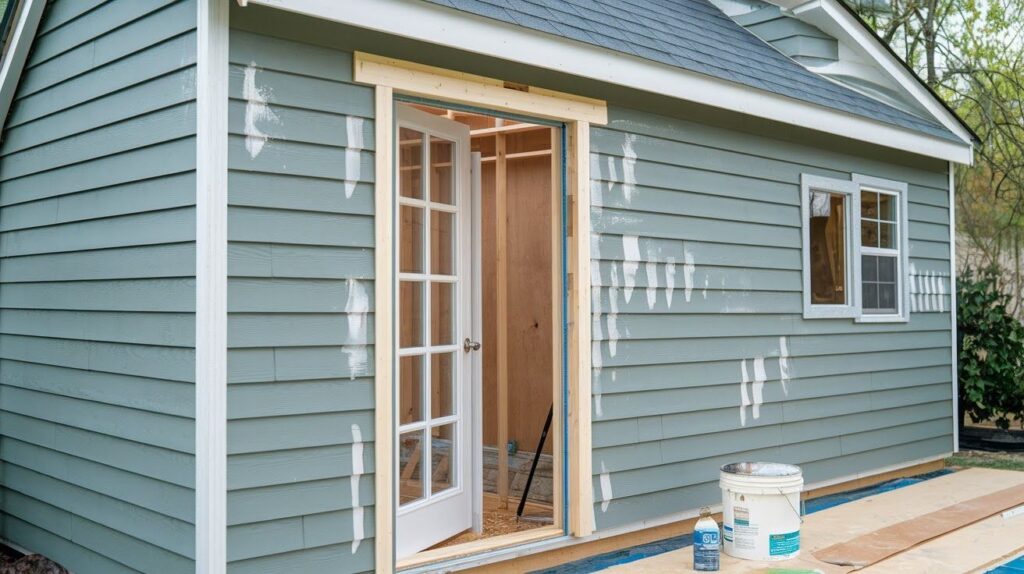
Pick your siding. T1-11 installs fast. Vinyl looks clean. Lap siding gives a classic feel.
Frame your door opening carefully. A crooked door never closes right. Want windows? Install them before siding.
Finish with paint or stain. This step makes everything look professional. Your shed is done. Time to fill it up!
Tips for Success
These tips have helped a lot of my clients:
- Use pressure-treated lumber for your skids. Regular wood rots fast when it touches the ground.
- Add vents to keep air moving inside. Trapped moisture ruins everything you store.
- Keep your shed size reasonable if you plan to move it. A 10×12 shed weighs tons when loaded.
- Check local building codes before you start. Some areas have size limits for structures without permits.
- Buy quality fasteners that won’t rust. Cheap screws and nails fail within a few years outdoors.
Conclusion
You’ve Got This
Building a shed on skids really is that simple. You get portable storage without the headache of pouring concrete or dealing with permits.
I’ve built dozens of these over the years. Each one taught me something new.
Start with a basic 8×10 design. Get comfortable with the process first. You can always build bigger next time.
The best part? You can customize it however you want. Need extra shelves? Add them. Want a workbench built in? Go for it.
Your neighbors will ask how you did it. And honestly, you’ll feel pretty good showing off your handiwork.
Take your time. Measure twice. Cut once. Before you know it, you’ll have storage space that works exactly how you need it.
Now get out there and build something.
Frequently Asked Questions
Do I need a building permit for a shed on skids?
Most areas don’t require shed permits for sheds under 120 square feet that aren’t permanently attached to the ground. Check with your local building department to be sure about your specific location.
How long does it take to build a shed on skids?
A basic 8×10 shed typically takes 2-3 days for a beginner working alone. With a helper and some experience, you can finish it in a weekend.
Can I move my shed after it’s built?
Yes, that’s one of the main benefits of skid construction. You’ll need a truck or tractor to pull it, and the shed should be empty during the move.
What’s the maximum size I can build on skids?
Most people stick to 12×16 or smaller for easy moving. Larger sheds become very heavy and may require professional movers or permanent placement.
How much does it cost to build a shed on skids?
Basic materials for an 8×10 shed cost around $800-1200. The final price depends on your choice of siding, roofing, and interior features.