
In addition to providing useful outdoor living space, proper porch roof framing shields your house from the elements.
However, mastering essential elements and methods is necessary to get the structure correct.
Details of porch roof framing, from planning to completion, are covered in this guide. I’ll go over design considerations, structural elements, and detailed framing techniques.
Common roof styles, load paths, beams, and rafters will all be covered. I’ll demonstrate how to steer clear of errors that jeopardize durability and stability.
This information assists you in creating a sturdy, long-lasting porch roof, whether you’re building new or fixing existing framing.
Let’s create something that endures for many years.
Understanding Porch Roof Structure

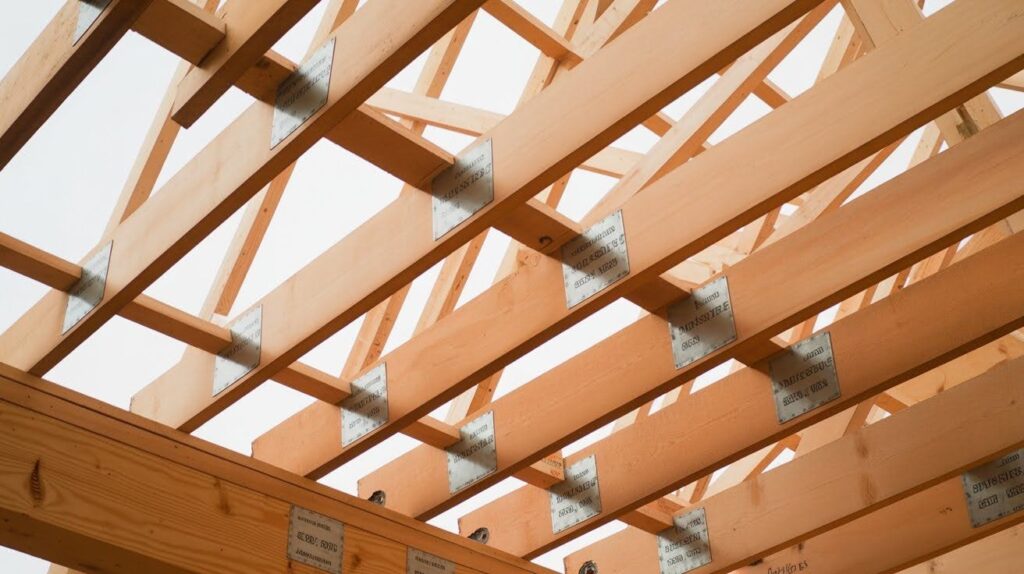
A porch roof consists of several key components working together. Rafters are sloped beams that support the roof surface, typically spaced 16 or 24 inches on center.
The ridge beam runs along the top where rafters meet, carrying roof loads down to posts or walls.
Ceiling joists span between walls or beams to support ceiling materials. Fascia boards cover rafter ends while soffit panels enclose the underside of overhangs. Ledger boards attach the roof frame to existing house framing.
Common porch roof styles each offer different benefits. Gable roofs feature a triangular shape with two sloping sides, allowing excellent drainage. Shed roofs use a simple single-slope design for small porches.
Hip roofs slope downward on all four sides, making them ideal for windy or coastal areas. Flat roofs create a modern look but require careful drainage planning to prevent water pooling.
Planning and Preparation
Assess site conditions, choose appropriate materials, and verify structural requirements before starting your porch roof framing project.
Evaluate your local climate conditions including wind speeds, snow loads, and humidity levels. These factors determine bracing requirements, beam strength, and material choices.
Measure your porch dimensions carefully, recording width, depth, and ceiling height. Determine your preferred roof pitch, such as 4/12 or 7/12 for better water shedding.
Choose materials based on cost and longevity. Dimensional lumber works for most porches while LVL or glulam beams handle longer spans.
Use pressure-treated wood for moisture exposure and galvanized hardware to prevent rust. Roofing options include metal, asphalt shingles, tile, or slate.
Verify that load-bearing points align with solid support paths to the foundation. Check local building codes for deflection limits. Plan for hurricane ties, joist hangers, and post anchors in high-wind regions.
Step-by-Step Guide to Framing a Porch Roof
Seven detailed steps from setting posts through adding fascia and soffit for complete porch roof framing.
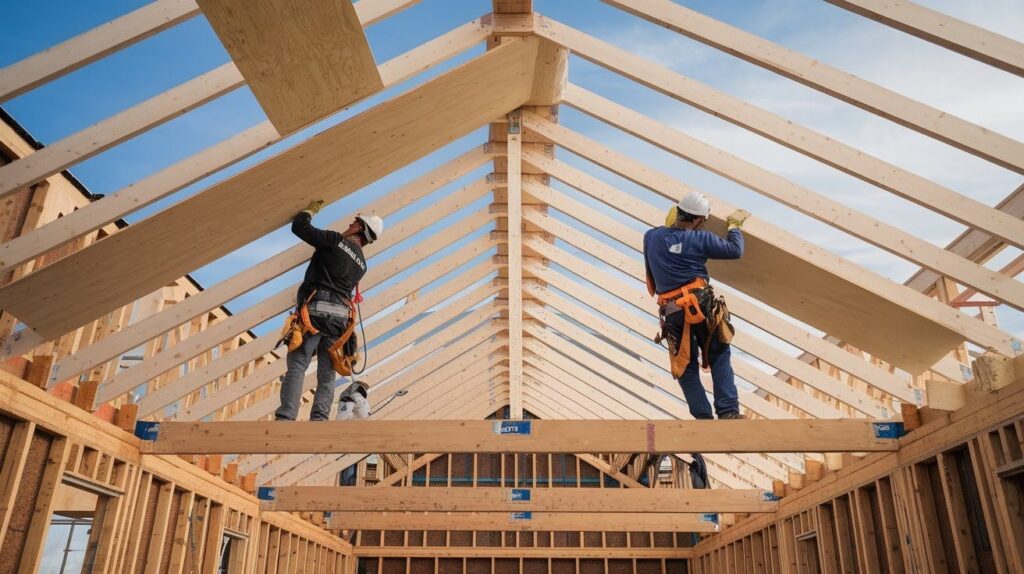
Step 1: Setting the Posts and Beam

Position 6×6 posts along the porch perimeter, spacing them 6 to 10 feet apart based on beam span capacity.
Secure posts with concrete footings below frost line using metal post bases. Install a header or beam across the top of posts to support rafter ends.
Step 2: Attaching the Ledger Board
Fasten the ledger board securely to house framing at the desired height using lag bolts or structural screws driven into wall studs.
Never attach to brick veneer. Check for level alignment across the entire porch width.
Step 3: Installing the Rafters

Mark rafter spacing at 16 or 24 inches on center along the ledger and outer beam. Cut birdsmouth notches where rafters sit on beams for flat bearing surface. Secure rafters with hurricane ties or joist hangers at both ends.
Step 4: Adding the Ridge Beam

Support the ridge beam on posts or load-bearing walls at each end. Use LVL beams or built-up 2×12 plies for spans over 10 feet. Confirm that end loads transfer directly to the foundation.
Step 5: Framing the Ceiling (Optional)
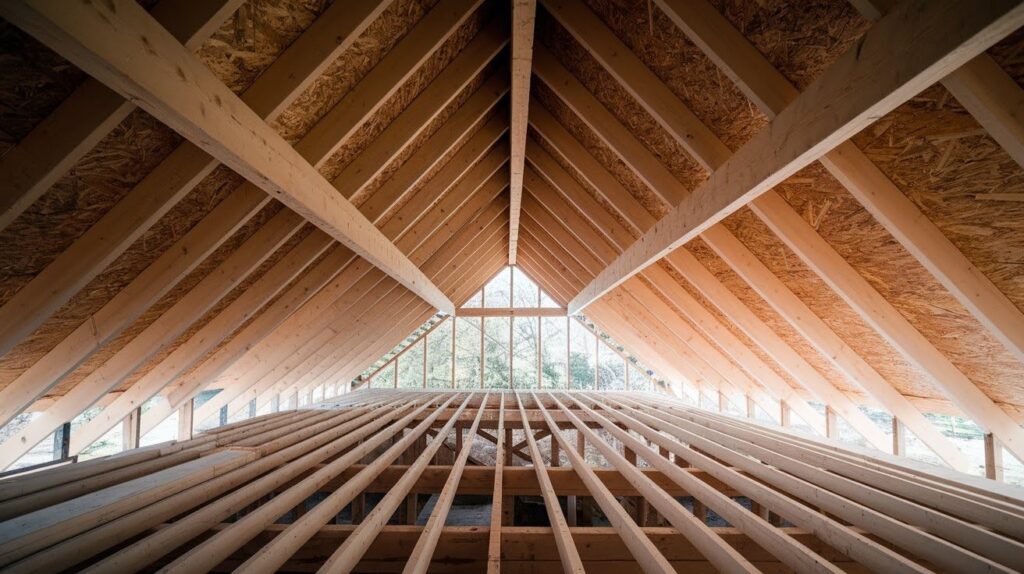
Add ceiling joists parallel to rafters if you want a flat ceiling surface. Consider vaulted or open-beam designs that expose rafters. Use collar ties connecting opposite rafters to prevent roof spreading if you skip ceiling joists.
Step 6: Installing Roof Decking
Apply plywood sheathing or skip sheathing over rafters. Leave small ventilation gaps if using metal roofing. Ensure decking is properly fastened with nails or screws at correct spacing.
Step 7: Adding Soffit and Fascia

Nail fascia boards vertically across rafter ends. Install soffit panels horizontally to enclose the eave space. Add decorative trim at corners or edges for finished appearance.
Porch Roof Finishing Touches

Complete your porch roof with ceiling treatments, appropriate roofing materials, and proper ventilation for lasting performance.
Ceiling Treatments
Ceiling options include beadboard for traditional style, tongue-and-groove planks for rustic appearance, or painted plywood for budget coverage.
Paint or stain protects wood from moisture and insects. Painting porch ceilings light blue was historically believed to deter insects.
Roof Covering
Choose roof covering that matches your house or contrasts for design interest. Metal roofs last 40 to 70 years with minimal maintenance. Asphalt shingles offer classic appearance with a 20 to 30 year lifespan.
Ventilation and Drainage
Ensure adequate slope for rainwater runoff, typically at least 1/4 inch drop per foot. Add ridge vents or soffit vents if the ceiling is enclosed. Proper ventilation prevents moisture buildup and rot.
Common Mistakes to Avoid
Prevent structural failures by avoiding ledger attachment errors, load path issues, undersized members, and code violations.
- Attaching Ledger to Brick Veneer: Attaching ledger boards to brick veneer instead of structural framing causes catastrophic failure. Brick veneer is decorative only and pulls away under roof loads, collapsing the entire structure.
- Ignoring Load Path: Ignoring the load path from roof to foundation creates weak points. Every roof load must transfer through properly sized members down to solid footings.
- Using Undersized Members: Using undersized beams or rafters leads to sagging, bouncing, or complete failure. Always follow span tables and engineering calculations for your specific loads.
- Neglecting Code Requirements: Neglecting local code requirements or wind load ratings results in structures that don’t meet safety standards. Building inspectors will require expensive corrections or complete rebuilds.
When to Consult a Structural Engineer
Consult a structural engineer when dealing with large spans exceeding standard lumber capabilities. Spans over 16 feet typically require engineered solutions and calculations.
Heavy roofing materials like slate or tile create much higher loads than asphalt shingles. Engineers size beams and connections appropriately for these increased weights.
Complex roof tie-ins to existing structures require analysis to prevent damage to your home. Improper connections can compromise both old and new framing.
Building in high-wind, heavy snow, or flood-prone areas demands engineering to meet local extreme load requirements. Standard construction methods may not provide adequate safety margins.
Conclusion
Over the years, I’ve framed a number of porch roofs, and every time, meticulous preparation separates success from frustration. You now comprehend the specifics of porch roof framing, from construction to completion.
Spend some time organizing your supplies, checking load routes, and adhering to regional codes. Your home is protected and you can enjoy the outdoors for many years with a well-framed porch roof.
If you have any questions, think about speaking with a structural engineer or skilled contractor. Saving a few bucks is not as important as building safely.
Do you have questions about porch roof framing? Post them in the comments section below!
Frequently Asked Questions
What size rafters do I need for a porch roof?
Rafter size depends on span, spacing, snow load, and roofing material. For typical 8-12 foot spans with 16-inch spacing, 2×6 rafters work in mild climates while 2×8 or 2×10 are required in heavy snow areas.
Can I attach a porch roof ledger to brick?
No, never attach ledger boards to brick veneer as it’s not structural and will fail under load. Attach through the brick into wall studs or rim joists using lag bolts or structural screws.
How much pitch does a porch roof need?
Minimum pitch is typically 1/4:12 for drainage, but 4:12 to 6:12 works best for most roofing materials. Steeper pitches shed water and snow better.
Do I need a building permit for a porch roof?
Most jurisdictions require building permits for porch roof additions as they’re structural modifications. Check with your local building department before starting to avoid code violations.
How far can a beam span without support?
Beam span depends on size, material, and load. A 4×8 beam might span 8 feet while a doubled 2×12 spans 10-12 feet. Consult span tables or an engineer.