
Ready to add 100 square feet of organized storage to your backyard?
You’re not alone. Thousands of homeowners choose the 10×10 shed as their first DIY building project every year.
Here’s why it works so well, the size is perfect. Not too big to feel overwhelming. Not too small to be useless. You’ll save hundreds compared to buying pre-built options. Plus, you get exactly what you want.
But here’s the best part, you can customize every detail. Paint colors. Door placement. Window options. It’s your shed, built your way.
This guide gives you everything needed to succeed. Free plans included. Complete material lists provided. Step-by-step instructions that actually make sense.
Let’s build something amazing together.
Why Choose a 10×10 Shed for Your Backyard?
A 10×10 shed hits the sweet spot for most homeowners. One hundred square feet provides substantial storage without occupying your entire backyard. You can easily fit lawn mowers, garden tools, bikes, and seasonal items.
Building your own saves hundreds compared to pre-built options. Most people spend $800-1500 on materials versus $3000-5000 for professional installation. Want double doors or extra windows? Your choice is complete.
The straightforward construction makes this ideal for first-time builders. Simple rectangular frame, basic roof, standard door installation. No complex angles required.
This space works for garden tools, bikes, outdoor furniture, or small workshops. Some convert them into craft rooms. The 10×10 size gives you options without breaking your budget.
Tools & Materials You’ll Need
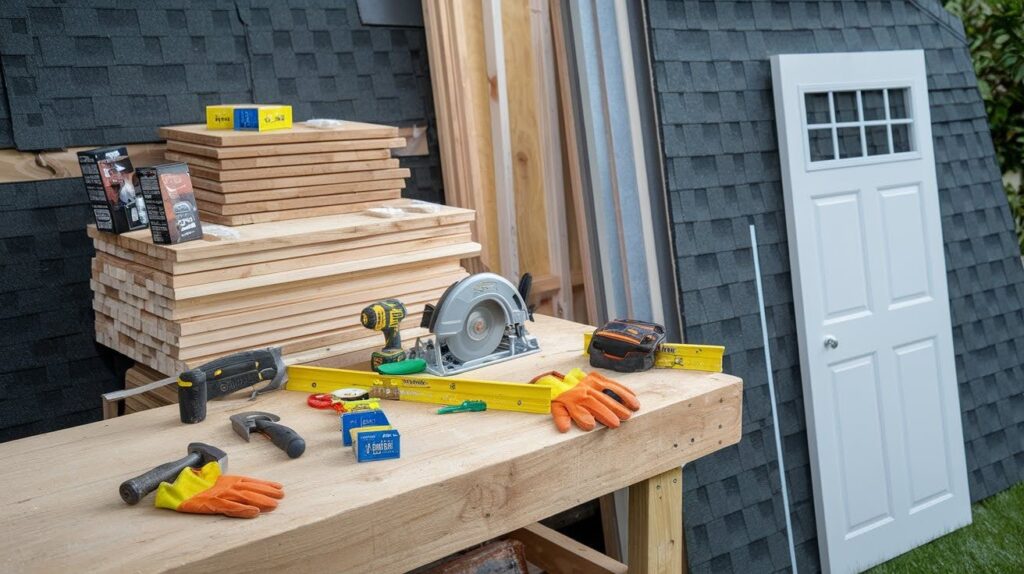
Grab a cup of coffee. Let’s talk about what you actually need to make this happen.
You probably own half these tools already:
- Hammer
- Drill with bits
- Circular saw
- Level
- Measuring tape
- Square
- Safety glasses
- Work gloves
A weekend warrior toolkit works perfectly fine. If you’re missing something, borrow from a neighbor or rent for the day.
Now for materials. Pressure-treated 2x4s for the frame. Plywood for walls and floor. Hit up your local lumber yard on weekdays. Prices drop when contractors aren’t competing with you.
Here’s the thing about roofing. Asphalt shingles are your friend. Cheap, reliable, easy to install.
Buy everything at once. Most places give bulk discounts. Screws beat nails every time. They hold better and don’t split wood.
Pre-hung doors save headaches. Trust me on this one.
Step-by-Step Guide to Building a 10×10 Shed
Time to get your hands dirty. Let’s break this down into bite-sized chunks that won’t overwhelm you.
Step 1: Preparing the Site
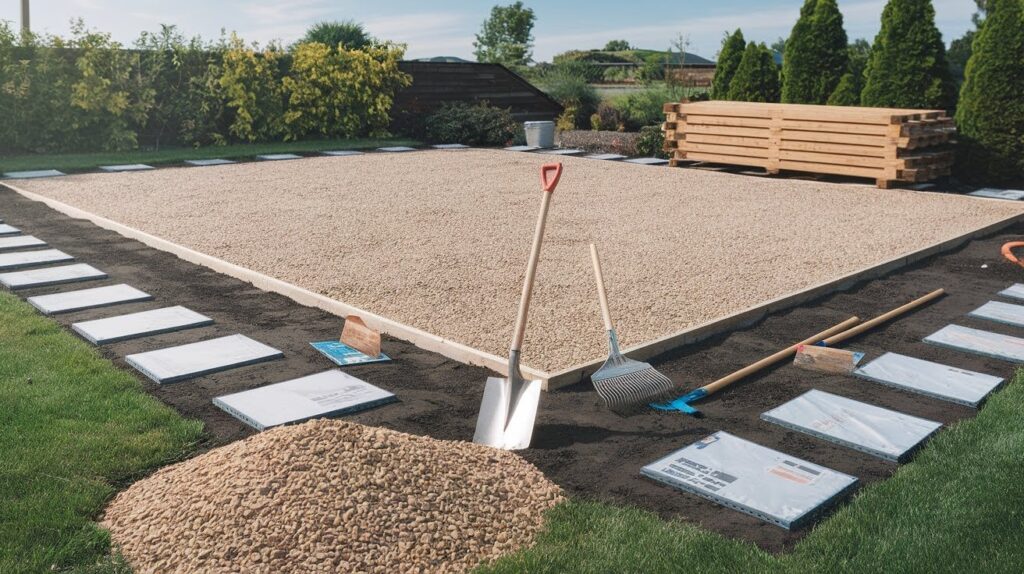
Finding the perfect spot matters more than you think. Look for level ground away from property lines. Check for underground utilities.
Call 811 before you dig. Level the ground properly. A gravel pad works great for most situations. Concrete lasts longer but costs more. Pressure-treated skids are the budget option.
Step 2: Building the Floor Frame
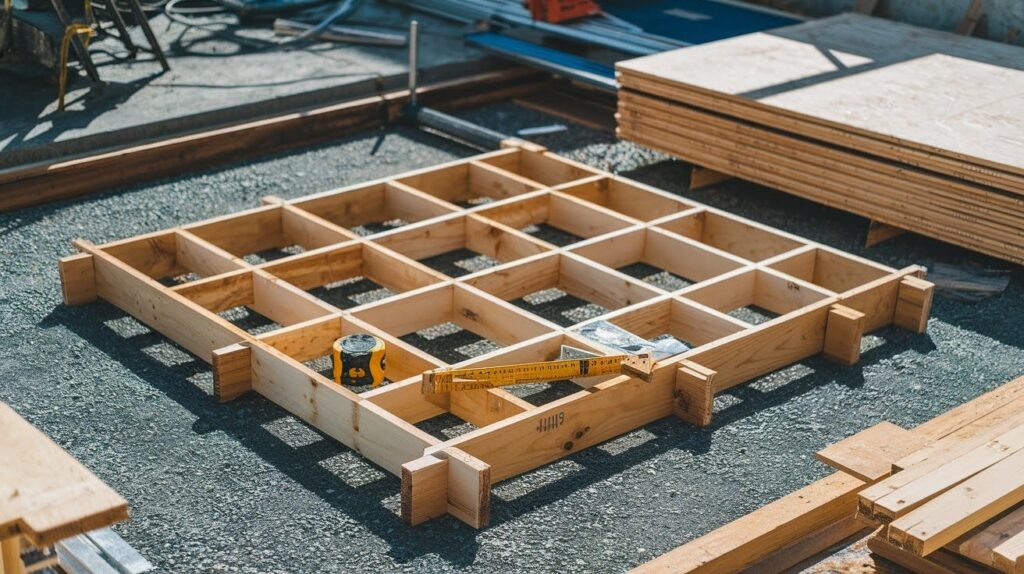
Cut your 2x4s to create a 10×10 rectangle. Add joists every 16 inches for proper support. Square it up with your measuring tape to avoid problems later.
Screw down plywood flooring securely. Make sure everything sits flat and level. This foundation determines how well your entire shed turns out.
Step 3: Constructing the Walls
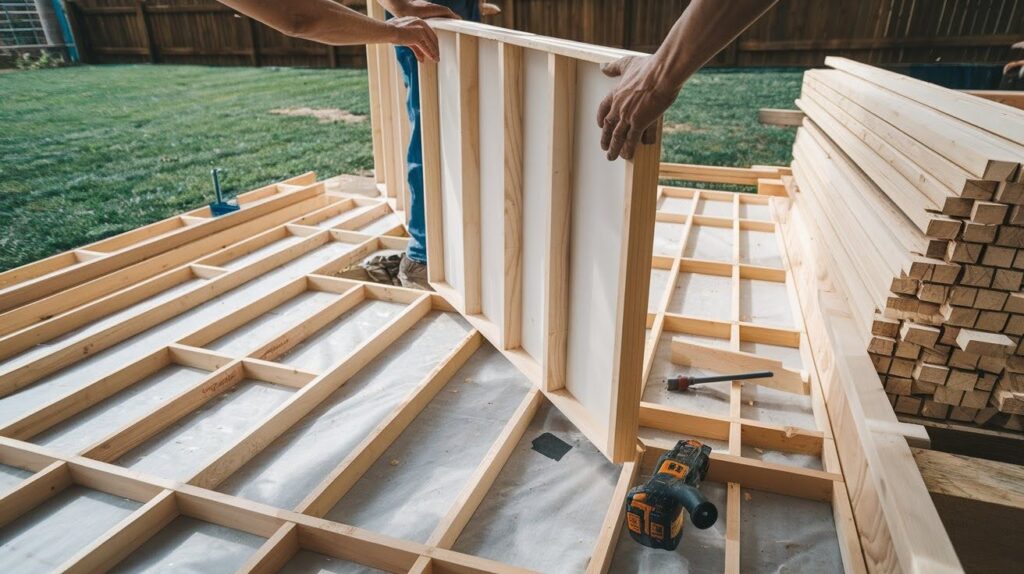
Measure twice, cut once. Build each wall flat on your new floor for easier assembly. Frame your door opening now because it’s simpler than doing it later.
Stand up one wall at a time with help from a friend. Connect walls at corners with screws for maximum strength.
Step 4: Installing the Roof
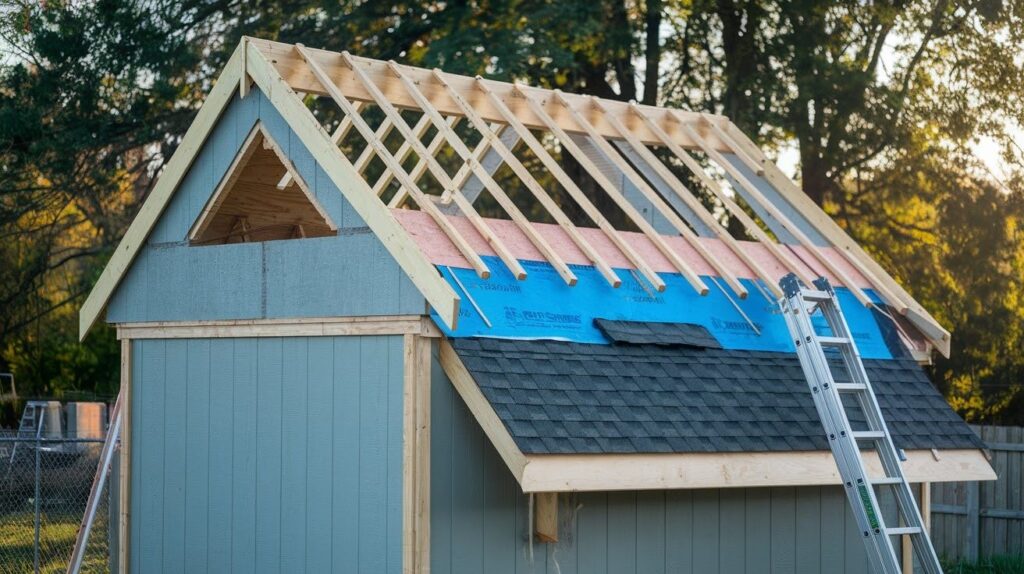
A simple gable roof works best for beginners. Cut your rafters at matching angles using a speed square. Attach sheathing first, then feel paper, then shingles in that order.
Take your time here because leaks cause serious problems. Weather delays are better than water damage inside your new shed.
Step 5: Adding Doors & Windows
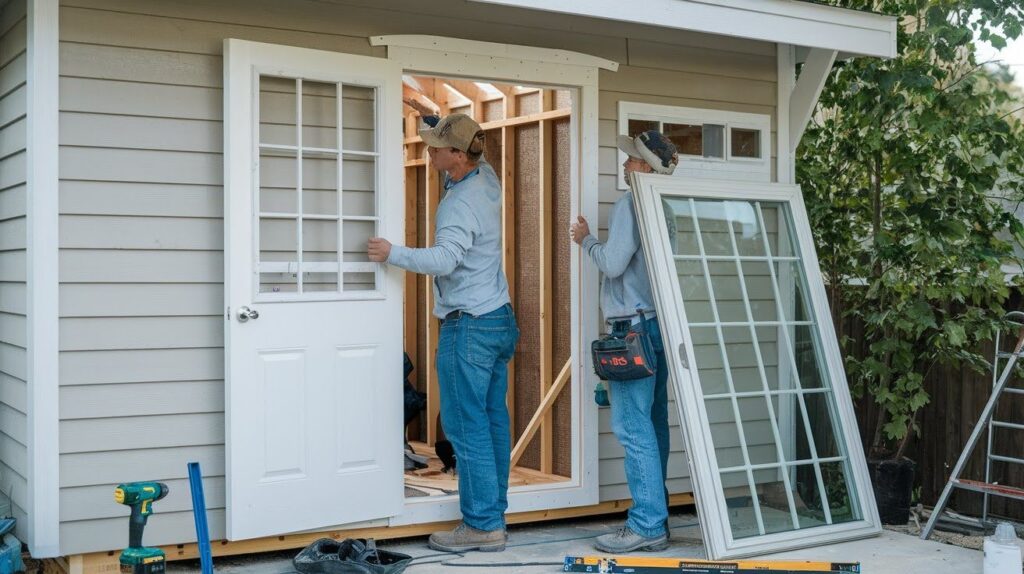
Pre-hung doors install faster than building from scratch and look more professional. Windows add natural light but aren’t required for basic storage needs.
Install door hardware after hanging. Check that everything opens and closes smoothly before moving to the next step. Adjust hinges if needed.
Step 6: Siding & Exterior Finishing
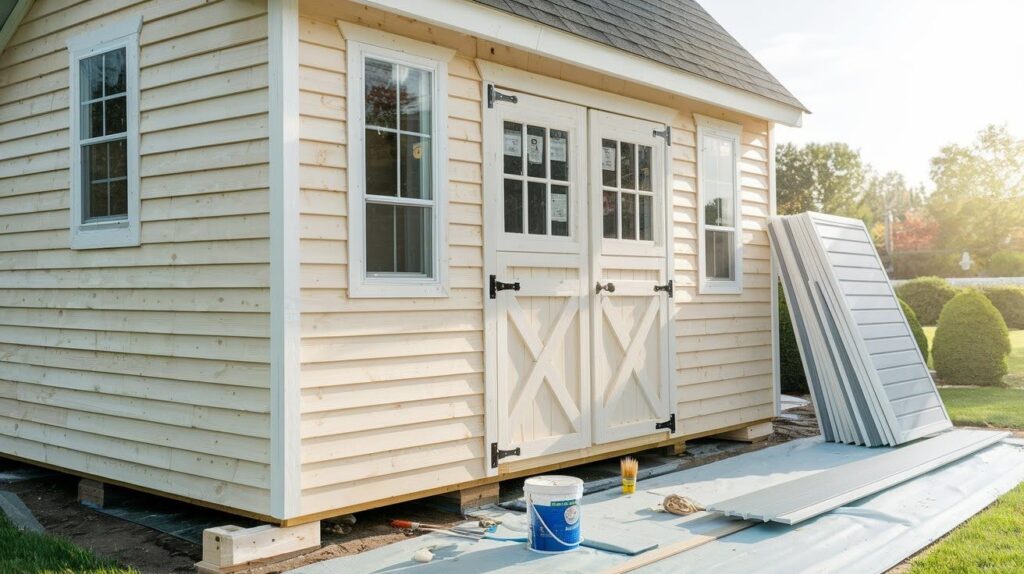
T1-11 plywood siding costs less and installs quickly with basic tools. Vinyl lasts longer but takes more time and patience.
Paint or stain everything for weather protection within 30 days. Two coats work better than one thick coat. Don’t skip primer on raw wood surfaces.
Step 7: Interior Organization (Optional)
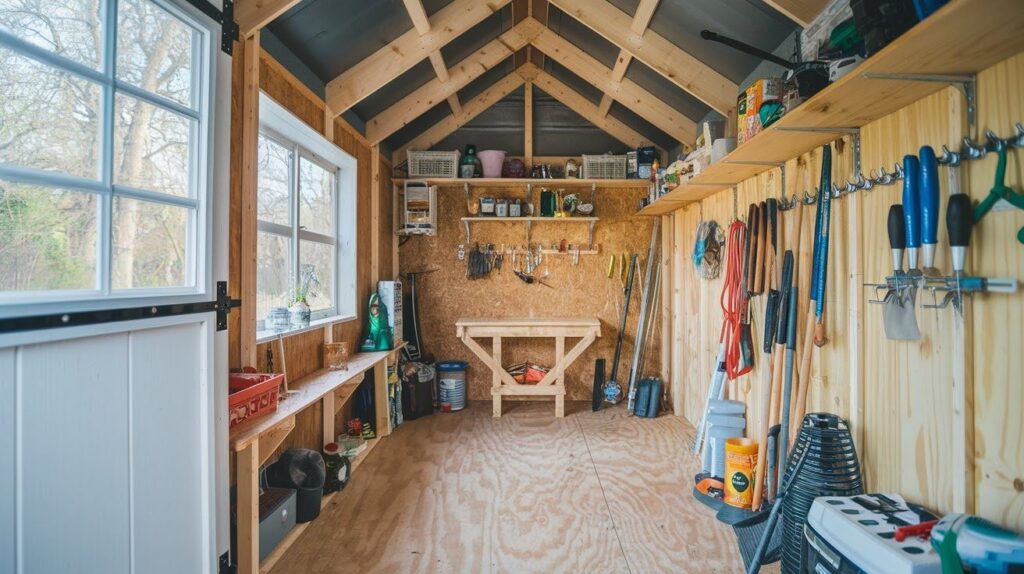
Add shelves where you need them most for your specific storage requirements. Install hooks for tools and equipment.
Build a simple workbench if space allows, and you need workspace. Plan your layout before installing anything permanent. Leave room to move around comfortably inside.
Done right, this project takes two weekends.
DIY Shed Building Tips for Success
These tips are sure-shot for success:
- Wear safety glasses every time you pick up a tool
- Keep your workspace clean and free of scraps
- Never rush when using power tools
- Take breaks when you feel tired
- Use sharp blades – they work better and are actually safer
Shop lumber yards instead of big box stores for better prices. Buy materials during off-season months when demand drops.
Check for damaged pieces you can use for shorter cuts. Many stores discount slightly warped boards that work fine for shed construction.
Here’s what trips up most beginners:
- Don’t skip the building permit if your area requires one
- Measure your foundation twice before cutting anything
- Square your corners properly or nothing else will fit right
- Pre-drill holes near board ends to prevent splitting
- Check the weather forecast before starting roofing work
Most problems happen when people rush the planning phase.
Conclusion
You’ve got this.
Building your own 10×10 shed isn’t just about saving money. Though you’ll keep hundreds in your pocket compared to buying pre-built. It’s about that feeling when you step back and see something you created with your own hands.
Every cut, every screw, every board tells your story.
Your friends will ask who built it. You’ll smile and say “I did.” That moment makes all the weekend work worth it.
Ready to start?
Our free plans include everything you need. Material lists, cut diagrams, step-by-step instructions that actually make sense. No confusing blueprints or missing details.
Your backyard storage problem ends this weekend. Start building your 10×10 shed today with our free step-by-step guide and plans.
Frequently Asked Questions
How long does it take to build a 10×10 shed?
Most people finish in two weekends with basic DIY skills. Weather delays might add extra time, so plan accordingly.
Do I need a building permit for a 10×10 shed?
Check with your local building department first. Many areas allow sheds under 120 square feet without permits.
What’s the best foundation option for my shed?
Gravel pads work well for most situations and cost less. Concrete lasts longer but requires more work and money.
Can I build this shed alone, or do I need help?
You can handle most steps solo, but get help for wall raising. Two people make roof work much safer too.
How much will materials cost for a 10×10 shed?
Expect to spend $800-1200, depending on your material choices. Shopping smart at lumber yards saves significant money.