
A violent storm just passed, and now you’re staring at a brown water stain on your ceiling. You didn’t expect your durable metal roof to let water in. But strong winds, falling branches, and flying debris can damage panels, seams, and fasteners. Even a small puncture or shifted flashing can create an entry point for rainwater.
Roof leaks can lead to damaged insulation, stained walls, and expensive repairs. Moisture trapped inside can encourage mold growth and weaken roof supports. The longer the leak stays unrepaired, the worse the damage becomes. Ignoring it may also reduce your home’s energy efficiency and resale value.
This article explains how to find and fix a leak in your metal roof after a storm. It provides safe, simple steps to take action before the next rain causes further damage.
Identifying the Leak Source
the first step to metal roof leak repair is checking your ceiling and attic for fresh water stains or wet spots. These marks help locate the general area of the leak. Use a flashlight to examine insulation and rafters closely. Wet insulation may drip slowly, so move it aside and look underneath.
Follow the water trail backward to find where it enters. Be patient, as water often travels along beams before dripping. Look for dark streaks or mold patches. Focus on areas directly under roof seams, fasteners, vents, and flashing.
Check each possible entry point thoroughly. Fasteners may have come loose. Flashing around skylights or chimneys may have shifted. Seams could be pulled apart or bent. If the roof is steep or wet, stay off it completely.
Inspect from the ground or attic using binoculars or a camera with zoom. This helps avoid slips and falls. While you can conduct the inspection yourself, engaging a metal roofing Madison company would be recommended for a thorough scrutiny of the leak sources, especially if the damage is extensive.
Cleaning and Preparing the Damaged Area
Clear all debris from the damaged section before starting any repair. Remove sticks, leaves, and dirt that may hide or block the leak. Use a soft brush or cloth to avoid scratching the surface more.
Dry the area using a clean towel or cloth. If moisture remains, repair materials may not stick properly. Wait until the metal surface feels dry to the touch before continuing.
Lightly sand the area around the leak. This roughens the surface, helping adhesives and sealants bond better. Wipe away dust with a dry rag once sanding is complete.
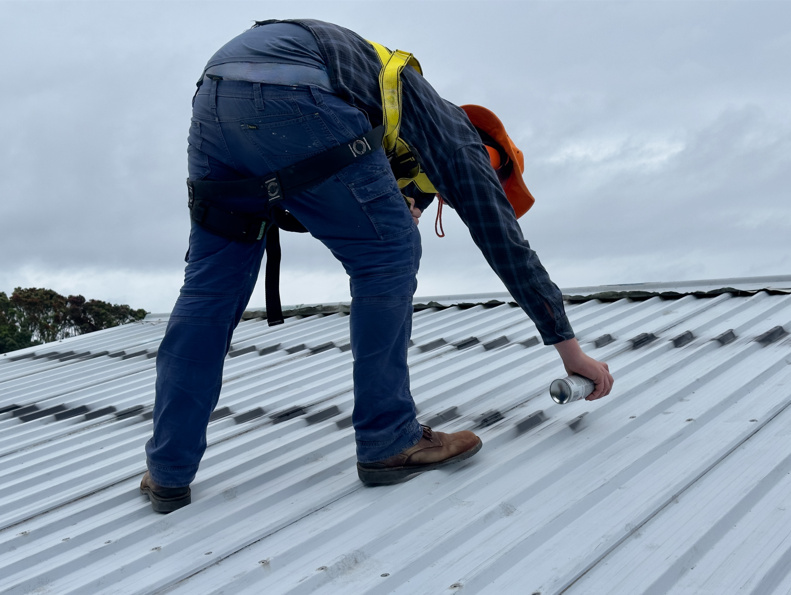
Always wear protective gear during this step. Use gloves to avoid cuts, safety glasses to block debris, and sturdy shoes for traction. If working on the roof, secure a harness or wear slip-resistant footwear.
Sealing Small Holes and Cracks
For minor leaks, use metal roof sealant or polyurethane caulk. These products work well on hairline cracks and small holes. Choose one made for outdoor use and metal surfaces.
Load the sealant into a caulking gun. Apply steady pressure as you fill the gap. Spread the material evenly using a putty knife. Make sure the sealant overlaps the edges of the hole.
Allow the product to cure based on the manufacturer’s instructions. Most sealants require dry weather for proper bonding. Do not disturb the area until it’s fully dry.
After curing, inspect the repair closely. Look for air bubbles, cracks, or missed spots. If needed, apply a second coat. A good seal prevents further water entry and helps extend your roof’s life.
Replacing Loose or Missing Fasteners
Inspect the entire metal roof for loose, rusted, or missing screws. Focus on seams and panel edges, where wind pressure is usually higher. Use a screwdriver or drill to test for movement.
Replace damaged fasteners with the same type and size. Rubber-washer screws work best because they form a watertight seal. Avoid using mismatched hardware, which can weaken the roof structure.
Tighten the metal roofing screws until snug but not overly tight. Overtightening may bend the panels or strip the screw hole. Both issues can lead to new leaks.
Once the new screws are in place, apply roofing caulk around their heads. This seals gaps between the washer and panel. A complete seal keeps water from entering through fastener holes during future storms.
Repairing Damaged Flashing and Seams
Check the flashing along chimneys, skylights, vents, and roof ridges. These areas often leak after storms due to wind shifts or impact damage. Look for rust, bending, or gaps between the flashing and roof surface.
Use pliers to remove damaged or loose flashing pieces. Work slowly to avoid tearing the surrounding metal. If nails are present, use a claw hammer to pull them out carefully.
Cut and shape new flashing to fit the exposed area. Secure it with roofing nails, then apply roof sealant along all edges. Ensure full contact with the roof surface for a tight seal.
If new flashing isn’t on hand, apply waterproof roofing tape as a temporary fix. Press it down firmly across seams or cracks to block water entry until permanent repairs can be made. Don’t hesitate to engage a professional roofing contractor for repairs beyond your ability.
Applying a Metal Roof Patch for Larger Holes
Cut a metal patch using the same material as your roof. Make sure it’s at least two inches larger than the hole on every side. This overlap helps ensure a strong, watertight seal.
File down sharp edges and remove burrs from the patch. Clean both the patch and the area around the hole with a dry cloth. A clean surface improves bonding and reduces the risk of corrosion.
Apply a thick layer of roofing sealant around the damaged area. Set the patch on top, pressing it firmly into place. Make sure it lies flat without lifting at the edges.
Secure the patch with roofing screws spaced evenly around the perimeter. Apply more sealant over each screw head and along the edges. Let the area dry fully before testing for leaks.
Testing and Monitoring the Repair
After completing repairs, test the area using a garden hose. Spray water slowly over the patched sections, starting from the bottom and moving upward. This method helps simulate rainfall without flooding the surface.
Go inside and inspect the attic or ceiling as water runs over each section. Watch for new drips or damp spots forming. Bring a flashlight to see into corners and dark areas.
If leaks appear, mark the exact location for further repair. Turn off the water and let the area dry completely before applying more sealant or replacing materials.
During the next actual rainfall, check the repaired sections again. Continued monitoring ensures that the fix holds under real conditions. Ongoing checks also help catch new issues before they worsen.
Conclusion
Unattended leaks can lead to structural damage, ruined insulation, and higher repair bills. Mold may grow silently in hidden spaces, while stress builds with each storm alert. Timely metal roof repair prevents those problems and protects your home’s value and comfort.
Start by inspecting your entire roof for signs of damage. Create a simple checklist for each storm season. Include debris removal, fastener checks, and flashing inspection. This routine helps you stay prepared and reduces emergency repairs.
Apply a metal roof coating system once a year to seal microcracks. It creates a protective layer that blocks moisture, reflects heat, and extends your roof’s lifespan. Coating on a regular basis also improves your home’s energy performance, saving money in the long run.