Tile has a way of transforming a room. A new floor or wall instantly looks cleaner, brighter, and more stylish. But here’s the truth: the beauty of tile isn’t just about the design you choose. It’s about how well it’s installed. Even the most stunning tile can end up looking uneven or popping loose if the process is rushed or done carelessly.
The best part is you don’t need years of experience to achieve professional results. By following the right steps and using the right tools, you can create a surface that’s both beautiful and built to last. These eight secrets will show you how to get it right.
1. Start With a Solid Subfloor
Every tile job begins with what’s underneath. If the base isn’t stable, the tiles won’t stay intact. A weak or uneven subfloor creates stress points, and tiles will eventually crack.
Before you lay the first piece, focus on thorough surface preparation. Remove dust, grease, or old adhesives. Patch holes and sand down bumps. For wood floors, make sure they don’t flex under weight. If they do, add a backer board for stability. For concrete, test for moisture and apply a moisture vapor control sealer if needed.
Think of leveling the floor as laying the groundwork for lasting strength. Do it well, and your tiles will stand firm. Skip this step, and problems are almost guaranteed.
2. Pick the Right Tile for the Space
Not every tile works everywhere. If you don’t match the tile to the conditions of the room, it won’t last. The easiest way to choose is by starting with the space, then selecting the material that performs best.
- Bathroom floors and walls: Use ceramic or porcelain tiles. Both are water-resistant and easy to clean. Porcelain is denser and ideal for high-moisture zones like showers, while ceramic offers great value and style options.
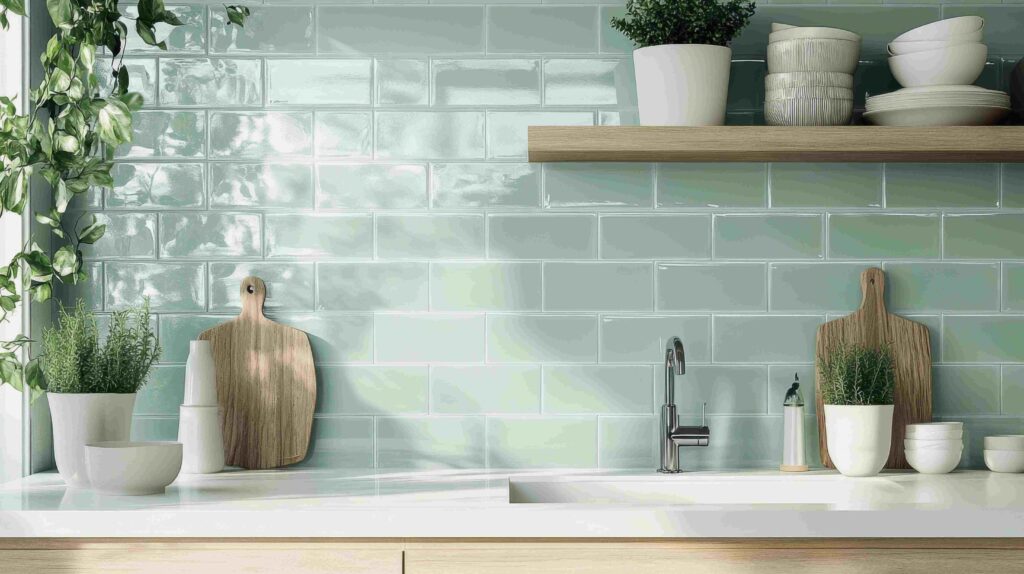
- Kitchen backsplashes: Choose ceramic or natural stone. Ceramic is low-maintenance and affordable, while stone adds elegance. Just be sure to seal it properly.
- Living rooms, hallways, entryways: Opt for ceramic or porcelain. These materials handle foot traffic well and come in a wide range of styles.
- Outdoor patios or wet zones: Go with porcelain or sealed natural stone. Porcelain handles temperature changes and moisture better than ceramic.
Always check slip resistance ratings for floor tiles, especially in wet areas. Matte or textured finishes are safer than glossy ones.
3. Use High-Quality Adhesives and Grout
Tiles rely on the right bonding and finishing products to stay secure. It’s easy to confuse mortar, adhesive, and grout, but each serves a different purpose.
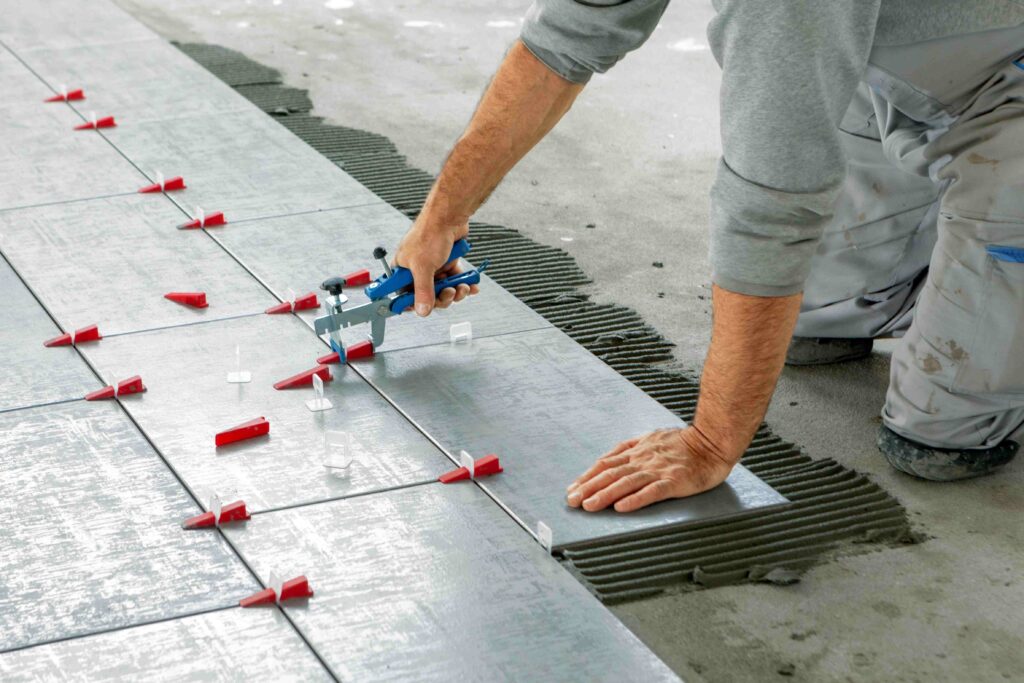
- Thinset mortar: This is a cement-based mixture applied in a thin layer to hold tiles firmly to the subfloor or wall. It’s the most common product for floor tile installation because it’s strong and long-lasting. Large or heavy tiles need modified thinset mortar, which has added polymers for extra grip and flexibility.
- Tile adhesive: These premixed products are often easier to use but are best suited for small wall tiles in dry areas. For dependable results, always choose a top quality tile adhesive that matches the job. In bathrooms or kitchens, a waterproof adhesive gives added protection.
- Grout: Grout isn’t an adhesive. Its job is to fill the joints between tiles, locking them in place and keeping out moisture and dirt. Apply it with a grout float, then seal it with a grout sealer to extend its life and keep the surface looking fresh.
When you understand the role of each product, it’s easier to pick the right ones. Cutting corners here often leads to cracked joints, loose tiles, and costly repairs.
4. Plan Your Layout Before You Start
Rushing into installation without a plan often leads to uneven lines or awkward tile cuts at the edges. Take the time to map out the tile layout before you spread adhesive. To do this, dry-fit a few rows to see how the pattern flows and how the tiles align with the room’s features.
In many cases, starting from the center of the room or a focal point like a fireplace or main wall helps create balance and symmetry. However, always check where the cut tiles will end up. If they look too narrow or fall in highly visible areas, adjust the layout before committing.
Using a laser level ensures straight lines and consistent spacing throughout the installation. Careful planning saves materials and ensures a finish that looks intentional and well-crafted.
5. Mind the Spacing
Spacing affects both the look and the lifespan of your tiles. If tiles are jammed together, there’s no room for expansion, and that pressure eventually leads to cracks.
Use tile spacers to keep gaps even and consistent. Small joints create a modern, streamlined look, while wider ones work well in rustic or traditional designs.
Remember, grout lines are part of the design as much as the tiles themselves. They frame each tile, add rhythm to the surface, and can even highlight a geometric pattern.
6. Cut Tiles With Care
Poorly cut tiles ruin the finish of a project. Jagged edges stand out, and small chips invite moisture damage. That’s why using the right tools is non-negotiable.
- Snap cutter: Works well for clean, straight cuts on ceramic and some porcelain tiles.
- Tile saws: Handle thicker porcelain or stone with precision and speed.
- Carbide-tipped tile cutter: Useful for tougher materials where extra accuracy is needed.
- Rubber mallet: Lets you gently tap tiles into place without cracking them.
Always practice on a scrap tile before cutting the real piece. It saves frustration and prevents wasted material.
7. Don’t Rush the Setting Time
Patience is part of the process. Adhesives and grout need time to cure properly. Walking on tiles too soon shifts them out of place, even if it’s only by a fraction of an inch.
Check the manufacturer’s instructions for drying times. Standard thin-set mortar often needs 24 hours, while fast-setting versions can be ready in a few hours. Grout usually requires at least a day before sealing.
It’s tempting to move ahead quickly, but rushing creates problems that aren’t easy to fix. Give the materials time to do their job, and the tiles will reward you with strength and stability.
8. Seal and Maintain Properly
The project isn’t over when the tiles are in place. Regular maintenance ensures they stay as stunning and strong as the day they were installed.
Seal grout to block moisture and stains, and don’t forget that some natural stone tiles also need sealing. For cleaning, skip harsh chemicals that strip finishes. A pH-neutral cleaner and a quick wipe after spills prevent discoloration and buildup. Regular sweeping reduces grit that could scratch the surface, especially on floors.
Even with good care, accidents happen. By learning basic tile replacement techniques, you can swap out damaged tiles without redoing the entire floor.
Small habits like sealing, gentle cleaning, and timely repairs extend the life of your tiles.
Final Thoughts
Great tile work is built on preparation and patience. With the right choices and careful execution, every detail adds up to a surface that looks polished.
Follow these eight secrets, and you’ll have a tile installation that looks professional and built to last. The effort you put in will pay off with beauty you’ll enjoy for years.


