
Home renovation can feel overwhelming. I’ve seen countless homeowners start projects with excitement, only to face unexpected costs, delays, and stress halfway through. The difference between a successful renovation and a nightmare? Proper planning.
You don’t need to be a construction expert to renovate your home successfully. What you need is a clear roadmap. This guide breaks down every essential step, from setting your initial goals to adding those final touches.
By following this checklist, you’ll avoid common mistakes that cost time and money. You’ll know exactly what to do and when to do it. Most importantly, you’ll feel confident throughout the entire process.
Ready to convert your space without the chaos? Let’s start with step one.
Step-by-Step Home Renovation Checklist
A comprehensive planning guide that breaks down home renovation into manageable steps, helping you stay organized, on budget, and stress-free throughout your remodeling project.
Step 1 – Define Your Renovation Goals

Before you pick up a hammer or call a contractor, ask yourself why you’re renovating. Are you planning to sell your home in the next few years? Do you need more space for a growing family? Maybe you simply want to update outdated finishes.
Your “why” shapes every decision you’ll make.
Start by writing down your main objectives. Be specific. Instead of “make the kitchen better,” write “create more counter space and storage for family meals.” This clarity prevents scope creep later.
Next, separate your needs from your wants. Needs are non-negotiable items that solve problems or add safety. Wants are nice-to-have features that enhance comfort or style.
Create a vision board or collect inspiration photos. This helps contractors understand your style and keeps you focused when making decisions. Save these images to your phone or print them out.
Remember, clear goals from the start save money and prevent regret later.
Step 2 – Set a Realistic Budget

Money talk isn’t fun, but it’s crucial. Most renovation projects cost 20% more than initially planned. I’ve learned this the hard way, and you can avoid the same mistake.
Start by researching average costs for your type of project. Check online resources, visit showrooms, and get preliminary quotes.
Write down everything:
- Materials and supplies
- Labor costs
- Permits and inspections
- Temporary living expenses
- Storage or moving costs
Add a contingency buffer of at least 20% to your total. Unexpected issues always arise once you open walls or remove flooring.
Use budgeting apps or simple spreadsheets to track expenses. Update your budget weekly during the project. This keeps you aware of spending and helps you make informed decisions when changes arise.
Don’t forget to factor in financing costs if you’re taking out a loan. Shop around for the best rates before you start.
Step 3 – Research and Hire Professionals

Deciding what to DIY versus what to hire out can make or break your project. I recommend hiring professionals for electrical, plumbing, structural work, and anything requiring permits.
You can handle painting, basic demos, and simple installations yourself. Be honest about your skill level and available time.
When hiring contractors, get at least three written estimates. Don’t automatically choose the lowest bid.
Look for contractors who:
- Are licensed and insured
- Provide detailed written estimates
- Have recent local references
- Communicate clearly and promptly
- Offer reasonable timelines
Ask for references and call them. Drive by recent projects if possible. Check online reviews, but remember that one bad review doesn’t tell the whole story.
Always get contracts in writing. Include timeline, materials, labor costs, and change order procedures. Never pay large amounts upfront. A reputable contractor won’t ask for more than 10% down.
Step 4 – Get Required Permits and Approvals

Skipping permits might seem like a shortcut, but it can cost you thousands later. Unpermitted work can delay home sales, void insurance claims, and create safety issues.
Contact your local building department to understand requirements.
Generally, you’ll need permits for:
- Structural changes (removing walls, adding rooms)
- Electrical work (new circuits, panels)
- Plumbing modifications (moving fixtures, new lines)
- HVAC installations or major changes
- Windows and door replacements
Permit applications typically require detailed plans and may take 2-4 weeks for approval. Some projects need multiple permits, so start this process early.
Your contractor can often handle permit applications, but you’re ultimately responsible. Make sure permits are pulled before work begins.
Schedule required inspections in advance. Missing inspection appointments can delay your entire project.
Step 5 – Plan the Timeline
A realistic timeline prevents stress and keeps your project on track. Break your renovation into logical phases and sequence them properly.
Typical renovation order:
- Demolition and structural work
- Rough electrical, plumbing, and HVAC
- Insulation and drywall
- Flooring installation
- Painting and trim work
- Cabinet and fixture installation
- Final electrical and plumbing connections
Consider material lead times. Custom cabinets might take 8-12 weeks. Specialty tile or fixtures could take even longer. Order long-lead items first.
Factor in contractor availability. Good contractors are busy, especially during peak season. Book your team well in advance.
Build buffer time into your schedule. Plan for weather delays, permit issues, and unexpected problems. A kitchen renovation might take 6-8 weeks, but smart homeowners plan for 10-12 weeks.
Step 6 – Prepare Your Home

Proper preparation protects your belongings and makes the job easier for workers. Start by clearing the work area completely. Pack and store everything safely.
Set up temporary living spaces if needed. For kitchen renovations, create a simple meal prep area with a microwave, coffee maker, and mini-fridge. For bathroom work, arrange alternative facilities.
Protect adjacent areas with plastic sheeting and tape. Cover furniture, floors, and air vents to minimize dust spread.
Establish clear boundaries with workers. Decide which areas are off-limits and communicate this clearly. Provide access to a bathroom and water source.
If your project is extensive, inform neighbors about potential noise, parking changes, and construction schedules. A little courtesy goes a long way toward maintaining good relationships.
Move vehicles to allow space for contractor trucks and dumpsters. Arrange for temporary parking if needed.
Step 7 – Start with Demolition
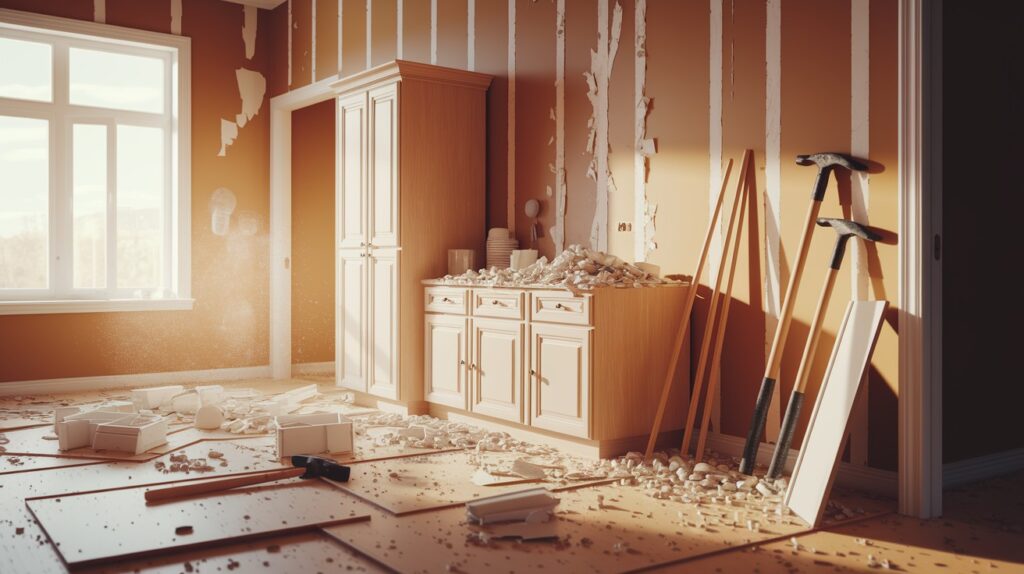
Demo day feels exciting, but approach it carefully. Safety comes first, always.
Before any demo work:
- Turn off utilities to the work area
- Check for asbestos or lead
- Rent proper equipment and safety gear
- Arrange for debris disposal
Start with non-structural elements like cabinets, fixtures, and flooring. Save structural demo for last and always verify what’s load-bearing before removing walls.
Rent a dumpster sized appropriately for your project. A 20-yard container handles most kitchen or bathroom renovations. Schedule a pickup before it overflows.
Donate usable items to local charities. Many organizations accept cabinets, appliances, and fixtures in good condition. You might even get a tax deduction.
Document everything with photos before the demo begins. This helps with reinstallation and serves as a reference for future repairs.
Step 8 – Structural and System Updates
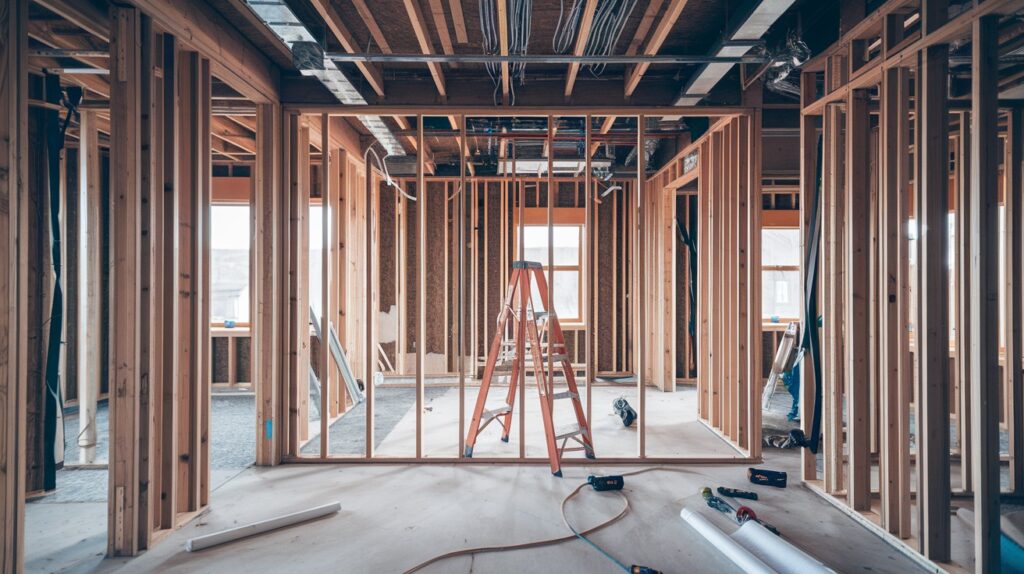
This phase involves the “guts” of your renovation. It’s not glamorous, but it’s critical for long-term success.
Electrical work comes first. Update panels, run new circuits, and install rough wiring. Modern homes need more outlets and circuits than older homes typically have.
Plumbing follows electrical. Move supply lines, install new drain connections, and test everything thoroughly. Address any pressure or flow issues now.
HVAC modifications happen next. Extend ductwork for new spaces or upgrade systems for improved efficiency.
Framing comes after utilities. Add structural support, frame new walls, or modify existing structures. This work requires permits and inspections.
Insulation and drywall finish this phase. Proper insulation improves energy efficiency and comfort. Quality drywall work creates smooth surfaces for finish materials.
Schedule inspections as required. Don’t cover any work until it passes inspection.
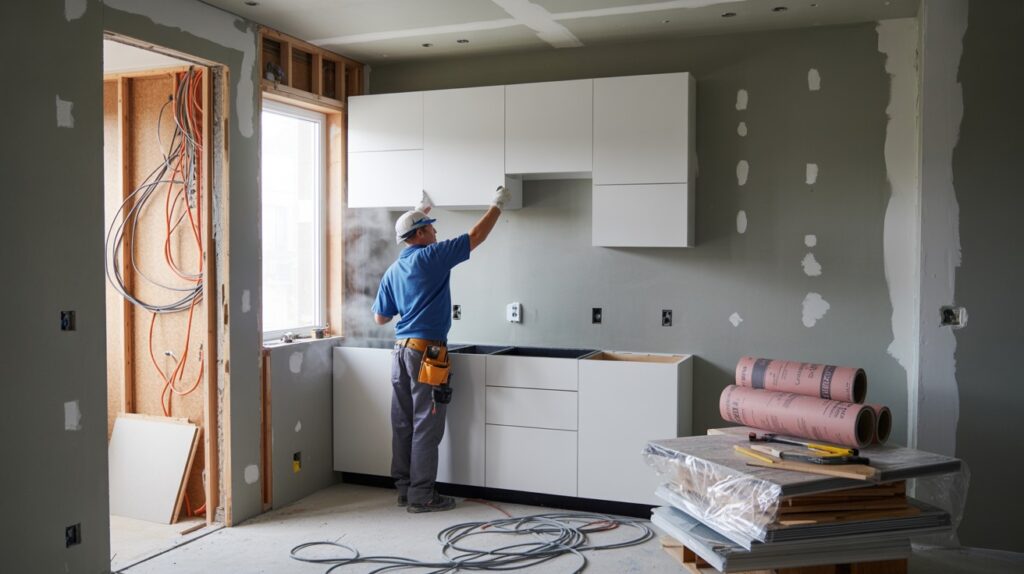
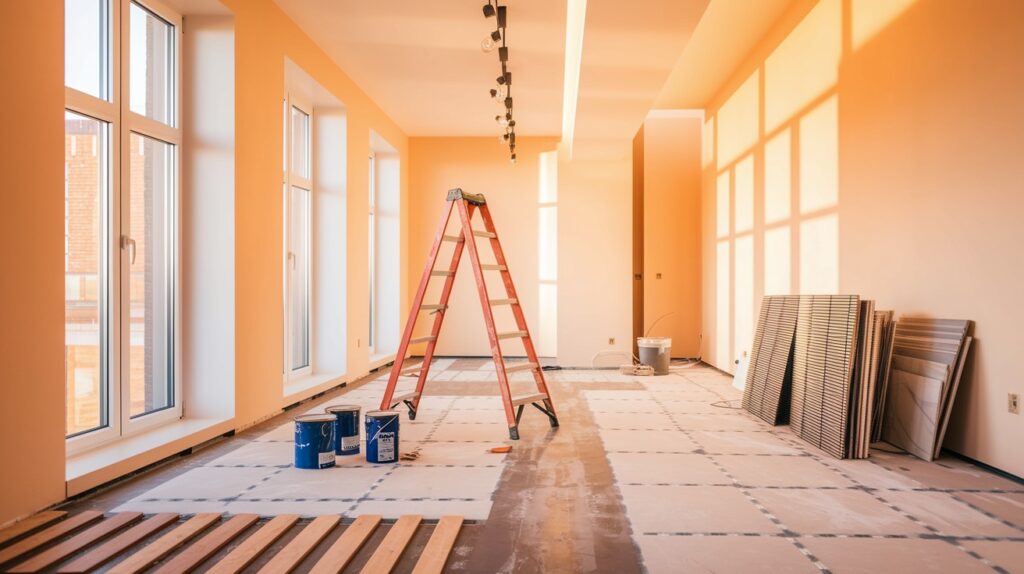
Step 9 – Interior Finishes

Now the fun begins. This phase transforms raw spaces into livable rooms.
Install flooring first (except for carpet). Hardwood, tile, and laminate go in before other finishes to avoid damage during installation.
Cabinets and built-ins come next. Professional installation ensures proper fit and function. Allow extra time for any custom modifications needed.
Countertops follow cabinet installation. Template and fabrication can take 1-2 weeks for stone surfaces.
Paint walls and ceilings before installing trim and fixtures. Use high-quality paint and primer for better coverage and durability.
Install light fixtures, switches, and outlet covers. Connect plumbing fixtures and test everything thoroughly.
Do a detailed walk-through at this stage. Create a punch list of any items needing attention before completion.
Step 10 – Final Touches and Cleanup
You’re almost done. This final phase brings everything together.
Professional cleanup removes construction dust and debris. Don’t skip this step – renovation dust gets into everything and affects air quality.
Complete final inspections and get approval certificates. These documents prove that work was done on to code.
Install final fixtures like towel bars, cabinet hardware, and switch plates. Add any remaining trim work or touch-up painting.
Move furniture and belongings back carefully. Clean items before bringing them into newly renovated spaces.
Test all systems thoroughly. Run water, check electrical outlets, test heating and cooling, and operate all new appliances.
Create a maintenance file with warranties, instruction manuals, and contractor contact information. Take final photos for your records.
Address any remaining punch list items promptly while contractors are still available.
Conclusion
Following this step-by-step checklist transforms overwhelming renovation projects into manageable processes. You now have a roadmap that prevents costly mistakes and reduces stress.
Remember, flexibility is key. Unexpected issues will arise, but good planning helps you handle them calmly. Stay patient with the process and communicate openly with your team.
Most importantly, trust the planning phase. Time spent preparing saves money and headaches later. A successful renovation starts with a solid plan, a realistic budget, and a clear timeline.
Your dream space is within reach. Take it one step at a time, follow this checklist, and enjoy the process. Soon you’ll be living in the home you’ve always wanted.
Frequently Asked Questions
How long does a full home renovation usually take?
Most full home renovations take 4-8 months, depending on size and complexity. Kitchen and bathroom projects typically need 6-12 weeks each. Weather delays and permit approvals can extend timelines, so always build extra time into your schedule.
Can I live in my house during renovation?
Yes, for minor projects. Major renovations affecting kitchens, bathrooms, or structural work may require temporary relocation for safety and convenience. Consider staying with family or renting temporary housing for extensive structural work.
How do I avoid going over budget?
Get detailed written estimates, add a 20% contingency buffer, track expenses weekly, and avoid major changes once work begins to stay on budget. Always compare multiple contractor bids and research material costs before making final decisions.
Do I need a permit for every type of renovation?
No. Cosmetic updates like painting don’t need permits. Structural, electrical, plumbing, and HVAC work typically requires permits and inspections. Contact your local building department early to understand specific requirements for your project.
What’s the most important step in a renovation project?
Planning is crucial. Proper planning prevents delays, cost overruns, and mistakes. Spend time defining goals, setting budgets, and creating detailed timelines. Rushing into work without solid plans almost always leads to problems and additional expenses.