
Building a small boulder wall doesn’t have to feel overwhelming. I’ve built one in my own yard, and I know the questions you’re asking right now.
This guide walks you through planning, foundation work, stacking techniques, drainage, and safety.
You’ll learn how to measure your site, choose the right stones, create a stable base, and avoid costly mistakes.
I’m sharing what actually works based on real experience. By the end, you’ll have a solid retaining wall that lasts for decades.
What Is a Small Boulder Wall?
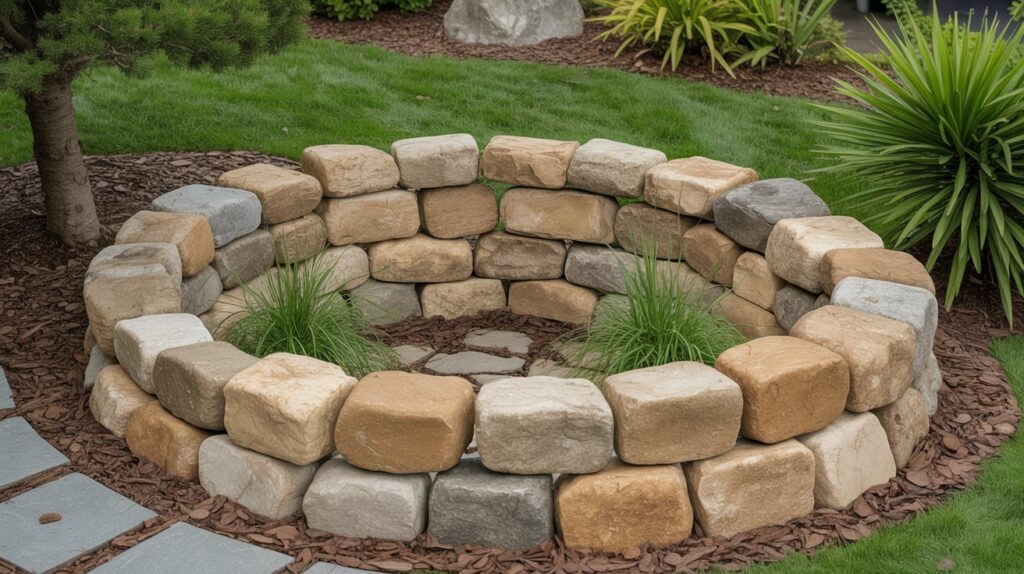
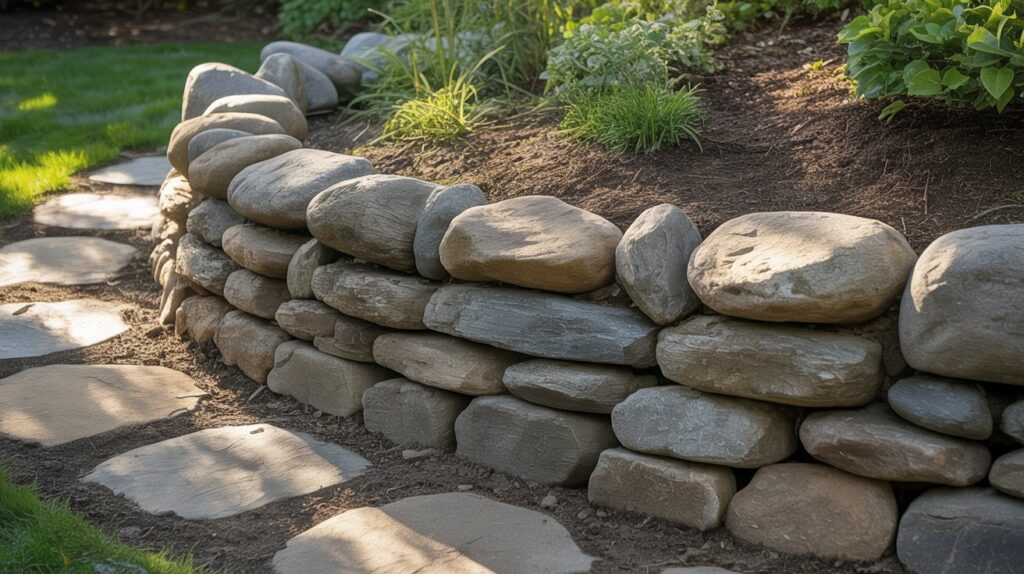
A small boulder wall uses naturally shaped stones to hold back soil and create level areas in your yard. These walls typically stand one to three feet tall and work well for residential projects.
Small stackable boulders usually measure 8 to 18 inches across and weigh between 50 and 100 pounds. They come in natural materials like granite, sandstone, limestone, or fieldstone. Most have at least one flat side that helps with stability.
Small boulders work perfectly for garden retaining walls, terracing slopes, raised flower beds, and vegetable gardens.
They make excellent borders along driveways or pathways and are ideal for preventing soil erosion on hillsides. Just avoid using them for tall structural walls or heavy load-bearing projects.
Planning Your Small Boulder Retaining Wall
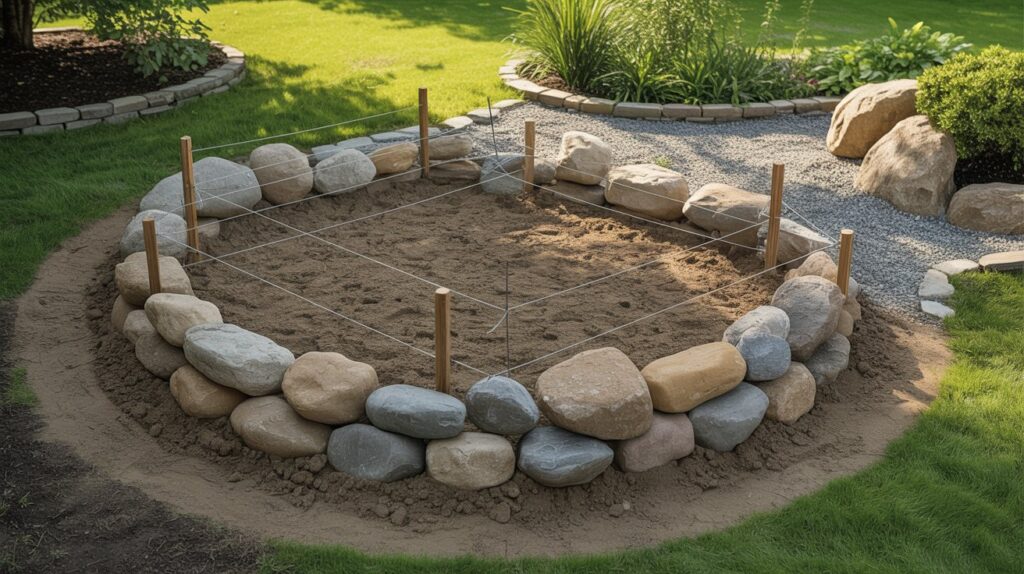
Good planning saves time, money, and frustration later. Walk your site and note the slope, soil type, and drainage patterns. Use a measuring tape and stakes to mark your wall’s path. Measure the length and height to determine how many boulders you need.
One ton of small boulders covers roughly 25 to 35 square feet of wall face. For a wall three feet high and ten feet long, you need about one to two tons. Heavier stones go on the bottom for stability. Flat or square-sided pieces are easier to stack than round ones.
Boulder colors depend on the stone type. Gray granite gives a cool, modern look. Buff sandstone adds warmth. Tan limestone creates a softer appearance. Visit a stone yard to see colors in person before ordering.
Preparing the Foundation
A solid foundation keeps your wall stable for decades. Without proper prep, the wall can shift, lean, or collapse. Start by removing grass, roots, and debris from the wall line.Clear all vegetation from a three-foot-wide strip where your wall will sit.
Use spray paint or stakes with string to mark the exact wall location. Remove topsoil down to firm subsoil for better stability.
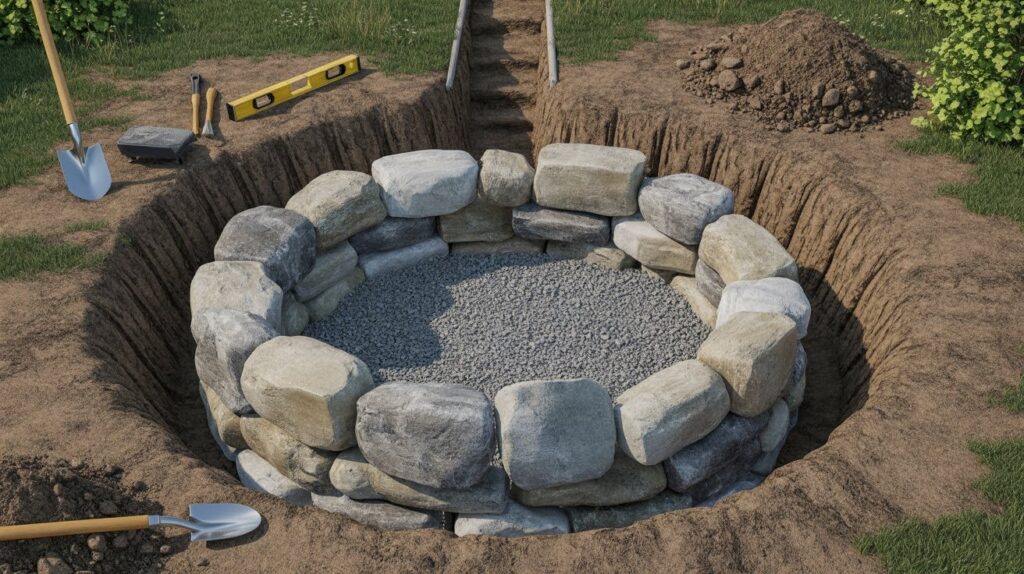
Dig a trench along your marked line that’s 6 to 12 inches deep. The depth depends on wall height and soil conditions. Make the trench about 6 inches wider than your largest boulders. Keep the bottom as level as possible. Compact the soil at the bottom using a hand tamper or plate compactor.
Fill the trench with 4 to 6 inches of crushed gravel or three-quarter-inch stone. Spread the gravel evenly and compact it firmly with a tamper. The compacted gravel should be rock-solid when you walk on it.
How to Build a Safe Small Boulder Wall
Building safely means following proven techniques that create long-lasting structures. Each boulder placement matters for overall stability. Work methodically from the base up. Use your strongest, flattest stones for the foundation course.
Laying the First Course: The Most Important Step
The first course determines everything that comes after. Choose your largest, flattest boulders for this layer. Place them directly on the compacted gravel base. Set each stone with the flattest side down.
A slight backward tilt into the slope is fine and actually helps stability. Walk on each stone to test it. If it rocks, adjust it.
Stacking Boulders for Maximum Stability
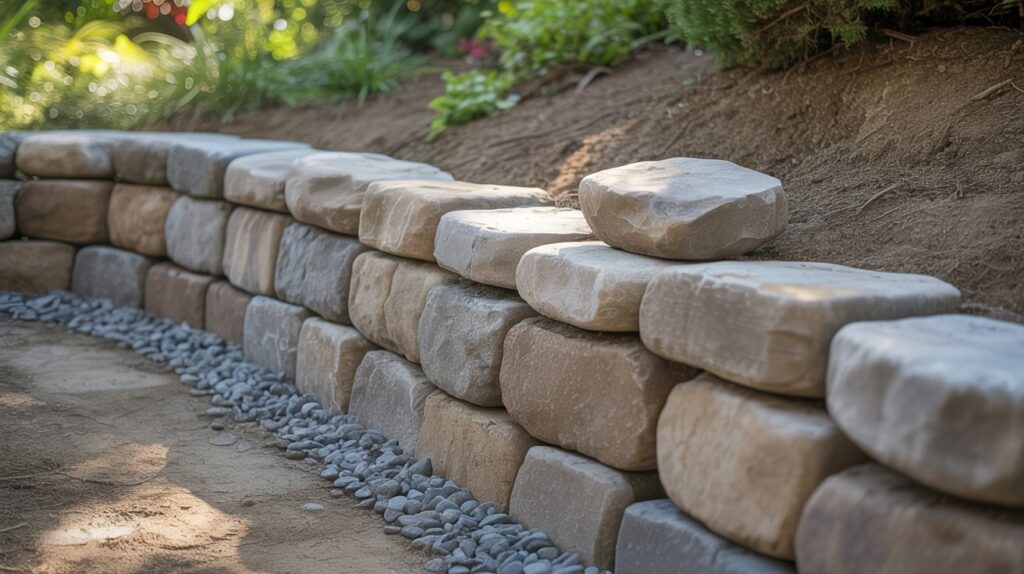
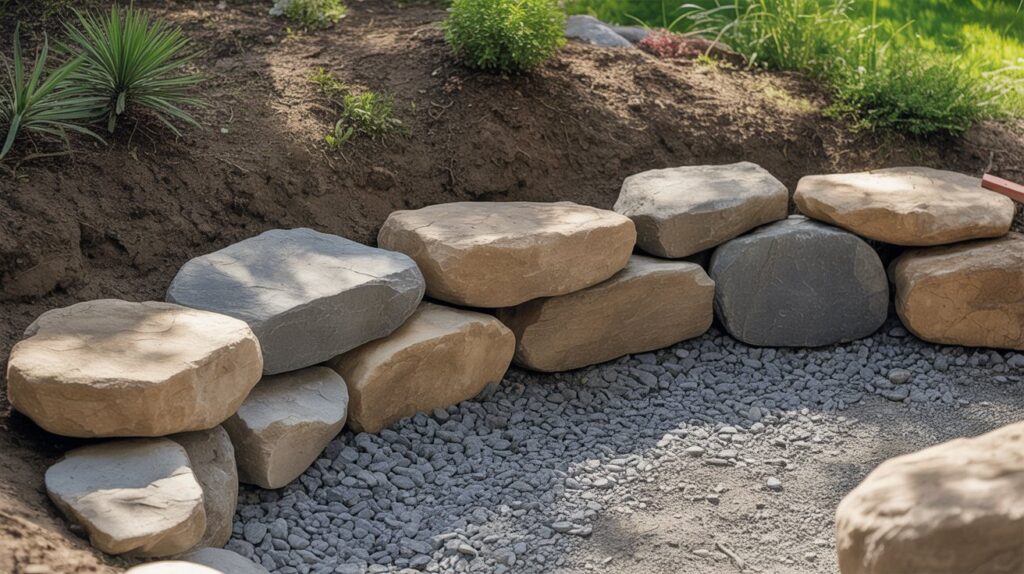
Stack your second course so each stone bridges the joint between two stones below. This overlap pattern, called “breaking the joints,” adds strength. Never stack stones directly on top of each other with aligned seams.
Push each boulder back slightly toward the hillside for better support. Add gravel behind and between stones as you go.
Creating Natural Overlap for Structural Strength
Natural overlap means each upper stone rests on multiple lower stones. This distributes weight across the wall instead of creating pressure points. Look for stones that span at least six inches across a joint below.
The best walls have stones reaching 12 to 18 inches back into the hillside. Place at least one long tie stone every four to six feet of wall length.
Drainage & Backfilling
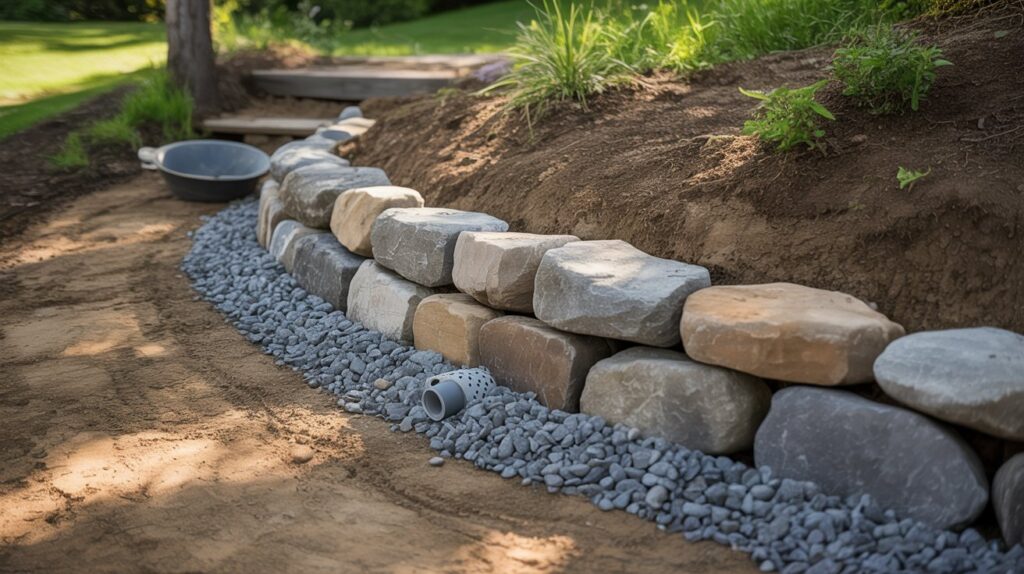
Water is your wall’s biggest enemy. Trapped moisture creates pressure that pushes walls outward and causes failure. Proper drainage lets water flow through and away from the structure. Never backfill with dirt alone since it holds water like a sponge.
Water behind a retaining wall creates hydrostatic pressure that can be enormous. When soil stays saturated, it becomes heavy and pushes against your wall. Freezing water expands and creates even more force. Most wall failures happen because of poor drainage, not poor construction.
As you build each course, backfill behind the stones with clean gravel. Use three-quarter-inch crushed stone or pea gravel. Fill the space between the boulders and the hillside 12 to 18 inches deep. Top the final gravel layer with soil only in the planting zone.
Safety Tips When Working With Small Boulders
Working with heavy stones requires smart lifting and proper protection. Even 50-pound rocks can cause serious injuries if handled carelessly. Take your time and listen to your body. Work with a partner whenever possible for heavy lifts.
- Always bend at your knees, not your waist, when lifting boulders and keep the stone close to your body as you stand up
- Engage your leg muscles and core, not your back, and test the weight before committing to a full lift
- If a stone feels too heavy, get help or use a dolly instead of risking injury
- Wear steel-toed boots to protect your feet from dropped stones and heavy-duty work gloves to prevent cuts and blisters
- Use safety glasses to shield your eyes from rock chips and dust, and keep a first aid kit nearby for minor cuts
Common Mistakes to Avoid
Learning from others’ mistakes saves you headaches and money. These errors are easy to make but hard to fix after the wall is built. Most problems come from rushing or skipping steps.
- Starting on uneven or soft ground guarantees future problems since your wall will settle unevenly and create gaps
- You can’t fix a bad base by adjusting stones higher up, so always invest time creating a level, stable foundation
- Throwing stones together randomly creates weak spots where stones only touch at small points and can shift easily
- Each stone should nestle against its neighbors with good contact, so test different positions before settling on placement
- Backfilling with dirt instead of gravel is the number one cause of wall failure since dirt holds water and creates massive pressure
When to Hire a Professional
Some boulder wall projects require expertise beyond typical DIY skills. Knowing your limits prevents dangerous situations and wasted money. Professionals have equipment, experience, and insurance for challenging jobs.
Walls taller than three feet create serious safety concerns if built incorrectly. Most building codes require permits and engineering for walls this tall. The foundation needs to be much deeper and more substantial. Keep your DIY projects under three feet for safety.
Slopes steeper than 45 degrees need professional assessment. The soil may be unstable or prone to sliding. If your wall will support a driveway, patio, or building foundation, get expert help. If you have any doubts about handling your project safely, consult a contractor.
Conclusion
Building my own small boulder wall taught me that patience really does pay off. I remember standing back after placing that first course and feeling genuinely excited about what was taking shape.
You’ve got everything you need now to create something that lasts. Start with a solid foundation, stack with care, and never skip drainage. Your wall will serve your yard for decades.
I’d love to hear how your project turns out. Drop a comment below or check out our other landscaping guides for more hands-on ideas.
Frequently Asked Questions
How deep should the trench be for a small boulder retaining wall?
Dig your trench 6 to 12 inches deep based on wall height. Add 4 to 6 inches of compacted gravel at the bottom for drainage and a stable foundation.
Can I build a boulder wall without using any mortar?
Yes, small boulder walls under three feet don’t need mortar. The stones hold together through gravity and proper stacking. Mortar can trap water and cause issues.
How much does it cost to build a DIY boulder retaining wall?
Materials cost $15 to $25 per square foot. A 3-foot by 10-foot wall runs about $450 to $750. Professional installation costs $40 to $100 per square foot.
What’s the maximum height I can build without a professional?
Keep DIY walls under three feet. Taller walls need engineering and permits. Check your local building codes for specific height restrictions.
How do I prevent my boulder wall from leaning forward over time?
Set each course with a slight backward lean. Use gravel backfill for drainage. Stack stones so each upper stone rests on two lower ones.