
Ready to stop wrestling with a wobbly shed door that won’t close properly?
You’re not alone. Most homeowners face this exact problem within two years of building their shed.
Here’s the thing. Your shed door isn’t just about keeping things inside. It protects your tools from rain, snow, and curious raccoons. A solid door makes the difference between a shed that lasts 20 years and one that falls apart in five.
You have three main options: single doors for smaller sheds, double doors for wide openings, or roll-up doors for maximum space.
Should you build from scratch or buy pre-hung?
That depends on your skill level and budget. We’ll cover both paths so you can make the right choice for your situation.
Planning Your Shed Door Project
Stop right there.
Before you grab your saw, let’s talk about strategy. Poor planning ruins more shed door projects than bad weather ever will.
Single doors work great for sheds under 8 feet wide.
Double doors? Perfect for riding mowers and large equipment. Roll-up doors save space but cost more. Sandwich construction adds insulation if you live somewhere cold.
Here’s what most people get wrong.
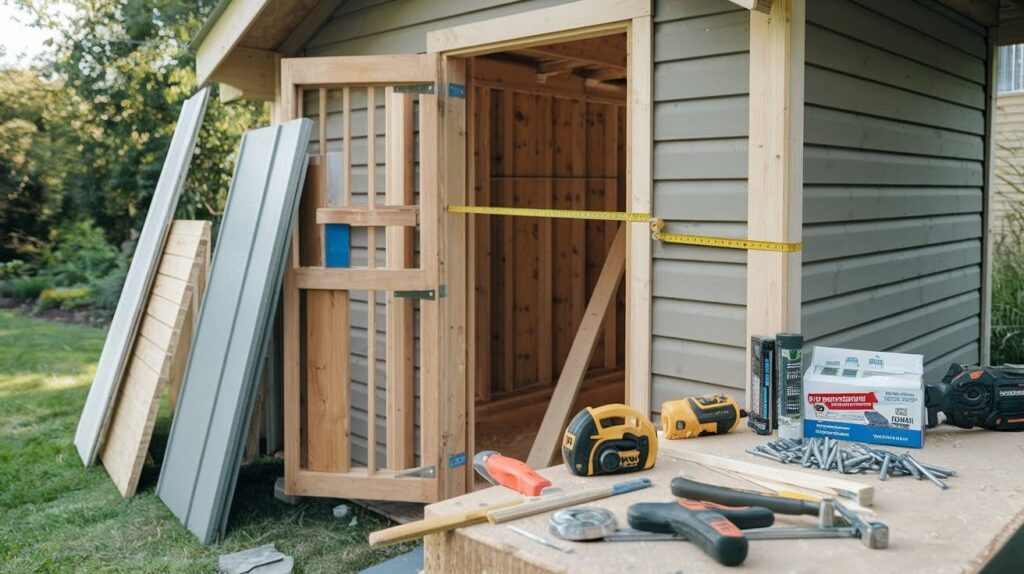
They skip the measuring step. Get your tape measure out. Write down the exact width and height of your opening. Add 1/4 inch gap on all sides for proper swing. Don’t guess. Guessing leads to gaps that let rain inside.
Now for your shopping list.
You’ll need pressure-treated lumber for the frame. Siding panels to match your shed. Heavy-duty hinges rated for outdoor use. A sturdy handle with a lock. Galvanized screws that won’t rust.
Missing even one item means another trip to the store. Smart builders gather everything first. Then they build.
Step-by-Step Guide: How to Build Shed Doors
Time to get your hands dirty.
Most people think building shed doors is rocket science. It’s not. Follow these six steps and you’ll have doors that actually work.
Step 1: Start With Your Door Frame
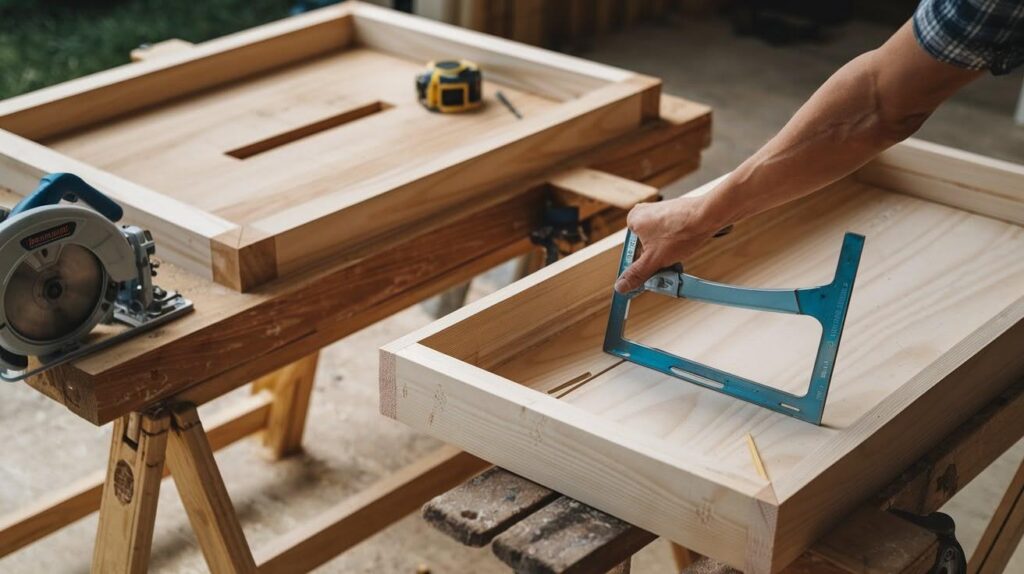
Cut your studs, rails, and headers to the exact measurements you wrote down earlier. Use pressure-treated lumber for the frame. Single doors need a simple rectangle. Double doors require a center post for stability.
Check everything with a square. Crooked frames mean doors that won’t close properly. Trust me on this one.
Step 2: Add Your Back Panel Next
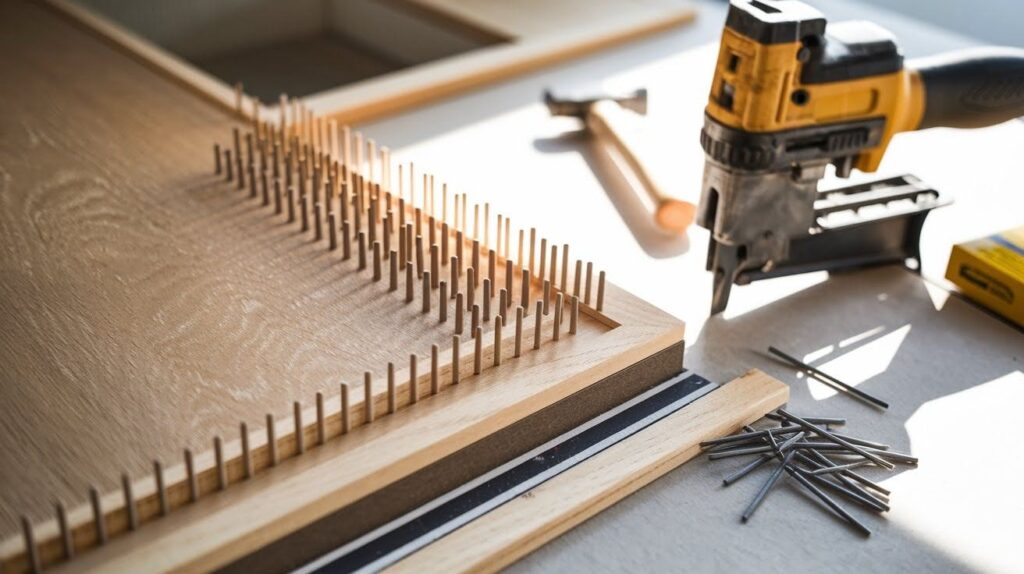
T1-11 siding works great here. So does plywood or OSB. Nail it to your frame every 8 inches along the edges. Every 12 inches in the field areas.
Leave small reveal gaps around the edges. This prevents the siding from buckling when it expands.
Step 3: Now Build Your Door Panels

Cut your door pieces from matching siding panels. Make them 1/4 inch smaller than your opening on all sides. This gives you room to swing without scraping.
Add Z-frame bracing or use the sandwich method. Z-frame costs less. Sandwich construction looks cleaner. Both prevent warping if done right.
Step 4: Time For Trim and Support
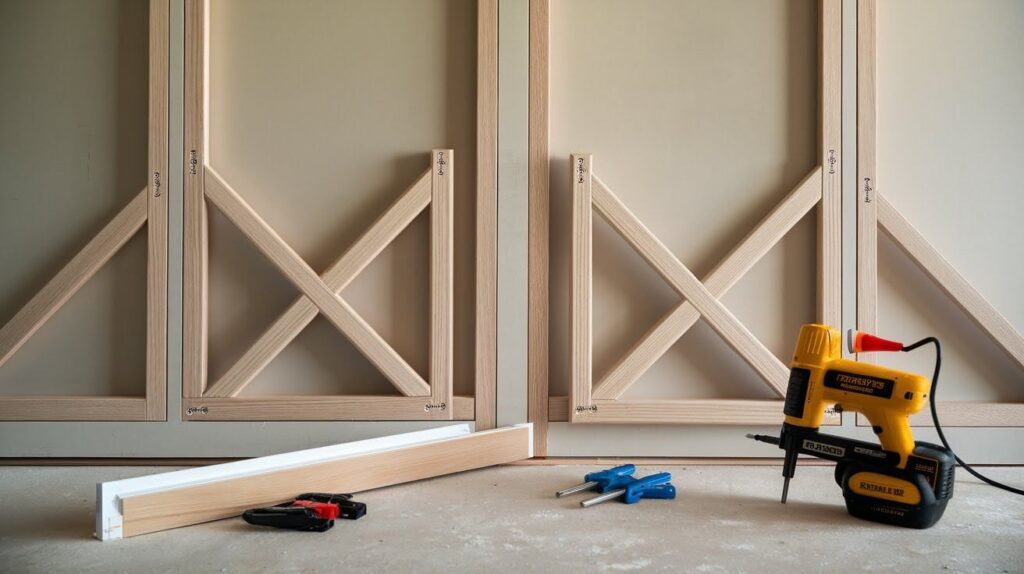
Add trim around your door edges. This covers any rough cuts and looks professional. Install diagonal braces from corner to corner. They stop your doors from sagging over time.
Step 5: Hanging Day Has Arrived
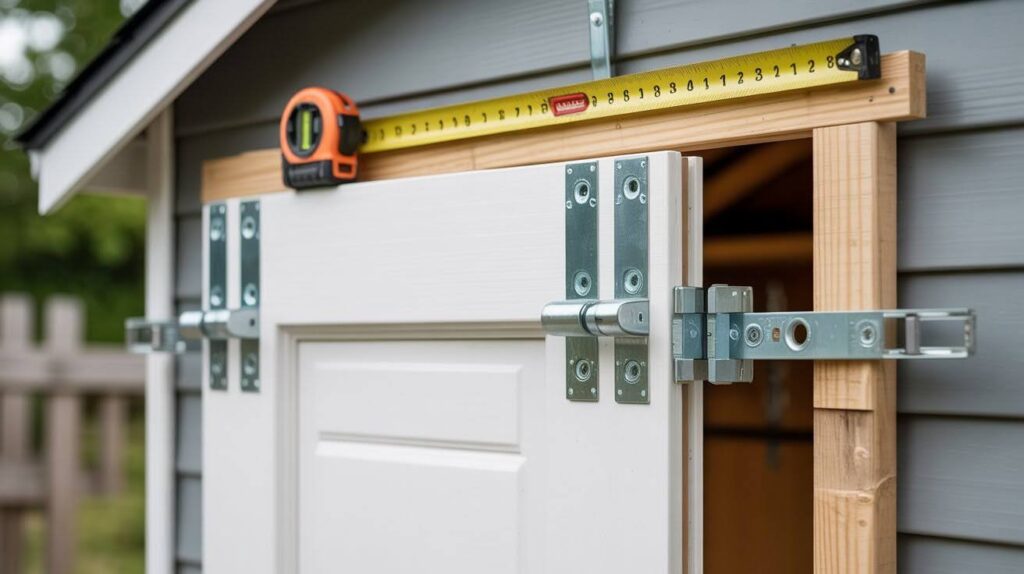
Mark your hinge locations carefully. Top hinge goes 7 inches from the top. Bottom hinge sits 11 inches from the bottom. Add a middle hinge on doors over 6 feet tall.
Set your reveal gaps before tightening everything down. Heavy doors need three people. Don’t be a hero.
Step 6: Final Hardware and Protection
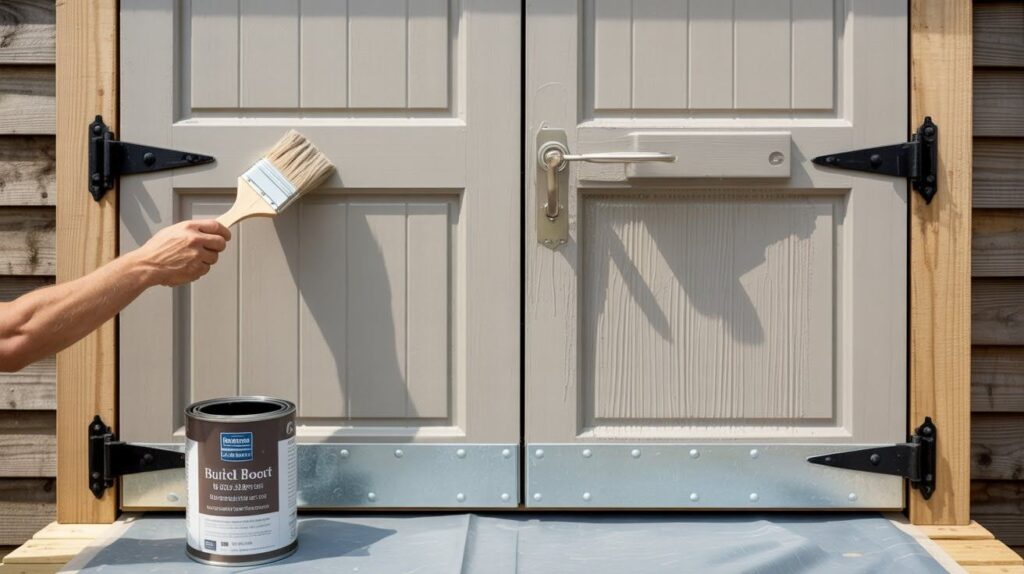
Pick hardware that matches your shed style. Barrel bolts work great for double doors. Add a metal threshold to keep water out.
Apply paint or sealer within 48 hours of installation. Raw wood soaks up moisture like a sponge.
Your shed doors are ready to work.
Types of Shed Doors You Can Build
Pick the wrong style and you’ll regret it every time you open that door. Here’s how to choose the right one for your situation.
Single Shed Doors: Perfect for openings up to 3 feet wide. Simple, lightweight, and cheap to build. Great for small sheds but won’t fit large equipment.
Double Shed Doors: Best for 4-6 foot openings. Swing wide for riding mowers and bulk storage. Need center post support and more hinges.
Roll-Up Shed Doors: Roll up overhead, saving swing space. Cost three times more and require special framing that most basic sheds can’t handle.
Sandwich-Style Shed Doors: Heavy-duty design with siding, frame, and interior panel. Last decades but weigh more and need three people to hang properly.
Shed Door Building Tips
Here’s what separates pros from weekend warriors.
Most DIYers skip these details and wonder why their doors fail after one winter.
- Use exterior-grade screws and hardware only. Interior screws rust out in six months.
- Pre-paint or seal doors before installation. Raw wood soaks up moisture once it’s hung.
- Leave 1/4 to 1/2 inch gaps around all door edges. Doors swell and shrink with weather changes.
- Test fit everything before final installation. Check swing clearance and fix problems now.
- Install a drip cap above your door opening. This keeps water from running down onto your hardware.
- Add weatherstripping around the door frame. It blocks drafts and keeps moisture out of your shed.
Conclusion
You now have everything you need to build solid shed doors.
We covered the six main steps: framing, back panels, door construction, trim work, hanging, and final hardware. Each step matters. Skip one and you’ll deal with problems later.
Pick the right door style for your opening size. Single doors for small sheds. Double doors for equipment access. Roll-up doors if you have the budget and framing skills.
Remember those key tips. Use exterior hardware. Pre-paint everything. Leave proper gaps. Test fit before final assembly.
I’ve built dozens of shed doors over the years. These methods work. Your doors will too if you follow the process.
Check out our complete shed building plans for your next project. Good luck with your build.
Frequently Asked Questions
What size hinges do I need for my shed doors?
Use 4-inch heavy-duty hinges for doors up to 6 feet tall. Add a third hinge in the middle for extra support on taller or heavier doors.
How much gap should I leave around my shed door?
Leave 1/4 to 1/2 inch on all sides of your door frame. This allows for wood movement and smooth operation in different weather conditions.
Can I use regular indoor screws for my shed door?
No, always use galvanized or stainless steel screws rated for exterior use. Regular screws will rust and fail within the first year outdoors.
How long does it take to build a basic shed door?
A simple single door takes 4-6 hours for most DIYers. Double doors or complex designs can take a full weekend to complete properly.
Do I need to seal my shed door after building it?
Yes, apply paint or wood sealer within 48 hours of installation. This protects the wood from moisture damage and extends the door’s lifespan significantly.