
After twenty years of helping homeowners restore their properties, I’ve seen countless brick walls buried under layers of paint and witnessed the immediate regret that follows.
Most people choose to paint brick thinking it’s a quick update, only to later crave the authentic texture and character that made them fall in love with their home originally.
But here’s the challenge, removing paint from brick incorrectly can cause permanent damage, leaving you with a costly mess.
I’ve guided hundreds of families through this exact situation, and I’m here to share the proven methods that actually work. This guide covers safe, effective techniques to bring your brick back to life without compromising its integrity or breaking your budget.
Why Remove Paint from Brick?
There’s something magical about exposed brick that no amount of paint can replicate. When I walk clients through their homes, I often see their eyes light up as we discuss removing layers of old paint to reveal the original brickwork underneath.
The natural variations in color, the subtle texture, and the authentic character that emerges can completely transform a space.
But beyond aesthetics, there’s a practical reason I always recommend paint removal. Brick needs to breathe.
When paint seals the surface, moisture gets trapped inside, leading to serious problems down the road cracking, crumbling mortar, and even structural issues that cost thousands to repair.
I’ve seen too many homeowners face expensive repairs because previous owners painted over brick without proper preparation.
If you’re planning to seal or repaint your brick properly, starting with a clean slate is essential. It’s the difference between a job that lasts decades and one that fails within a few years.
Tools and Materials You’ll Need
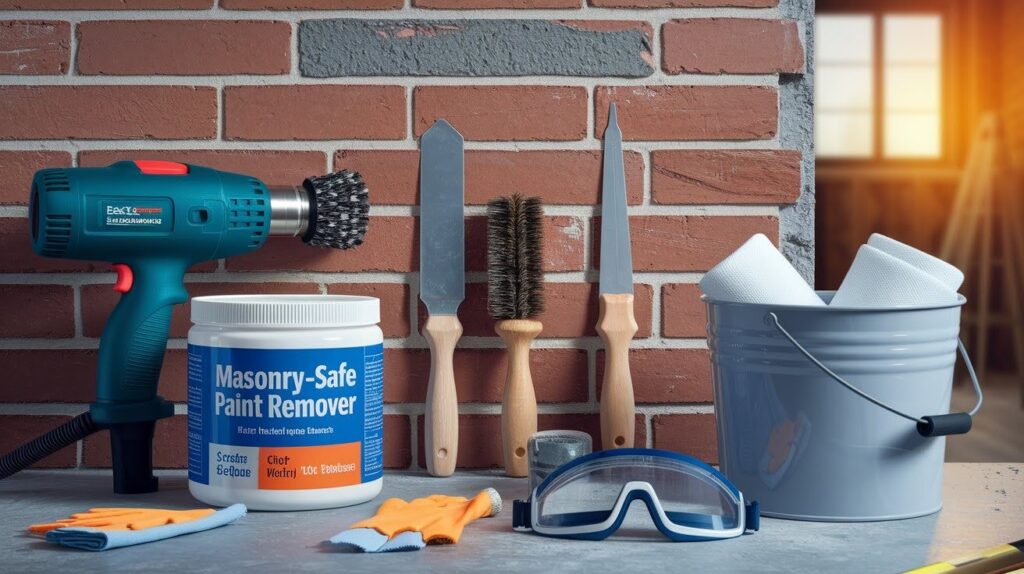
Before we begin, let me share what I always tell my clients: having the right tools makes this job manageable, while cutting corners often leads to frustration and damaged brick. I’ve learned this through years of trial and error, so trust me on this one.
- Paint remover – Choose a high-quality gel or paste formulation specifically designed for masonry that won’t run off vertical surfaces
- Scraper and wire brush – Essential for detailed work and removing stubborn paint layers
- Heat gun or rotary brush – Heat guns work great for tough spots, while rotary brush attachments save your arms during larger projects
- Bucket, water, and cleaning brush – You’ll need these for the final wash and plenty of clean rags
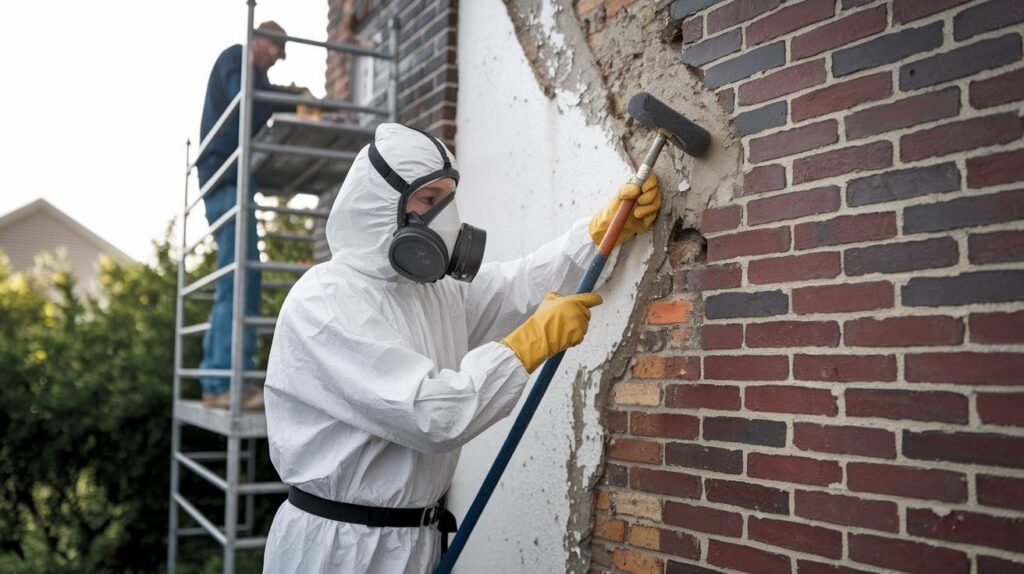
- Personal protective equipment – Chemical-resistant gloves, respirator mask, and safety goggles are non-negotiable. I’ve seen too many people skip protection and regret it later
Trust me, gathering everything upfront will make the actual work much smoother. Your health is worth more than saving a few dollars on equipment.
Step-by-Step Paint Removal Process
After years of helping homeowners through this process, I’ve developed a foolproof method that protects your brick while getting results. Let me walk you through each step the way I would if I were standing right there with you.
Step 1: Test a small area before full removal
I can’t stress this enough, always start with a hidden corner or small section. Every brick is different, and what works on one wall might be too harsh for another. I usually pick a spot behind a plant or furniture where any mishaps won’t be visible.
This test run will show you how your specific brick responds and help you adjust your technique.
Step 2: Prepare your workspace with plastic sheeting
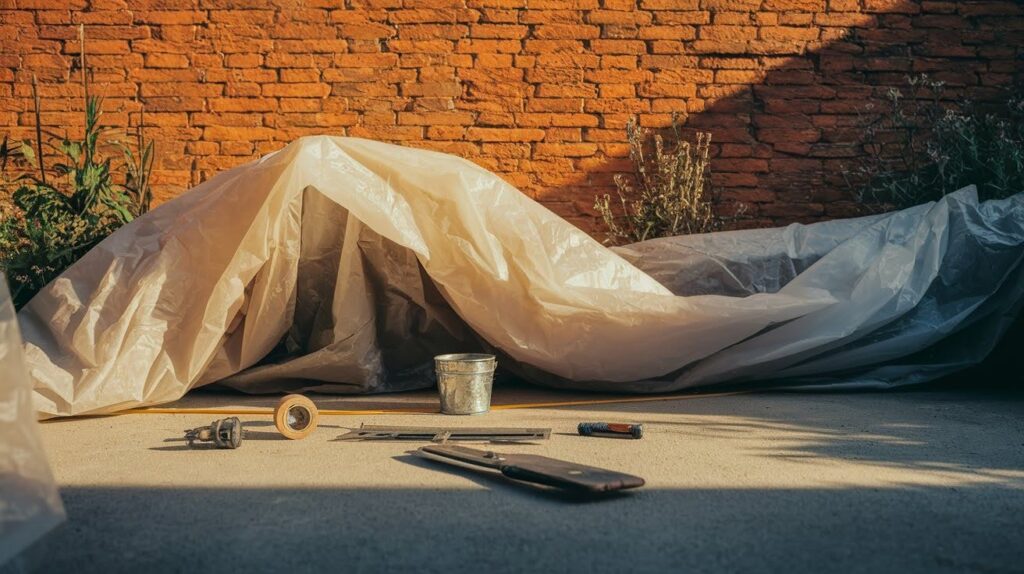
Cover everything you don’t want splattered, trust me on this. Paint remover can stain concrete, damage plants, and make a real mess of nearby surfaces. I lay down thick plastic sheeting and secure it well. It takes an extra fifteen minutes upfront but saves hours of cleanup later.
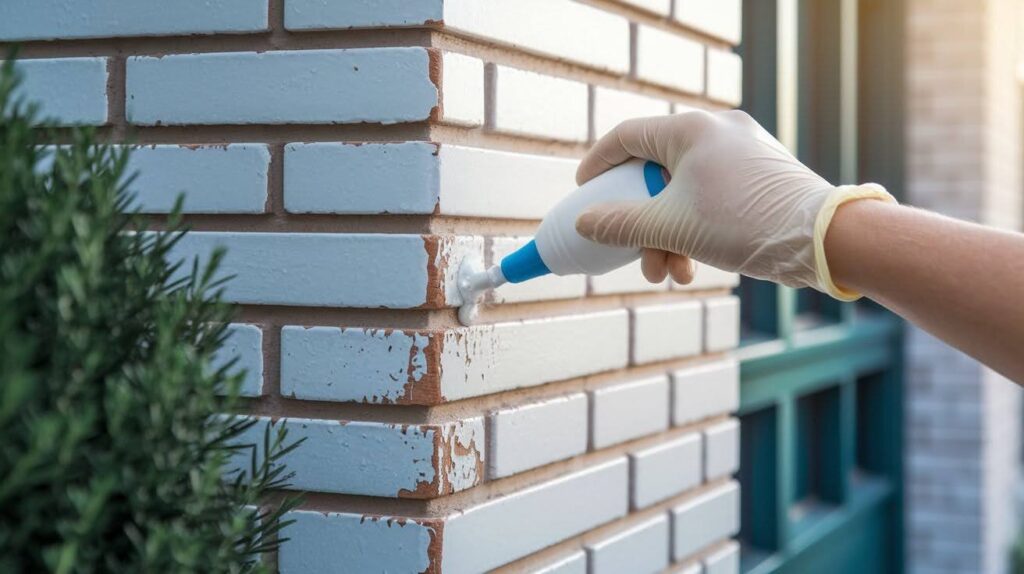
Step 3: Apply paint remover and allow it to dwell
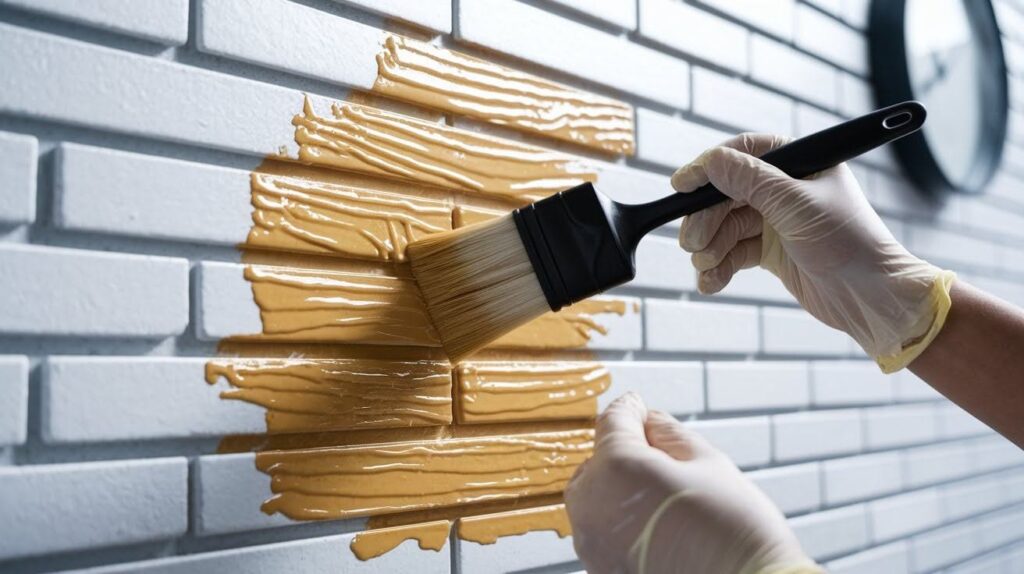
This is where patience pays off. Apply the remover generously and let it do the work. I’ve seen too many people rush this step and end up scraping twice as hard. Follow the manufacturer’s timing, usually 15-30 minutes depending on paint thickness.
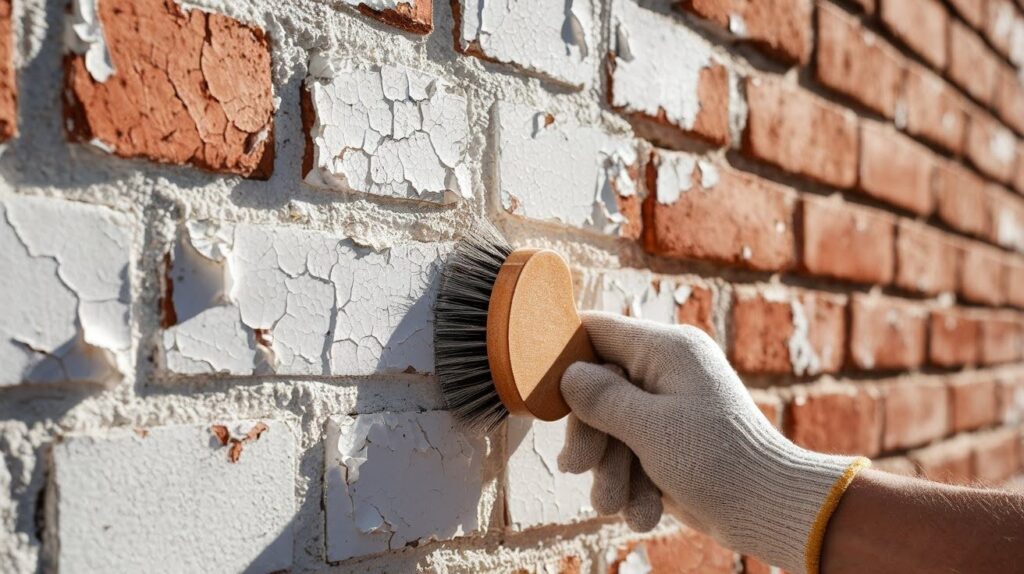
Step 4: Gently scrape or scrub off loosened paint
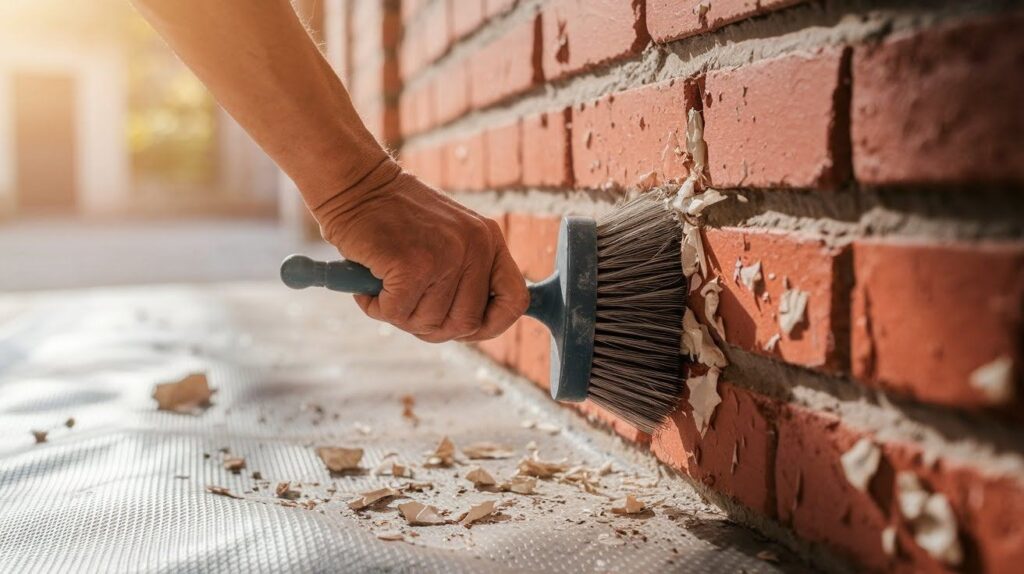
The key word here is “gently.” The paint remover should have done most of the work. Use steady pressure, but don’t attack the brick. Work in sections and take your time. If something isn’t coming off easily, apply more remover rather than scraping harder.
Step 5: Rinse thoroughly with warm water and allow to dry
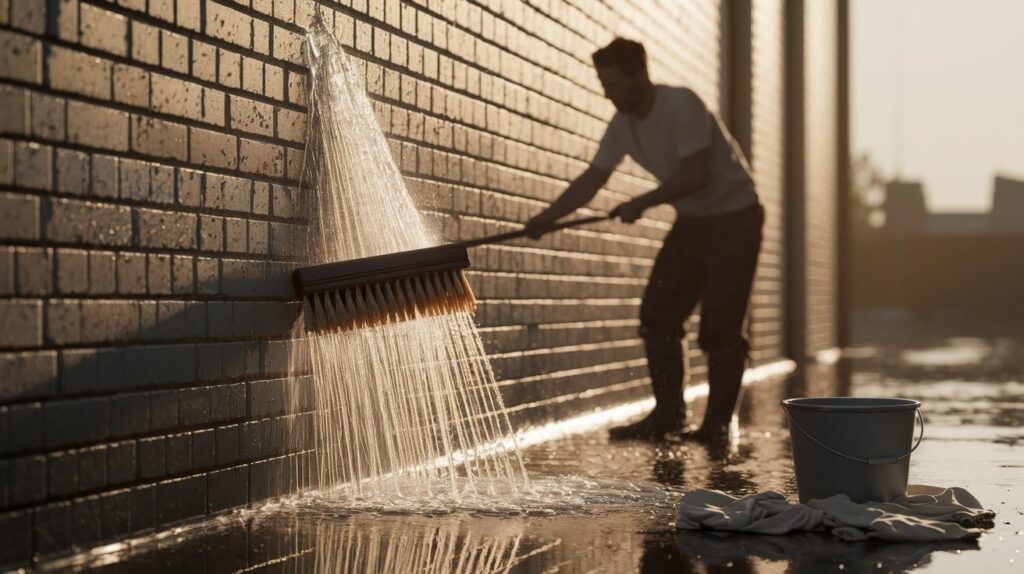
This final step is crucial. Any leftover chemical residue can cause problems later. I use warm water and scrub with a stiff brush to make sure every trace is gone. Then let it dry completely usually 24-48 hours before deciding if you need a second round.
Post-Removal Brick Care
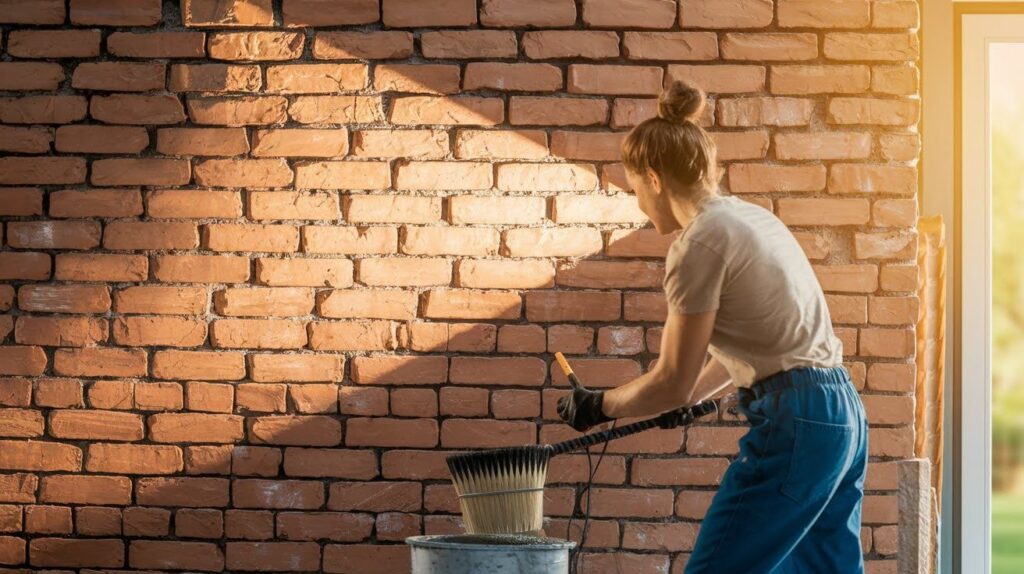
Once you’ve finished the removal process, your work isn’t quite done yet. I always tell my clients that proper aftercare makes the difference between a professional-looking result and a project that causes problems later. Let me share the final steps that I never skip.
Clean residual chemicals with TSP: Even after thorough rinsing, some chemical residue might remain on your brick surface. If you notice any film or sticky spots, mix up a solution of TSP (trisodium phosphate) according to package directions.
Scrub the area gently with a stiff brush, then rinse again with clean water. This extra step ensures your brick is completely clean and ready for whatever comes next.
Inspect bricks for damage or leftover paint: Walk along your wall carefully, looking for any stubborn paint spots you might have missed or areas where the brick looks damaged.
I use a flashlight held at an angle, it shows imperfections clearly. Mark any problem spots with chalk so you can address them before moving forward.
Let bricks dry completely before next steps: This is the hardest part for most homeowners waiting. Your brick needs 48-72 hours to dry thoroughly, sometimes longer in humid conditions.
I know it’s tempting to rush ahead, but moisture trapped under sealers or new paint will cause failures down the road. Trust the process and let time do its work.
When to Call a Professional
I’ve been in this business long enough to know my limits, and more importantly, to recognize when a project is beyond what most homeowners should tackle alone. There’s no shame in calling for backup, in fact, it’s often the smartest move you can make.
Lead-based or unknown paint types: If your home was built before 1978, there’s a real chance you’re dealing with lead paint. I’ve seen too many well-meaning homeowners put their families at risk by attempting removal without proper testing and safety protocols.
Professional remediation companies have the equipment, training, and certifications to handle hazardous materials safely. The cost of professional removal is minimal compared to potential health consequences or EPA fines.
Multi-story or large-scale jobs: Working on a small interior wall? You can probably handle that. But when I see homeowners setting up ladders for second-story exterior work or tackling entire building facades, I always recommend bringing in professionals.
The safety risks multiply quickly, and the specialized equipment needed for large jobs often costs more to rent than hiring someone who owns it. Plus, professionals work much faster, minimizing disruption to your daily life.
Severely damaged or crumbling brick: If your brick is already compromised with loose mortar, cracking, or crumbling sections, paint removal can make things worse.
I always tell clients that structural issues need to be addressed by someone who understands masonry repair. A mason can assess the damage, make necessary repairs, and then safely proceed with paint removal using techniques appropriate for fragile surfaces.
Conclusion
After guiding countless homeowners through this process, I can tell you that restoring painted brick is one of the most rewarding projects you’ll tackle.
Yes, it requires patience and careful attention to detail, but watching that authentic character emerge from under layers of old paint never gets old for me and I’ve seen the joy it brings to families rediscovering their home’s original beauty.
The key to success lies in following each step methodically. Rush the process, skip the prep work, or use the wrong materials, and you’ll likely face setbacks that cost more time and money than doing it right initially.
Remember, there’s no shame in calling professionals for complex situations. I’ve built my reputation by knowing when to recommend expert help. Your brick has lasted decades or even centuries, treat it with the respect it deserves, and it will reward you with timeless appeal.
Frequently Asked Questions
Can I use a pressure washer to remove paint from brick?
No, pressure washers can damage brick and mortar joints, especially on older masonry. The high-pressure water can erode mortar and create costly structural problems that require professional repair.
How long does the paint removal process typically take?
Plan for 2-4 hours per 100 square feet, plus drying time between steps. Complex projects with multiple paint layers or detailed brickwork will require additional time and patience.
Is it safe to remove paint from brick indoors?
Yes, but proper ventilation is essential when using chemical paint removers. Open windows, use fans, and wear appropriate safety equipment to protect yourself from fumes.
What should I do if some paint won’t come off after the first attempt?
Apply a second round of paint remover to stubborn areas rather than scraping harder. Sometimes older or thicker paint layers need multiple treatments for complete removal.
How much does professional brick paint removal cost?
Professional removal typically costs $3-8 per square foot depending on project complexity and location. While more expensive than DIY, professionals have specialized equipment and experience with challenging situations.