
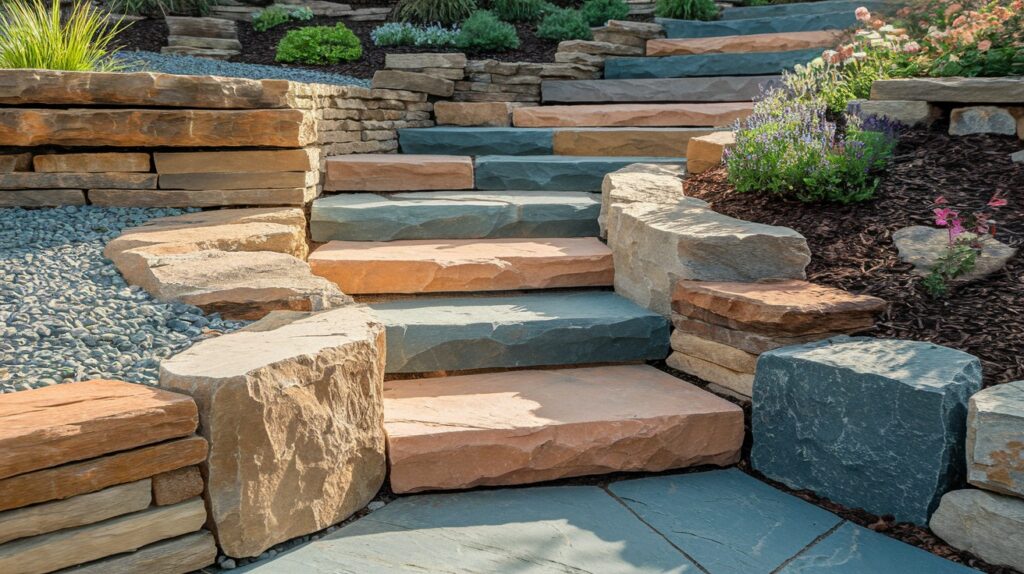
Natural stone steps combine practical functionality with timeless beauty, making them an excellent addition to any outdoor space.
These durable installations provide safe passage through sloped areas while adding sophisticated visual appeal that complements both traditional and contemporary landscaping styles.
Unlike manufactured alternatives, natural stone weathers gracefully and develops character over time.
This comprehensive guide covers everything you need to create professional-quality stone steps at home.
We’ll walk through essential materials selection, proper planning techniques, required tools, and detailed installation procedures that ensure long-lasting results.
You’ll also learn maintenance practices that keep your stone steps looking their best for years to come.
With careful planning and attention to detail, you can build stone steps that enhance your property’s value while providing a beautiful, functional pathway through your outdoor spaces.
Benefits of Using Natural Stone for Steps
Natural stone offers unmatched advantages for outdoor step construction, making it the preferred choice for homeowners seeking both functionality and aesthetic appeal. Understanding these benefits helps you appreciate why stone steps represent a worthwhile investment in your property.
Durability & Longevity
Natural stone steps stand up to decades of use without losing their structural integrity or visual appeal.
These materials withstand harsh weather conditions, from freezing winters to scorching summers, while handling constant foot traffic and heavy use.
Unlike concrete or manufactured materials that may crack or deteriorate over time, quality stone maintains its strength and appearance for generations.
The initial investment pays off through reduced replacement costs and minimal repair needs throughout the stone’s lifetime.
Natural Beauty & Curb Appeal
Each piece of natural stone brings unique color variations, textures, and patterns that manufactured materials simply cannot replicate.
This individuality ensures your steps will be one-of-a-kind, adding distinctive character to your landscape design.
Whether you prefer the rustic charm of fieldstone or the refined appearance of cut granite, natural stone enhances your property’s curb appeal and overall value.
The organic beauty of stone complements both formal garden settings and casual outdoor spaces effortlessly.
Slip Resistance & Safety
The naturally textured surfaces of most stone types provide excellent traction, even when wet from rain or morning dew.
This inherent slip resistance makes stone steps safer than smooth concrete or tile alternatives, reducing the risk of accidents for family members and guests.
Many stone varieties feature naturally rough textures that improve with age, maintaining their grip properties while developing attractive weathered patinas.
Custom Fit for Any Landscape
Stone’s versatility allows for flexible design solutions that work with virtually any terrain or architectural style.
Whether you’re working with steep slopes, gentle grades, curved pathways, or geometric layouts, natural stone can be cut, shaped, and arranged to fit your specific needs.
This adaptability makes stone ideal for connecting different levels in gardens, creating transitions between patios and lawns, or providing access to elevated outdoor living areas.
Tools and Materials You’ll Need
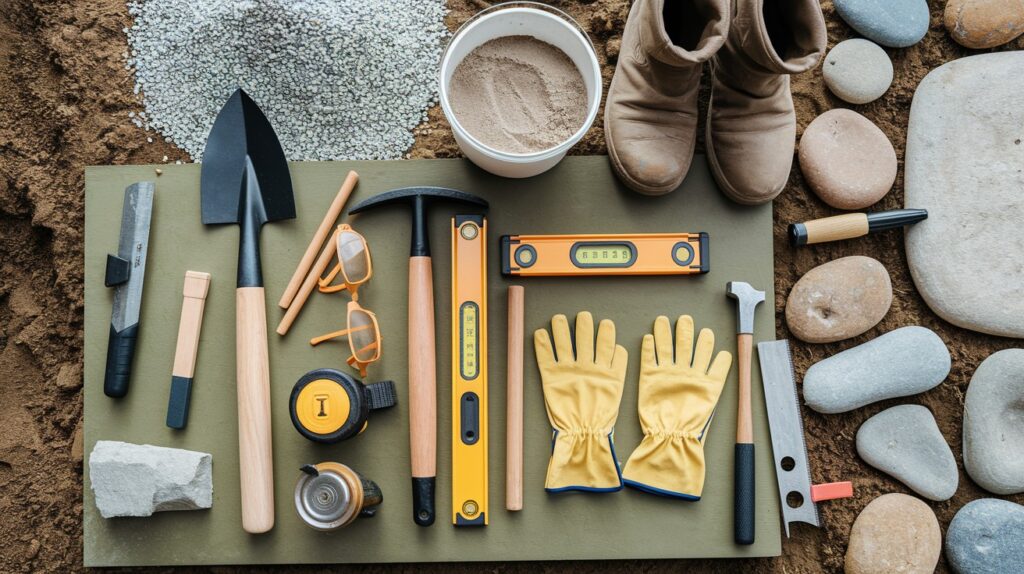
Proper preparation begins with assembling the right tools and materials for your stone step project. Having everything on hand before you start ensures smooth progress and professional-quality results.
Essential Tools
- Sturdy shovel for digging and excavation work
- Pickaxe for breaking through tough soil or roots
- Tape measure for accurate spacing and alignment
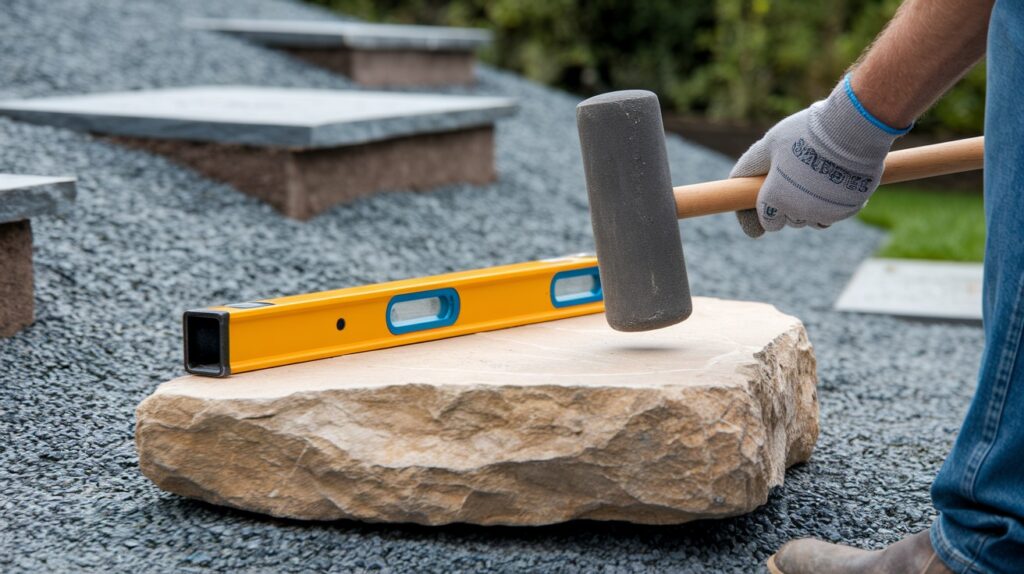
- Quality level to ensure each step sits properly
- Rubber mallet for positioning stones without damage
- Safety gear including work gloves, safety glasses, and steel-toed boots
For Installation
The installation phase requires specific materials and specialized tools for proper stone placement.
You’ll need gravel or stone chips for creating a stable base layer, plus bedding sand for fine-tuning stone positioning and leveling.
Keep a chisel and hammer available for making minor adjustments to stone shapes or removing small protrusions.
A masonry saw, while optional, proves invaluable for precise cuts when stones need custom sizing.
These materials ensure your steps have the solid foundation necessary for long-term stability.
Step-by-Step Guide: How to Create Natural Stone Steps at Home
Building natural stone steps requires careful planning and methodical execution. Follow these detailed steps to create beautiful, functional stone steps that will enhance your outdoor space for years to come.
Step 1: Plan and Measure Your Space
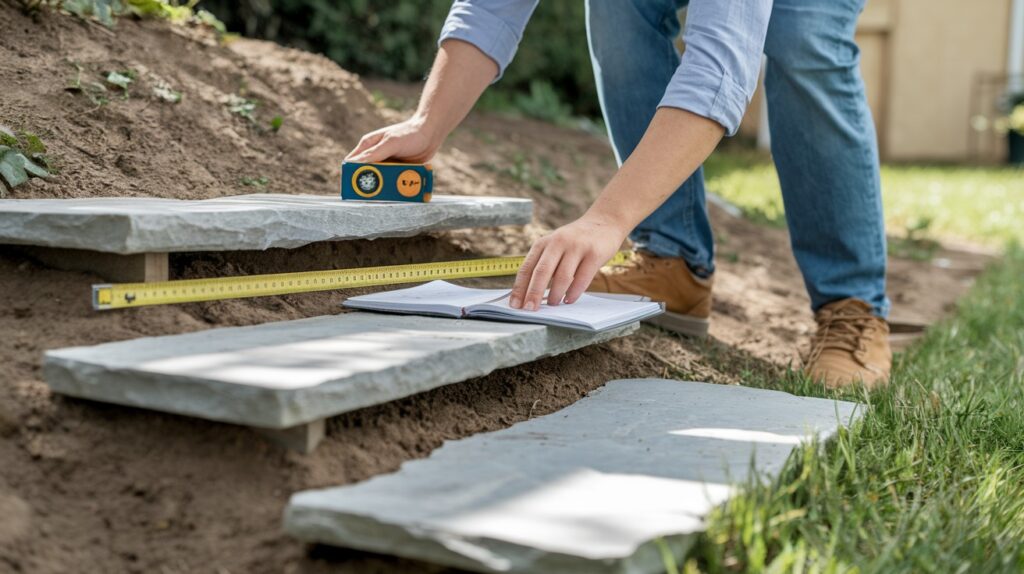
Begin by thoroughly assessing your slope to determine the total height difference you need to accommodate.
Measure the rise (vertical distance) and calculate how many individual steps you’ll need based on comfortable step heights of 6-8 inches each.
Determine the run (horizontal distance) each step will occupy, ensuring adequate depth for safe footing.
Choose stone treads that are 6-7 inches thick and 12-18 inches deep, as these dimensions provide both structural stability and comfortable use.
Take time with this planning phase, as accurate measurements prevent costly mistakes and material waste later in the project.
Step 2: Gather Tools and Materials
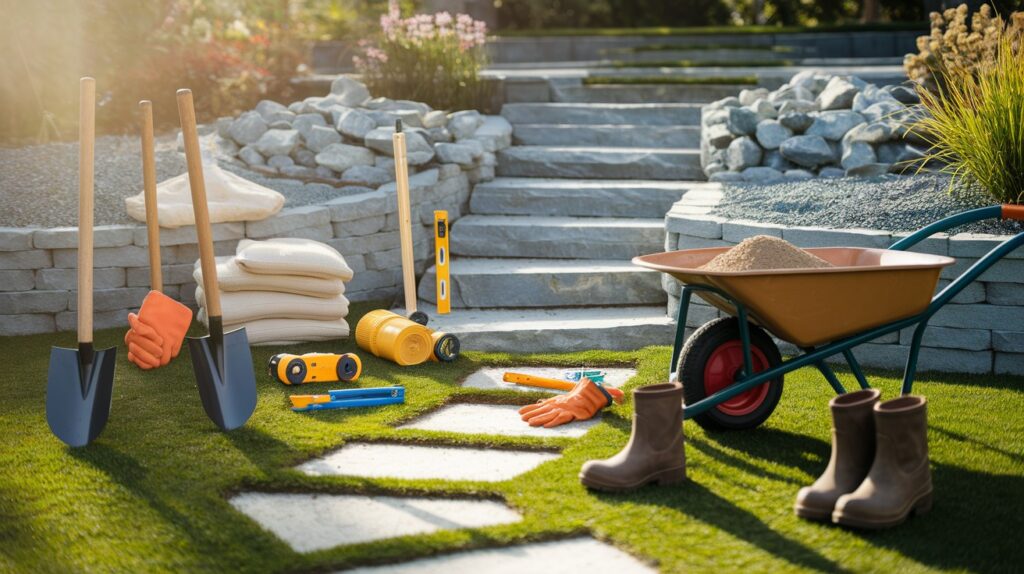
Review your complete tool list to ensure nothing is missing before you begin excavation work.
Select your stone type based on your budget, local availability, and desired aesthetic, then calculate the total quantity needed including a 10% buffer for breakage or mistakes.
Consider visiting a local stone supplier to see materials in person and get professional advice on stone selection, quantities, and installation techniques.
Having all materials on-site before starting prevents project delays and ensures consistent stone coloring and texture throughout your installation.
Step 3: Prepare the Site

Excavate the slope systematically, creating individual platforms for each step at the proper depth and width.
Remove all organic matter, roots, and loose soil to prevent future settling that could destabilize your steps.
Create a solid foundation by laying and compacting a 4-6 inch base of gravel or stone chips on each platform.
Use your level frequently during this phase to ensure each base is perfectly flat and properly positioned.
Proper site preparation is crucial for long-term stability and prevents future maintenance issues.
Step 4: Place the First Stone Step
Position your first stone carefully on the prepared gravel bed, starting from the bottom of your slope and working upward.
Use a rubber mallet to make fine adjustments while checking constantly with your level to ensure the stone sits perfectly horizontal in all directions.
Test the stone’s stability by applying weight and checking for any rocking or movement.
This first step sets the standard for all subsequent stones, so take time to get the placement exactly right before proceeding to the next level.
Step 5: Install Remaining Steps
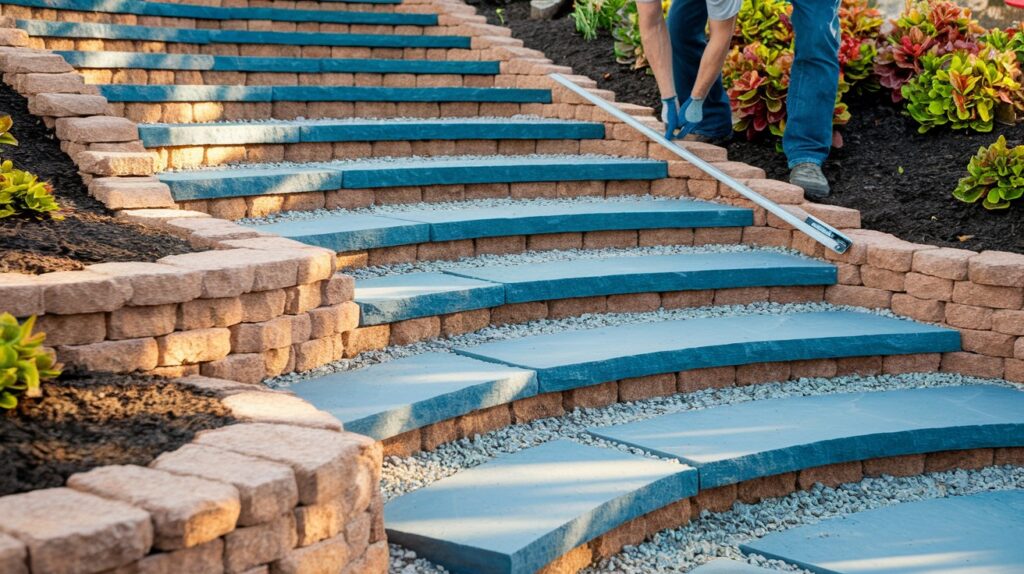
Continue placing stones one at a time, working your way up the slope while maintaining consistent spacing and alignment.
Stagger the stones with slight overlaps to create visual interest and improve structural integrity.
Check both level and alignment after positioning each stone, making adjustments as needed before the installation becomes too complex to modify easily.
Apply mortar between stones if your local climate or soil conditions require extra stability, though many stone step installations rely on proper grading and compaction alone.
Step 6: Final Adjustments and Landscaping
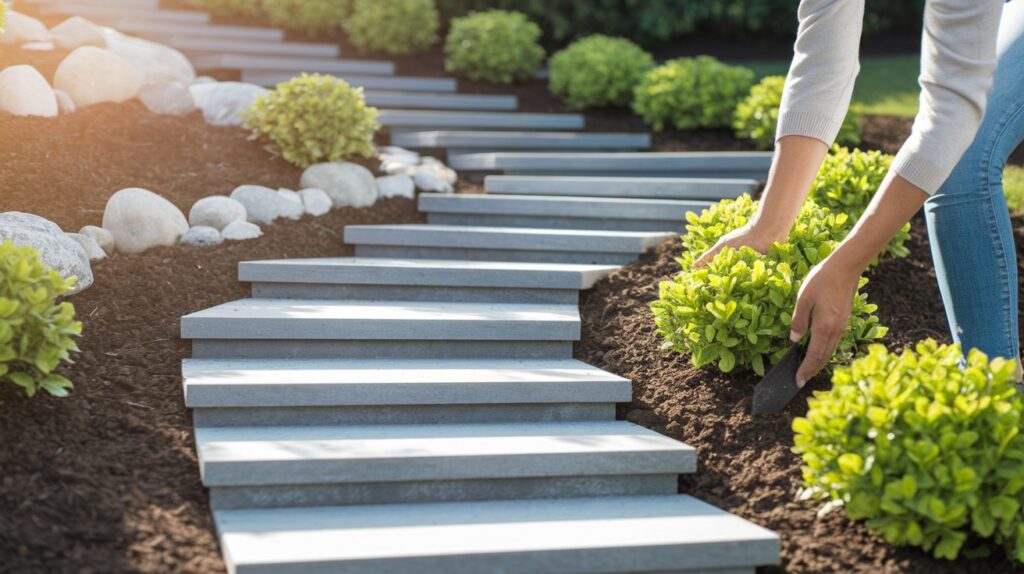
Complete your installation by backfilling around the sides of each step with quality soil, ensuring proper drainage away from the stone surfaces.
Add complementary landscaping elements such as low-growing plants, decorative edging stones, or mulch to create a finished, professional appearance.
Clean any excess mortar, soil, or construction debris from the stone surfaces using appropriate tools and techniques.
Step back and evaluate your work, making any final adjustments to ensure your new stone steps are both beautiful and completely functional.
Maintenance Tips to Keep Your Steps Looking Great
Proper maintenance ensures your natural stone steps remain beautiful and functional for decades with minimal effort and regular attention.
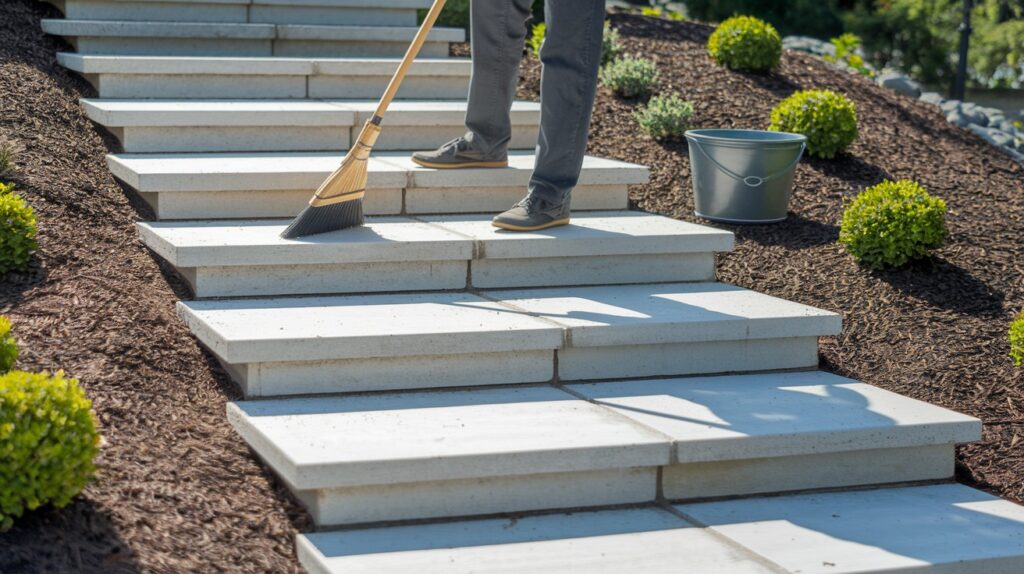
Regular Cleaning and Debris Removal
Sweep your stone steps weekly to remove leaves, dirt, and organic matter that can create stains or slippery conditions. Rinse periodically with clean water to wash away salt, pollen, and residues that dull the stone’s natural appearance.
Annual Sealing for Protection
Evaluate your steps each spring to determine if resealing is necessary for optimal protection. Apply appropriate sealers during dry weather to preserve color, resist staining, and protect against freeze-thaw damage in colder climates.
Structural Inspection and Repairs
Examine your steps after heavy rainstorms or freeze-thaw cycles to identify shifting, settling, or erosion issues. Address minor problems immediately by releveling stones, adding base material, or improving drainage to prevent costly future repairs.
Conclusion
Creating natural stone steps transforms your outdoor space while providing lasting value and functionality.
This comprehensive guide has covered everything from initial planning and material selection to installation techniques and ongoing maintenance practices.
With proper preparation, the right tools, and careful attention to detail, you can build professional-quality stone steps that enhance your property’s beauty and accessibility.
Remember that successful stone step construction relies on thorough site preparation, accurate measurements, and methodical installation.
Take time with each phase of the project to ensure long-term stability and visual appeal.
Your investment in natural stone steps will reward you with decades of reliable use and timeless beauty that improves with age.
Start planning your stone step project today and create a stunning pathway that connects your outdoor spaces with style and permanence.
Frequently Asked Questions
How much does it cost to build natural stone steps yourself?
DIY stone steps typically cost $15-40 per square foot for materials, significantly less than professional installation at $50-100 per square foot. Your total cost depends on stone type, project size, and whether you rent or buy specialized tools.
What type of stone works best for outdoor steps?
Granite, bluestone, and sandstone offer excellent durability and slip resistance for step construction. Choose stones that are at least 6-7 inches thick and have naturally textured surfaces for optimal safety and longevity.
How long does it take to complete a stone step project?
A typical residential stone step project takes 2-4 days for an experienced DIYer, depending on the number of steps and site conditions. Allow extra time for proper planning, site preparation, and curing if you use mortar between stones.
Do I need special permits to build stone steps on my property?
Most residential stone step projects under 30 inches high don’t require permits, but check with your local building department first. Some areas have specific requirements for retaining structures or steps near property lines that may need approval.
Can stone steps be installed on any type of slope?
Stone steps work on most slopes, but extremely steep grades may require professional engineering or alternative solutions. Gentle to moderate slopes are ideal for DIY installation, while very steep areas might need terracing or retaining walls.