
Lattice windows feature distinctive grid patterns that divide glass panes into smaller sections, creating a classic architectural element that has stood the test of time.
These windows are experiencing renewed popularity in both contemporary and traditional home designs, offering homeowners a perfect blend of vintage charm and modern functionality.
Choosing lattice windows for your home brings multiple benefits. They add visual interest to plain facades, improve energy efficiency through smaller glass segments, and provide enhanced security.
The grid pattern also helps break up large expanses of glass, creating more intimate interior lighting effects.
For homeowners seeking to increase curb appeal while maintaining practical functionality, lattice windows represent an ideal solution that complements various architectural styles from colonial to craftsman designs.
Understanding Lattice Windows
What Are Lattice Windows?
Lattice windows are characterized by their grid-like framework that creates individual glass sections within a single window opening. At their core, these windows consist of intersecting bars or strips that form geometric patterns across the glass surface.
It’s important to distinguish between the window frame-the outer structure that holds the entire window unit and the lattice itself, which refers specifically to the internal grid system that creates the decorative pattern.
Types of Lattice Windows
Internal Bar Lattice Windows- Internal bar lattice windows feature grids positioned between two panes of glass, offering a clean appearance that’s easy to maintain since the bars are protected from weather and dirt.
Glass-Dividing Lattice Windows- Glass-dividing lattice windows use actual structural bars that separate individual pieces of glass, creating authentic divided light windows with traditional appeal.
Decorative Surface-Applied Lattices- Decorative surface-applied lattices provide the visual effect of divided glass while using a single pane, with grid patterns attached to the glass surface for an economical alternative.
Popular Patterns
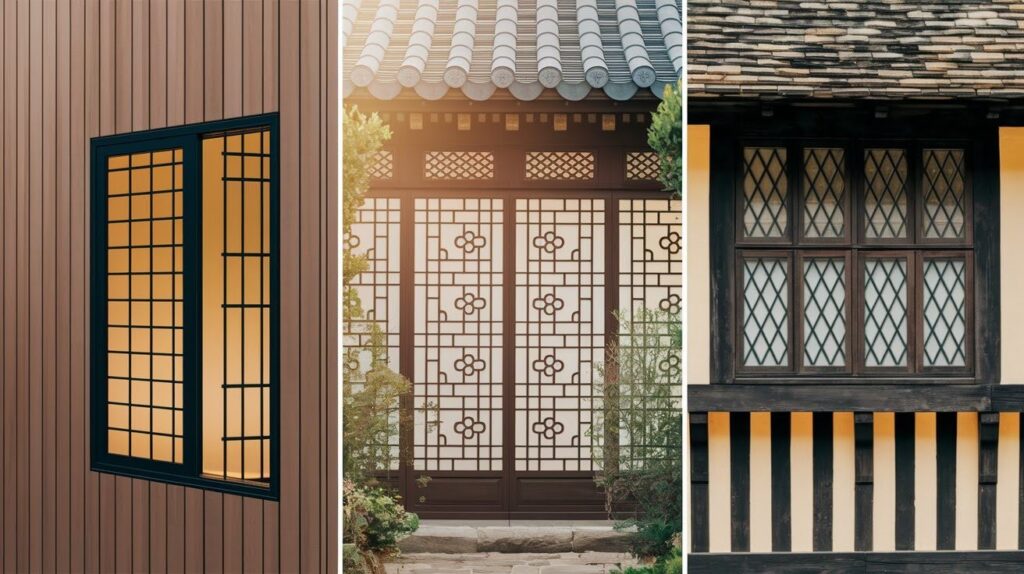
Lattice windows come in numerous pattern styles to suit different tastes and architectural themes. Classic options include diamond configurations, square grids, and simple cross patterns.
More intricate designs feature ice-crack patterns that mimic natural formations, and floral motifs that add artistic flair. Regional styles also influence pattern choices.
Chinese lattice work often incorporates symbolic geometric shapes and nature inspired designs, while Tudor style patterns typically feature rectangular or diamond arrangements that reflect English architectural traditions.
Choosing the Right Lattice Window for Your Home
Material Options
Selecting the right material for your lattice windows significantly impacts both appearance and long-term performance. Each option offers distinct advantages suited to different needs and preferences.
Wood
Wood remains the traditional choice for lattice windows, providing natural warmth and character that complements heritage homes beautifully. Wooden frames age gracefully and can be painted or stained to match your home’s color scheme.
They work particularly well in older properties where authenticity matters, though they require regular maintenance to prevent weather damage and ensure longevity.
Aluminium
Aluminium lattice windows bring a contemporary feel to modern homes while offering practical benefits. These frames are notably lightweight, making installation easier, and require minimal upkeep over time.
Their sleek profiles suit clean-lined architectural styles, and powder coating options provide various color choices that won’t fade or chip easily.
uPVC
uPVC presents an economical solution without sacrificing visual appeal. Modern manufacturing techniques create wood-look alternatives that closely mimic natural timber grain patterns.
These windows resist warping, rotting, and fading while requiring virtually no maintenance beyond occasional cleaning.
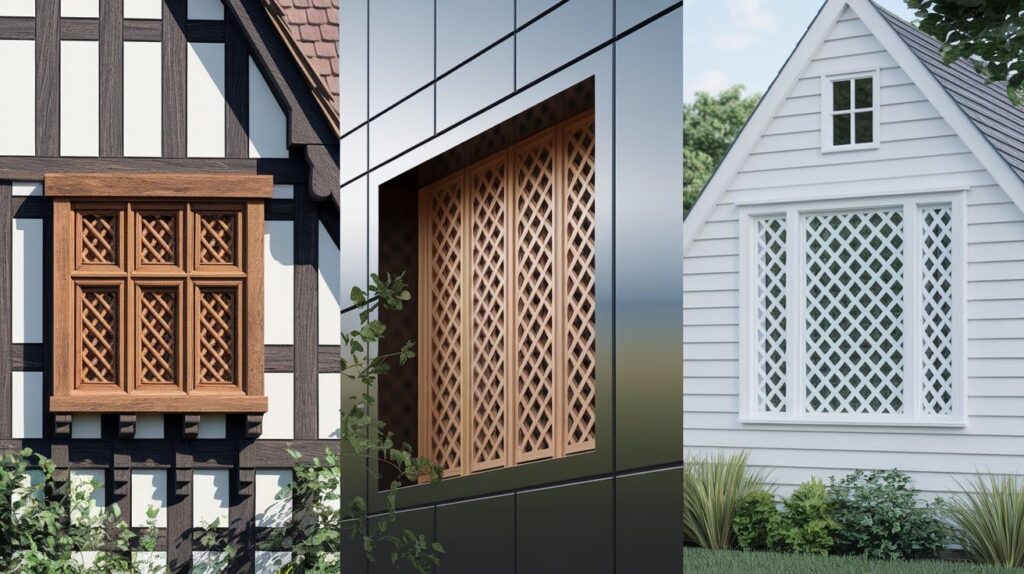
Style Compatibility
Your home’s architectural style should guide your lattice window selection. Tudor-style homes benefit from diamond or rectangular grid patterns in dark colors that emphasize their historical character.
Farmhouse designs pair well with simple square or cross patterns in white or natural wood finishes.
Planning Your Installation

DIY vs. Professional Installation
Deciding between self-installation and hiring professionals depends on several factors that affect both cost and outcome quality.
DIY Installation Pros: Cost savings represent the primary advantage, as labor typically accounts for 40-60% of total installation expenses.
You also control the timeline and can work at your own pace without scheduling constraints. Many homeowners find satisfaction in completing home improvement projects themselves.
DIY Installation Cons: Installation mistakes can lead to air leaks, water damage, or structural issues that cost more to fix than professional installation would have cost initially. Without proper experience, you might void manufacturer warranties or create safety hazards.
Complex installations require specialized knowledge of building codes and structural requirements.
Professional Installation Pros: Experienced installers bring expertise that ensures proper fit, weatherproofing, and compliance with local building standards. Most professionals offer warranties on their work and carry insurance for potential damages.
They complete installations faster and handle permit requirements.
Professional Installation Cons: Higher upfront costs and scheduling limitations based on contractor availability. Less personal control over installation timing and methods.
Complexity Levels Based on Window Type: Surface-applied lattices offer the simplest installation, often requiring only adhesive application or clip-on attachment. Glass-dividing lattice windows present moderate complexity, involving precise measurements and structural considerations.
Internal bar systems require the most expertise, as they involve sealed glass units that need professional handling to maintain integrity.
Tools and Materials You’ll Need
Basic Tools: A measuring tape ensures accurate dimensions, while a power drill handles screw installation efficiently. Quality screws appropriate for your wall material provide secure mounting. Weatherproof sealant prevents air and water infiltration around window frames.
Safety Gear and Protective Coverings: Safety glasses protect eyes from debris during drilling and cutting. Work gloves prevent cuts from sharp edges and provide better grip. Drop cloths protect flooring and furniture from dust and scratches during installation work.
Step-by-Step Installation Process
1. Measuring and Preparing the Window Opening

Start by measuring the window opening at three points-top, middle, and bottom for both width and height. Record the smallest measurements to ensure proper fit. Remove old caulk, paint chips, and debris from the window opening using a putty knife and wire brush.
Sand rough surfaces smooth and wipe clean with a damp cloth.
2. Installing the Window Frame
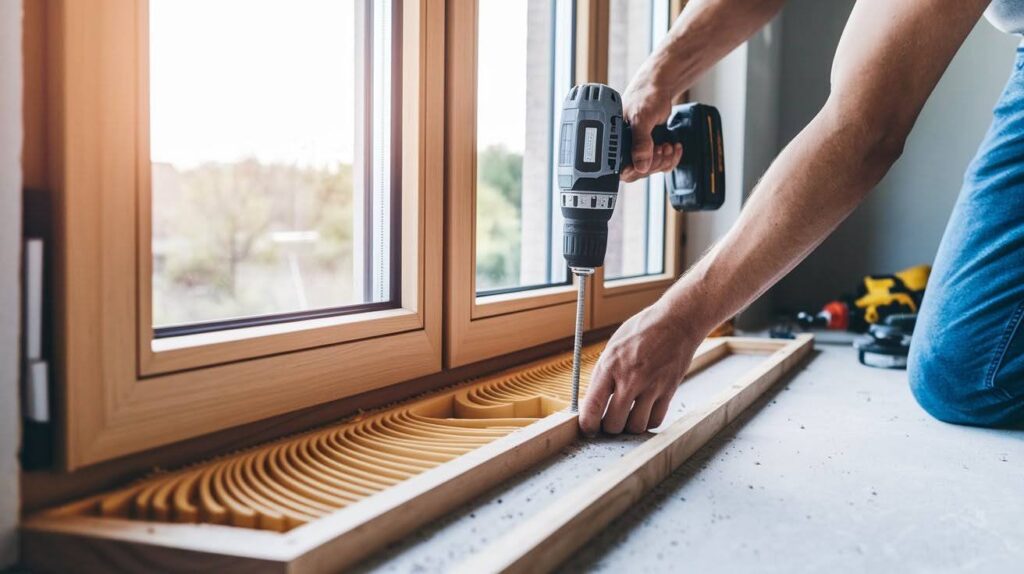
Place the window frame into the opening, ensuring equal gaps on all sides. Use wooden shims to adjust positioning and achieve perfect level and plumb alignment. Drive screws through the frame flanges into the wall studs, spacing them every 12-16 inches around the perimeter.
Apply a continuous bead of exterior-grade sealant around the outside perimeter where the frame meets the wall surface.
3. Fitting the Lattice Design

For internal bar systems, the lattice grid comes pre-installed between glass panes, requiring no additional work. External lattice bars attach to the glass surface using clips or adhesive strips. Position each bar carefully, ensuring consistent spacing and alignment with your chosen pattern.
Work from the center outward to distribute any minor adjustments evenly. Double-check alignment frequently during installation, as repositioning becomes difficult once adhesive sets.
4. Finishing Touches
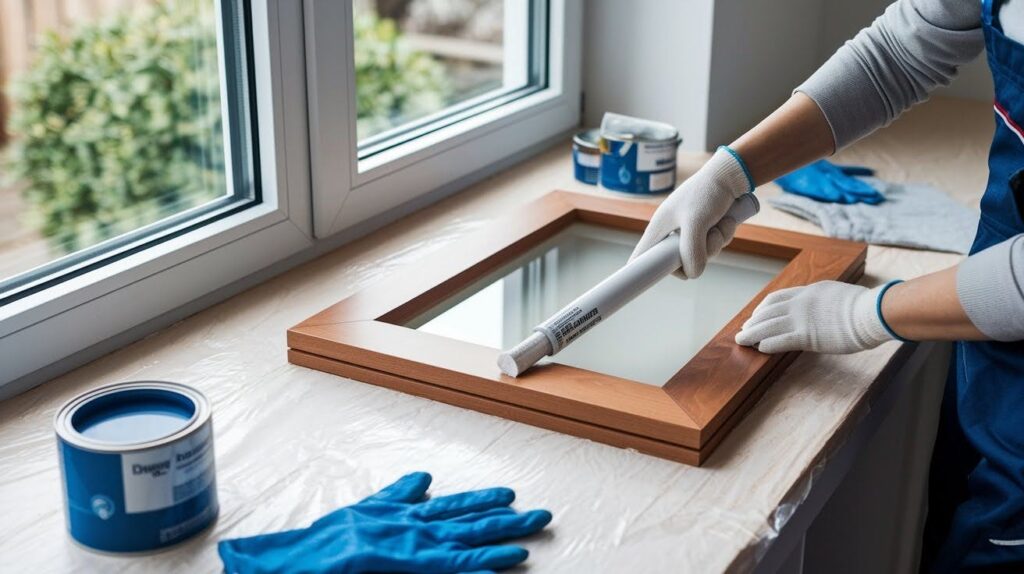
Apply interior caulk around the inside perimeter where the window meets the wall. Smooth caulk lines with your finger or a caulk tool for a professional appearance. Sand any rough spots on wooden frames and apply primer if needed.
Use high-quality exterior paint or stain designed for window applications. Apply thin, even coats and allow proper drying time between applications for best results.
Maintenance Tips for Lattice Windows
Cleaning Without Damaging the Lattice
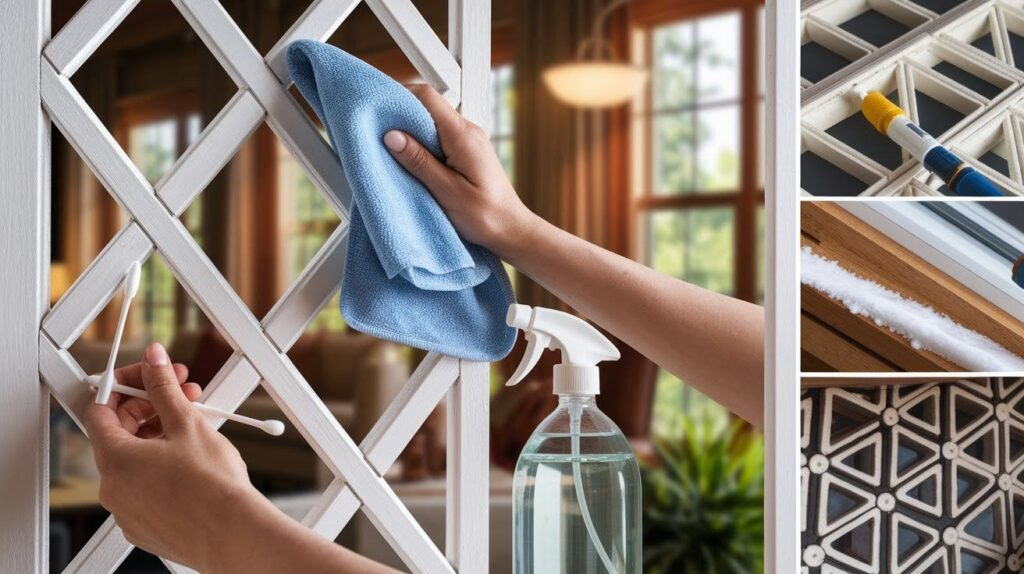
Use a soft brush or microfiber cloth to clean lattice windows, working gently around the grid patterns to avoid putting pressure on delicate muntins. Start with plain water and a mild soap solution, applying it with a spray bottle rather than soaking the window directly.
For stubborn dirt, use a cotton swab to clean tight corners and intricate decorative patterns. Avoid harsh chemicals or abrasive cleaners that can damage finishes or weaken adhesive bonds on surface-applied lattices.
Regular Inspections
Check your lattice windows seasonally for signs of wear or damage. Look for warping in wooden frames, especially after periods of high humidity or extreme temperature changes.
Examine glass panes for cracks and inspect the lattice bars for loose connections or moisture buildup between panes. Plan to refinish wooden frames every 3-5 years or when you notice paint peeling or stain fading.
Reseal around window frames annually to maintain weatherproofing and prevent air leaks.
Common Mistakes to Avoid
- Overlooking ventilation requirements when installing multiple lattice windows in the same room
- Failing to consider how lattice patterns affect natural light distribution throughout your space
- Selecting materials unsuitable for your local climate conditions, such as choosing wood in high-humidity areas without proper treatment
- Taking inaccurate measurements that result in gaps around the frame or unstable installation
- Installing windows without proper weatherproofing, leading to water damage and energy loss
- Ignoring manufacturer guidelines for maintenance schedules and approved cleaning products
Conclusion
Installing lattice windows at home offers a rewarding way to enhance both visual appeal and functionality.
We’ve covered the essential steps from selecting appropriate materials and styles to completing the installation process with proper measurements, secure mounting, and weatherproofing techniques.
Regular maintenance ensures your windows continue performing well while preserving their attractive appearance.Lattice windows successfully combine practical benefits with aesthetic value, improving energy efficiency while adding architectural character to any home.
The key lies in choosing designs that complement your existing style and using quality materials suited to your climate.
When facing complex installations or uncertain about structural requirements, don’t hesitate to consult a qualified professional. Their expertise can prevent costly mistakes and ensure your lattice windows provide lasting satisfaction for years to come.
Frequently Asked Questions
Can I install lattice windows myself, or do I need a professional?
Simple surface-applied lattice installations are suitable for DIY enthusiasts with basic carpentry skills. Complex glass-dividing systems require professional expertise to ensure proper weatherproofing and building code compliance.
How long does lattice window installation typically take?
A single window installation usually takes 2-4 hours for experienced DIYers. Professional installers can complete most residential projects within a full day.
What’s the difference between internal and external lattice bars?
Internal bars are sealed between glass panes, offering better weather protection and easier cleaning. External bars attach to the glass surface, providing a more affordable option but requiring more maintenance.
How do I maintain lattice windows to ensure longevity?
Clean regularly with mild soap and soft brushes, inspect seasonally for damage. Refinish wooden frames every 3-5 years and apply fresh sealant annually around frames.
Which lattice pattern works best for my home’s architectural style?
Traditional homes benefit from diamond or rectangular grids that match historical periods. Contemporary designs suit clean geometric patterns that complement existing window styles.