
A waterproof, well-drained shower base forms the foundation of any successful bathroom renovation, preventing costly water damage and mold issues that can compromise your home’s structural integrity.
Without proper installation, moisture can seep through floors and walls, creating expensive repairs and health hazards over time.
The Schluter Shower Pan system has become a popular choice among both professionals and DIY enthusiasts due to its reliable waterproofing technology and straightforward installation process.
This prefabricated system eliminates the guesswork involved in traditional mud-bed installations while providing superior moisture protection and consistent drainage performance.
This comprehensive guide walks you through each step of installing a Schluter shower pan, helping you achieve professional-quality results that will protect your bathroom investment for years to come while ensuring optimal water management and structural integrity.
What Is a Schluter Shower Pan?
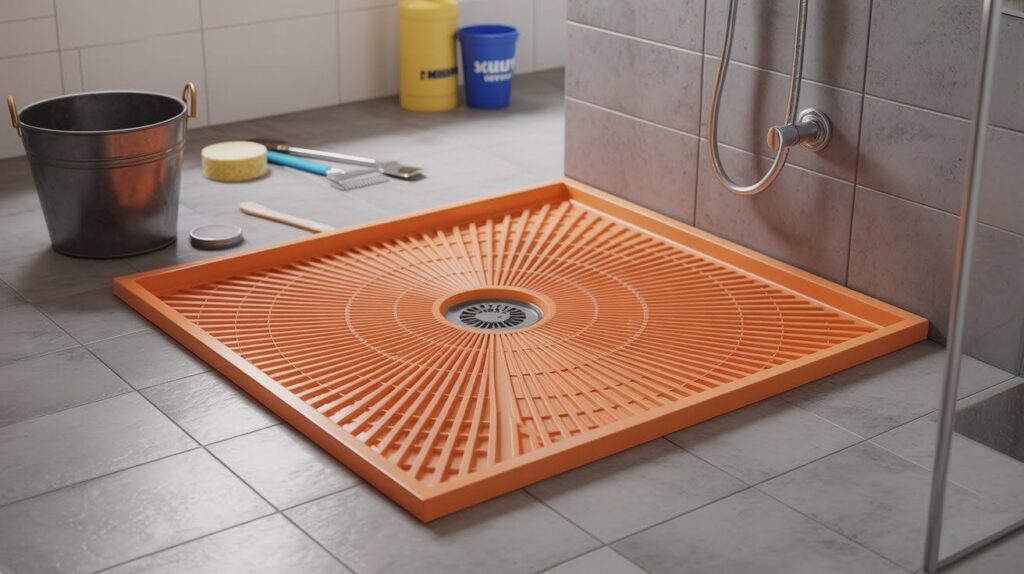
Schluter shower pans are pre-sloped waterproof systems with integrated drains, offering lightweight installation and compatibility with various tile types.
Overview of the Schluter Kerdi System
The Schluter Kerdi system consists of three essential components that work together to create a complete waterproof shower base: a pre-sloped foam tray that directs water toward the drain, an integrated drain assembly that connects seamlessly to your plumbing, and a waterproofing membrane that seals the entire shower area.
This engineered system is specifically designed for reliable water management through precise slopes and drainage channels, while providing long-term durability that withstands daily use and moisture exposure.
The integrated design eliminates common failure points found in traditional shower construction methods.
Why Choose Schluter?
The lightweight foam construction makes Schluter shower pans significantly easier to handle and install compared to heavy concrete alternatives, reducing physical strain and installation time.
The system requires fewer specialized tools and skills, making it accessible for both professional contractors and confident DIY installers.
Schluter pans offer excellent compatibility with various tile types, from ceramic and porcelain to natural stone, providing flexibility in your design choices.
The system’s versatile design supports both curbless shower configurations for accessibility needs and traditional raised-threshold installations, accommodating different bathroom layouts and user preferences.
What You Need Before Installation
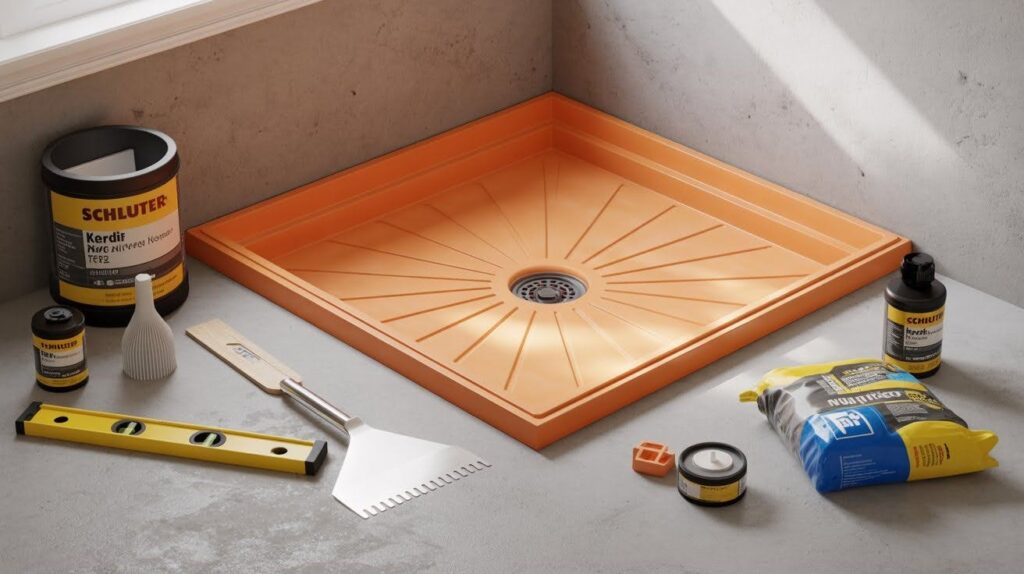
Tools & Materials
- Schluter Kerdi Shower Tray Kit including pre-sloped foam tray, drain assembly, and sealing components
- Unmodified thin-set mortar specifically recommended by Schluter for proper adhesion and waterproofing performance
- Notched trowel for mortar application, sharp utility knife for cutting materials, and reliable level for alignment
- PVC primer and cement required for secure drain connections to existing plumbing
- Chosen tiles and additional Schluter waterproofing accessories like corners, bands, and sealants for your specific configuration
Pre-Installation Checks
- Verify subfloor surface is completely level, clean, and free from debris, old adhesive, or irregularities that could affect stability
- Confirm shower layout measurements and drain positioning match your planned tile layout and plumbing connections
- Double-check that drain location aligns with existing plumbing rough-in to avoid costly modifications during installation
Installation Steps for Schluter Shower Pan
Installing a Schluter shower pan involves seven key steps from surface preparation through drain connection, waterproofing, and final tile installation.
Step 1: Prepare the Shower Area
Clean the surface thoroughly to remove all dust, debris, and any residual materials from previous installations that could interfere with proper adhesion.
Perform a dry-fit of the tray to confirm proper sizing, layout alignment, and compatibility with your shower space dimensions.
This preliminary check ensures the installation will proceed smoothly without unexpected adjustments or modifications during the actual installation process.
Step 2: Install the Drain Connection
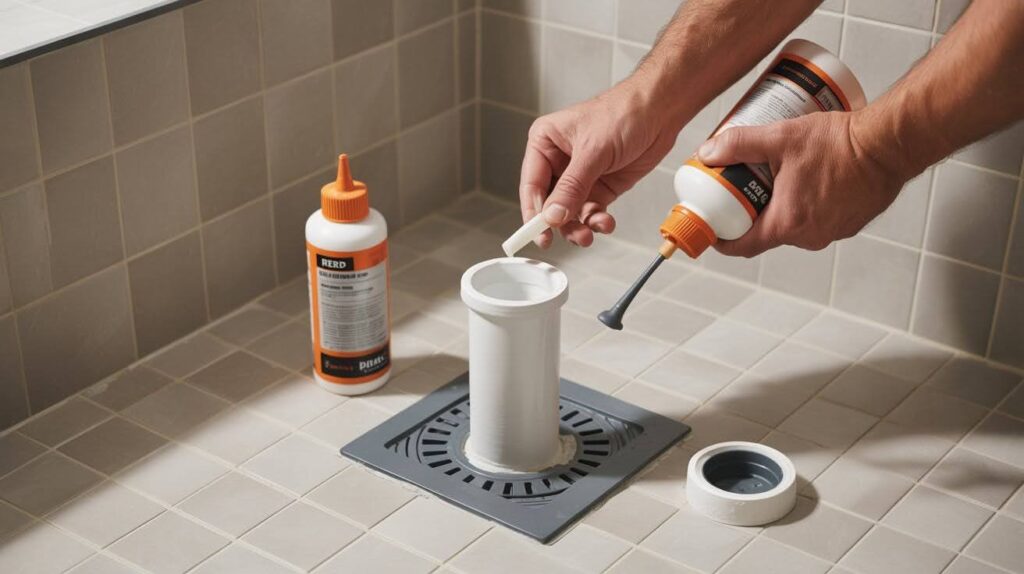
Apply PVC primer and cement to both the existing drain pipe and the Kerdi drain assembly following manufacturer specifications for proper chemical bonding.
Press the Kerdi drain firmly into place, ensuring a secure, leak-proof connection with your plumbing system.
Allow adequate curing time before proceeding to prevent connection failure that could compromise the entire waterproofing system’s effectiveness.
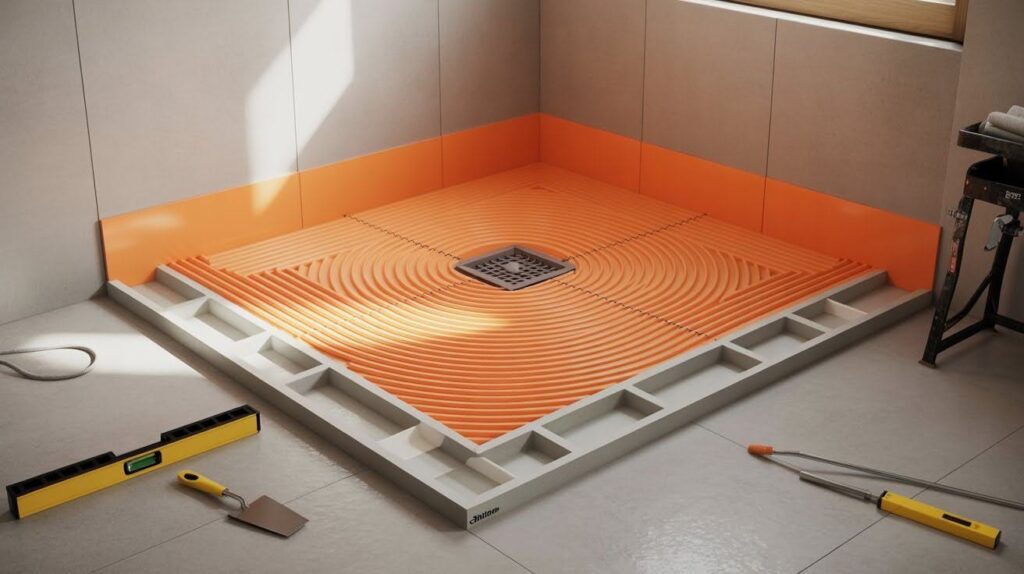
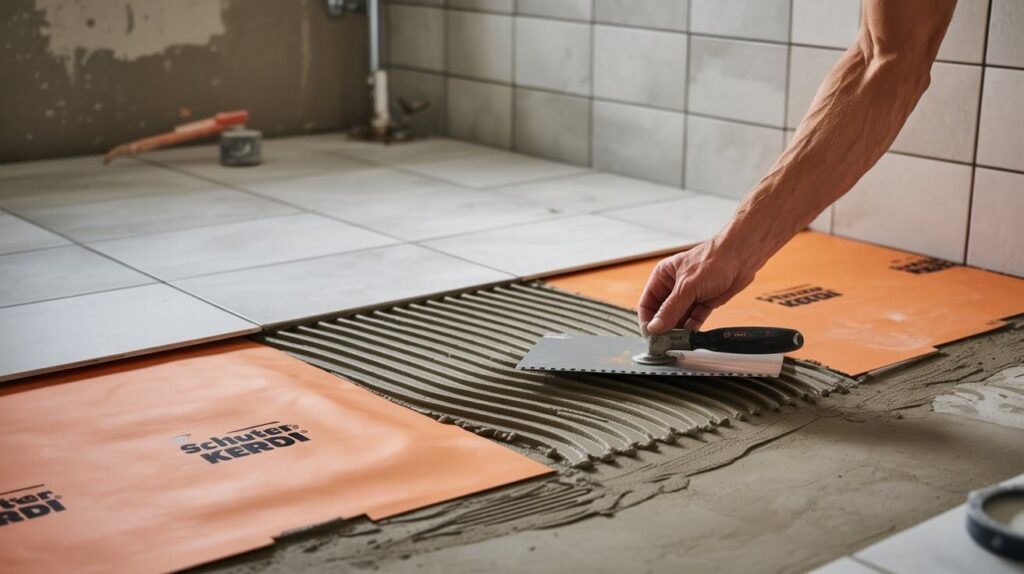
Step 3: Apply Thin-Set Mortar
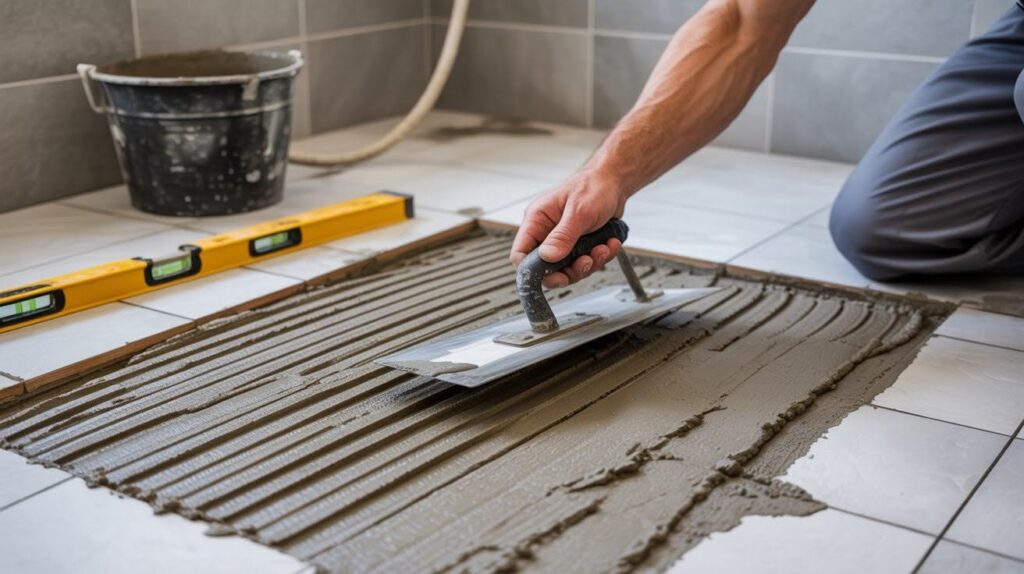
Mix unmodified thin-set mortar according to package directions and spread evenly across the prepared subfloor area using consistent techniques.
Use a notched trowel to create uniform ridges that ensure proper adhesion and eliminate air pockets beneath the tray.
Work efficiently as mortar has limited working time, and maintain consistent coverage to prevent weak spots in the installation.
Step 4: Set the Schluter Shower Tray
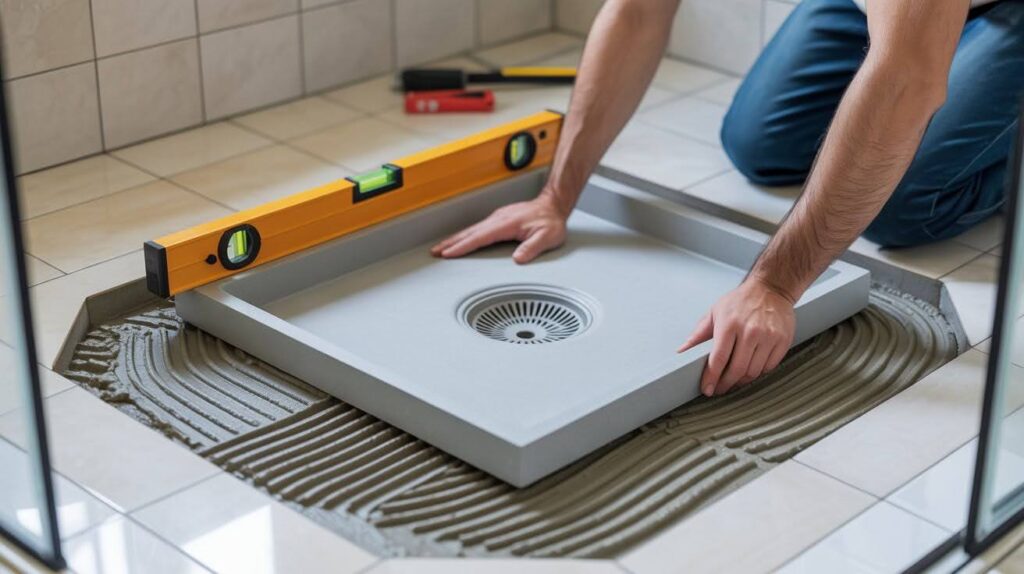
Position the shower tray carefully over the freshly applied mortar and press down firmly to achieve full contact with the adhesive layer.
Use a level to verify the pan sits evenly and maintains proper slope toward the drain for effective water drainage.
Check all edges and corners to ensure complete contact, adjusting pressure as needed to eliminate any gaps or high spots.
Step 5: Install the Kerdi Waterproofing Membrane
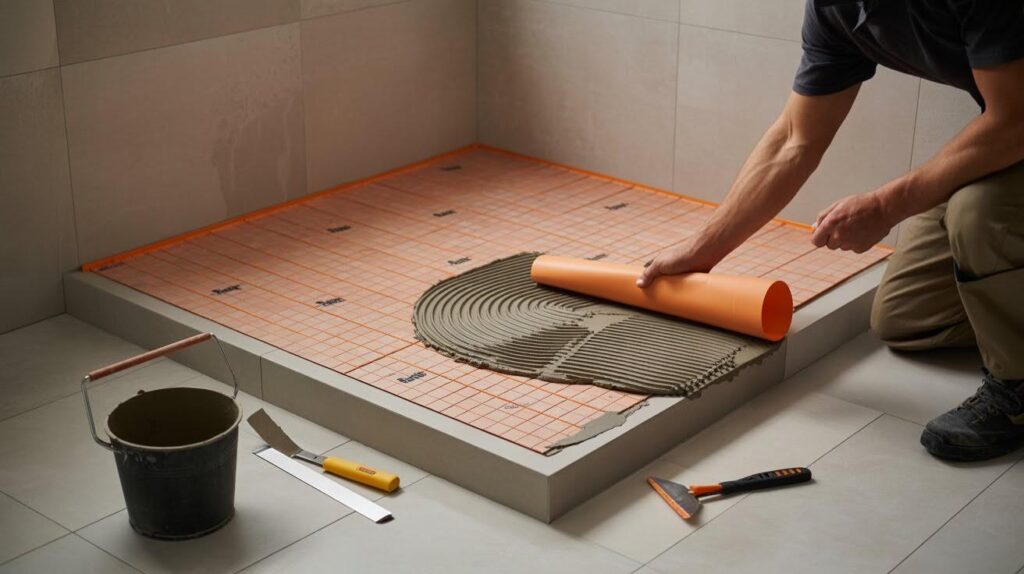
Apply a thin layer of thin-set mortar on top of the installed tray using smooth, even strokes to create uniform coverage.
Lay the Kerdi membrane over the mortar and press firmly to eliminate air bubbles and ensure complete adhesion throughout.
Extend the membrane up surrounding walls and over all seams to create continuous waterproof coverage that protects against moisture penetration.
Step 6: Seal Seams and Edges
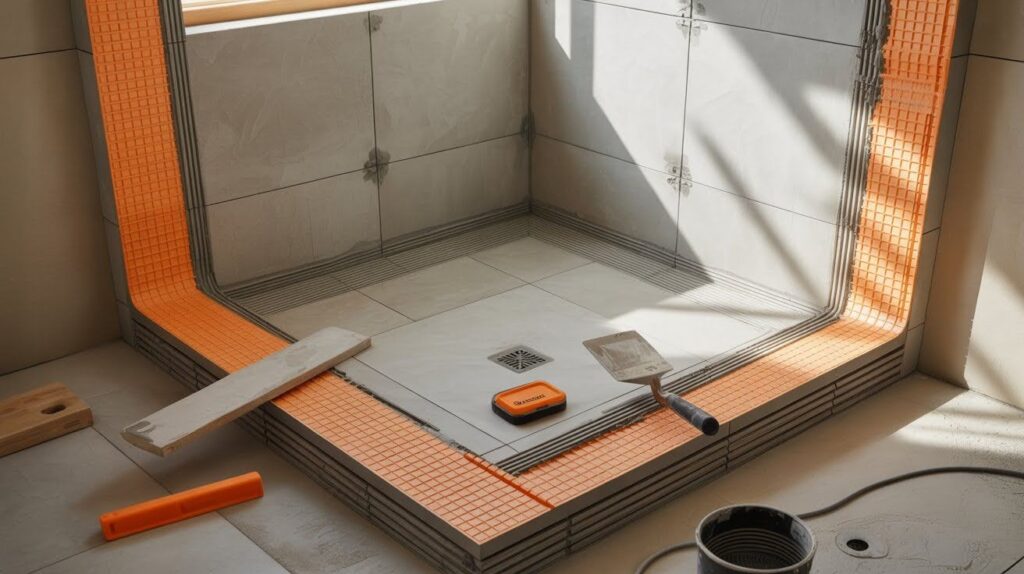
Apply Kerdi-Band over all corners, joints, and transition areas where the membrane meets walls or other surfaces requiring waterproof connections.
Press firmly and smooth out any wrinkles to ensure a complete watertight seal throughout the entire shower area.
Pay special attention to inside corners and wall transitions where water infiltration is most likely to occur if sealing is inadequate.
Step 7: Begin Tiling
Start your tile installation once the waterproofing membrane has properly set according to manufacturer timing recommendations for optimal adhesion.
Use tiles compatible with the Schluter system including ceramic, natural stone, or porcelain options that work effectively with the system’s adhesion properties.
Follow proper tiling techniques to maintain the waterproof integrity established by the underlying Schluter system throughout the installation process.
Post-Installation Tips
- Allow thin-set mortar to cure completely according to manufacturer guidelines, typically 24 to 48 hours depending on environmental conditions and mortar type
- Proper curing ensures maximum bond strength between all system components and prevents adhesion failure that could compromise the waterproof barrier
- Avoid walking on the installed membrane or beginning tile installation prematurely, as insufficient curing time can damage the waterproof seal
- Rushing the curing phase may result in costly repairs and potential water damage that negates the benefits of proper installation
- Consider performing an optional flood test by filling the shower pan with water to verify complete waterproof integrity before tile installation
- Monitor the water level for several hours to ensure no drops occur, indicating a properly sealed installation ready for final finishing work
- This preventive testing helps identify potential leak points while repairs remain simple and accessible rather than after permanent tile installation
Conclusion
Schluter shower pans offer a streamlined approach to waterproofing and drainage that simplifies installation while providing superior reliability compared to traditional methods.
The integrated system eliminates common failure points and guesswork, making professional-quality results achievable for both contractors and skilled DIY enthusiasts.
This versatile solution works exceptionally well in modern bathroom designs, accommodating both traditional curbed installations and contemporary curbless configurations that meet accessibility requirements.
The system’s adaptability makes it suitable for various design preferences and functional needs.
When installed carefully following manufacturer guidelines, Schluter shower pans deliver lasting performance that protects your investment for years to come.
The system’s compatibility with various tile types and finishes ensures your waterproofing foundation won’t limit your design choices, allowing you to create beautiful, functional shower spaces with confidence in their long-term durability and performance.
Frequently Asked Questions
How long does it take to install a Schluter shower pan?
The installation process typically takes 1-2 days, including preparation, installation, and initial curing time for the thin-set mortar. Additional time may be needed for waterproofing membrane application and final testing before you can begin tile installation.
Can I install a Schluter shower pan myself or do I need a professional?
DIY installation is possible if you have basic construction skills and follow the manufacturer’s instructions carefully. However, consider hiring a professional if you’re uncomfortable with plumbing connections or lack experience with waterproofing systems.
What type of mortar should I use with Schluter shower pans?
Always use unmodified thin-set mortar as specified by Schluter for proper adhesion and waterproofing performance. Modified mortars can interfere with the Kerdi membrane system and compromise the waterproof seal over time.
How do I know if my Schluter shower pan is properly waterproofed?
Perform a flood test by filling the shower pan with water and monitoring for leaks over several hours. If the water level remains constant with no visible moisture outside the pan area, your installation is properly sealed.
What happens if I damage the Kerdi membrane during installation?
Small cuts or punctures can be repaired using Kerdi patches and thin-set mortar following Schluter’s repair procedures. For larger damage, you may need to replace sections of the membrane to maintain waterproof integrity.