
Ever stepped into a friend’s bathroom and wondered how they achieved that sleek, hotel-like shower?
You’re looking at a curbless shower. And yes, you can build one too.
These barrier-free showers aren’t just about looks. They solve real problems. No more stubbing your toe on that annoying lip. No more helping elderly parents step over high edges. No more water pooling in corners.
Here’s what makes them special: seamless floors that flow right into your shower. Zero tripping risks. Fewer spots for leaks to start. Perfect for wheelchairs and walkers.
Sound complicated? It’s not.
You have three main options: prefab bases, mud bed construction, or raising your entire bathroom floor. Each has its place.
Ready to see which method fits your space and budget?
What is a Curbless Shower?
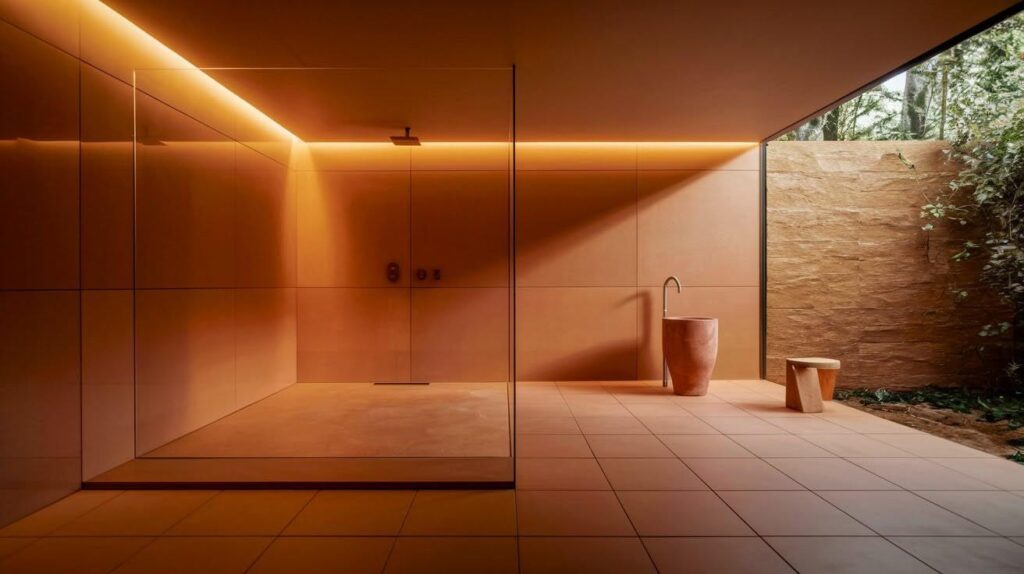
Think of your current shower. See that raised edge you step over? That’s the curb.
Now imagine it’s gone.
A curbless shower sits flush with your bathroom floor. No barrier. No step. Just a smooth transition.
Why does this matter?
Accessibility. Your aging parents can walk right in. No tripping risks. Wheelchair users roll in easily.
Design-wise? Your bathroom looks bigger. The floor flows seamlessly. You can use any tile pattern you want.
Traditional showers box you in. Curbless designs open everything up.
One continuous surface. Maximum flexibility.
Tools and Materials You’ll Need
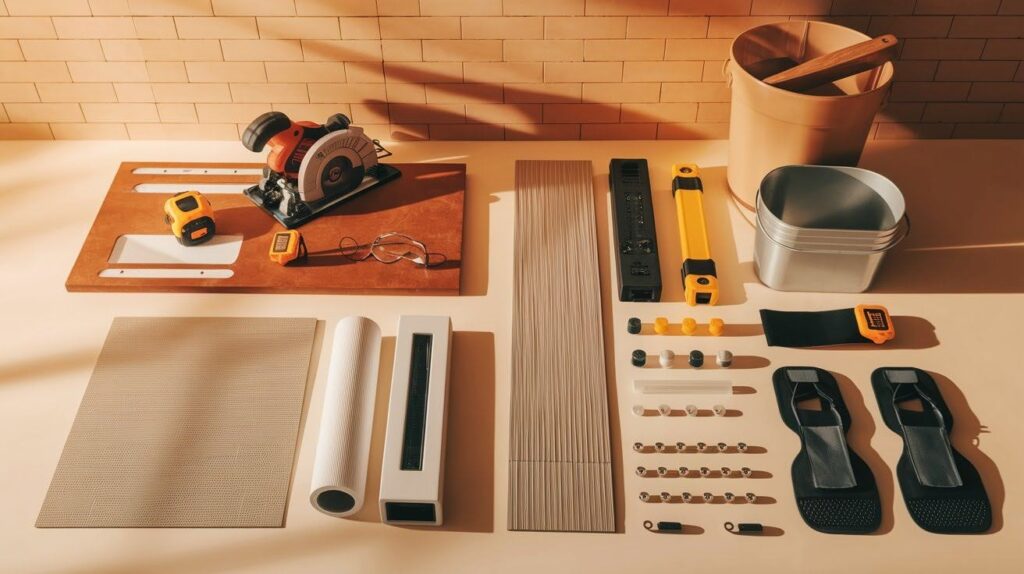
Get organized before you start. Nothing worse than stopping mid-project for a hardware store run.
Essential Tools:
- Circular saw
- Impact driver
- 4-foot level
- Tape measure
- Notched trowel
- Mixing bucket
- Utility knife
- Safety glasses
- Knee pads
Materials Checklist:
- Cement backer board
- Waterproofing membrane
- Linear drain assembly
- Thinset adhesive
- Grout
- Silicone caulk
- Tile spacers
- Screws and washers
Steps to Build a Curbless Shower
A comprehensive walkthrough covering planning, preparation, installation, and finishing touches to create your barrier-free shower from start to completion.
Step 1: Plan and Prepare
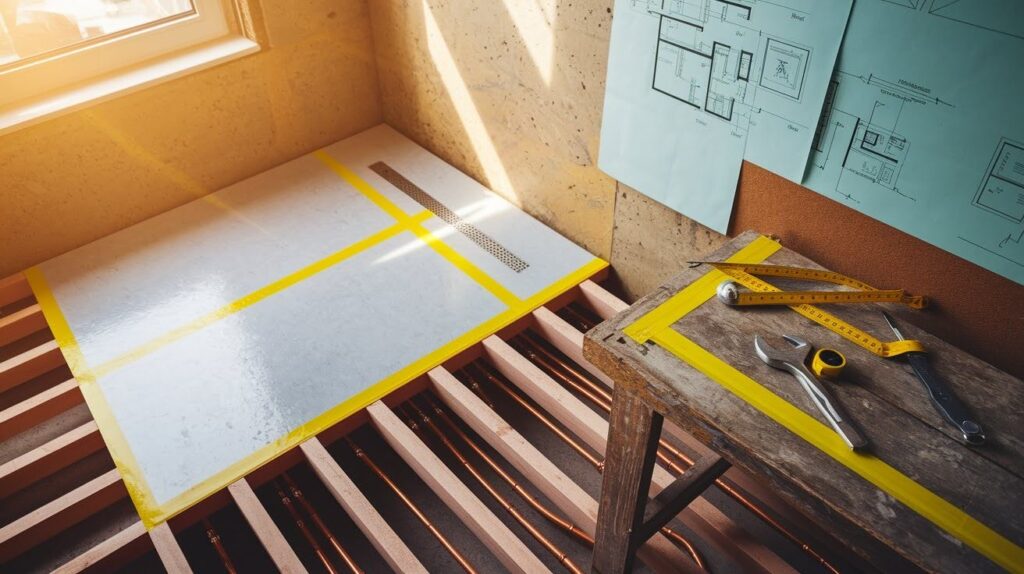
Start with measurements and mark your shower area clearly. Check your drain location to ensure it clears the floor joists.
Move it now if needed. Choose your method between a prefab system or a custom mud bed.
Here’s an important note: cutting joists weakens your floor, so call a structural engineer first. If you can’t cut joists, raise your entire bathroom floor instead to solve the problem.
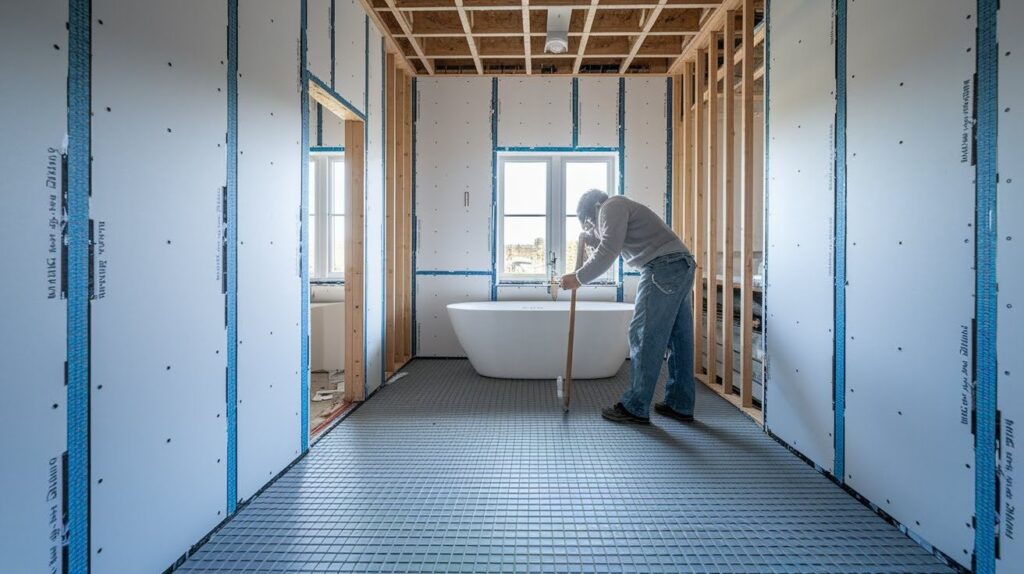
Step 2: Cut and Reinforce the Subfloor
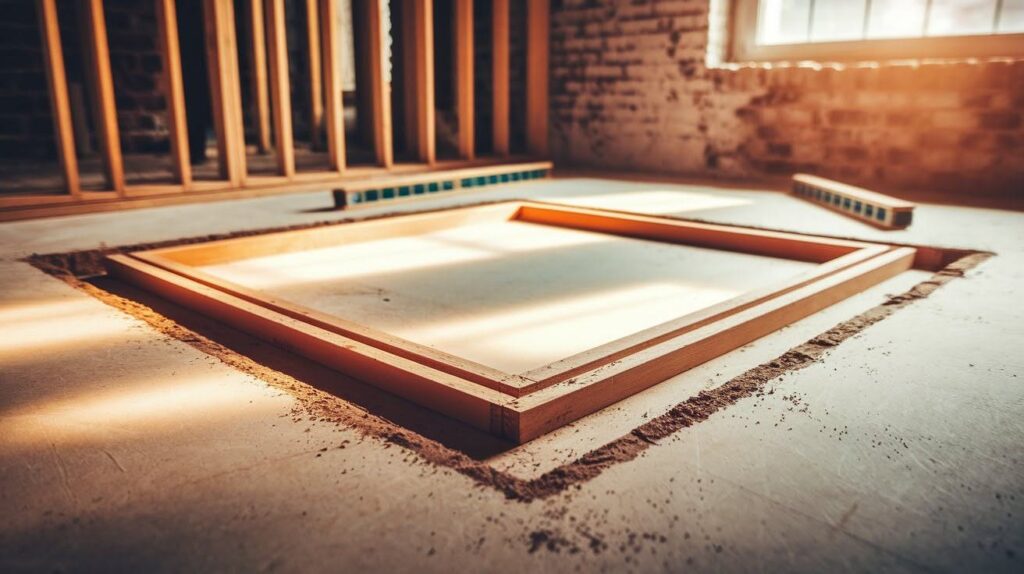
Mark your shower base outline carefully and cut the subfloor opening. Take your time with this step.
Add 2×4 blocking around the perimeter to prevent flex and squeaks later. Double-check that everything is level and secure before moving forward.
Step 3: Install the Shower Base or Mud Bed
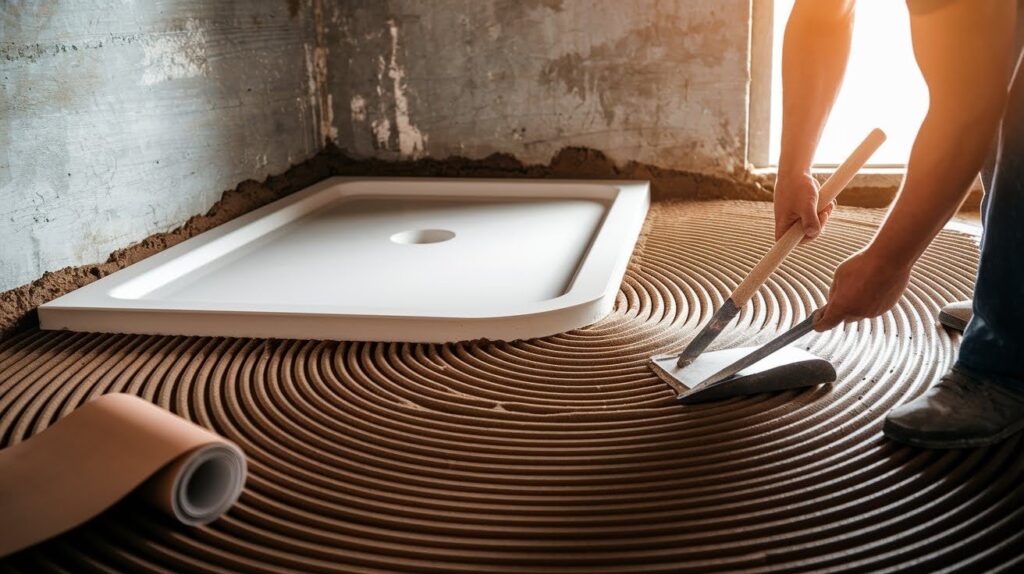
For prefab bases, apply construction adhesive to the subfloor first. Set your pre-sloped base and check the level in all directions.
Fasten according to the manufacturer’s specifications and don’t skip any screws.
For custom mud beds, mix deck mud to the proper consistency without making it too wet. Apply your preslope layer working toward the drain.
Install PVC liner or liquid waterproofing with proper seam overlap. Add the final mud layer and create a proper slope to drain.
Step 4: Install Backer Board
Install cement board on floors and walls now.
Cut pieces to fit while wearing a dust mask. Seal all joints with latex caulk and never use silicone here.
The surface must be smooth for a proper waterproofing application.
Step 5: Waterproof the Shower
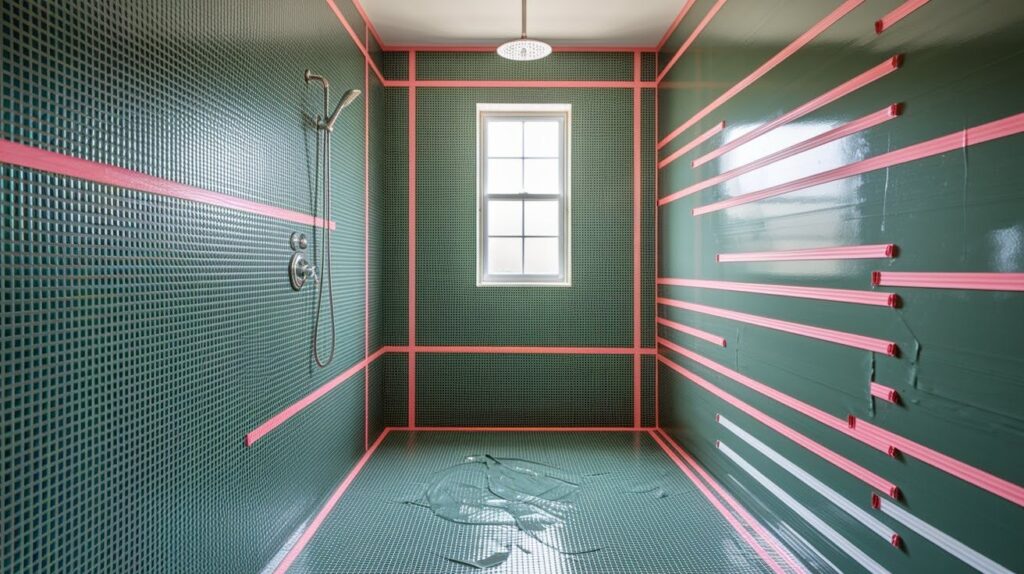
This step prevents disaster, so don’t rush it. Apply waterproofing tape at all seams and corners.
Brush or roll liquid membrane like Tank-10 with two coats. Alternatively, use sheet membrane systems like Schluter Kerdi.
Let everything cure completely before moving forward.
Step 6: Install the Drain
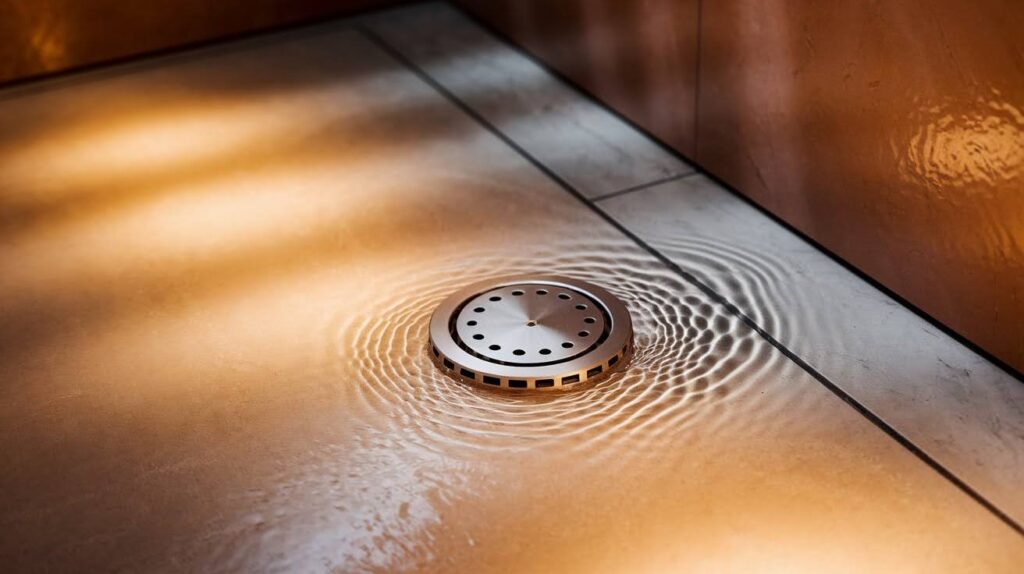
Position the drain kit exactly per the manufacturer’s instructions.
Secure all connections tightly and seal the drain area with a membrane, allowing no gaps.
Test for leaks before continuing with the next step.
Step 7: Lay the Tile
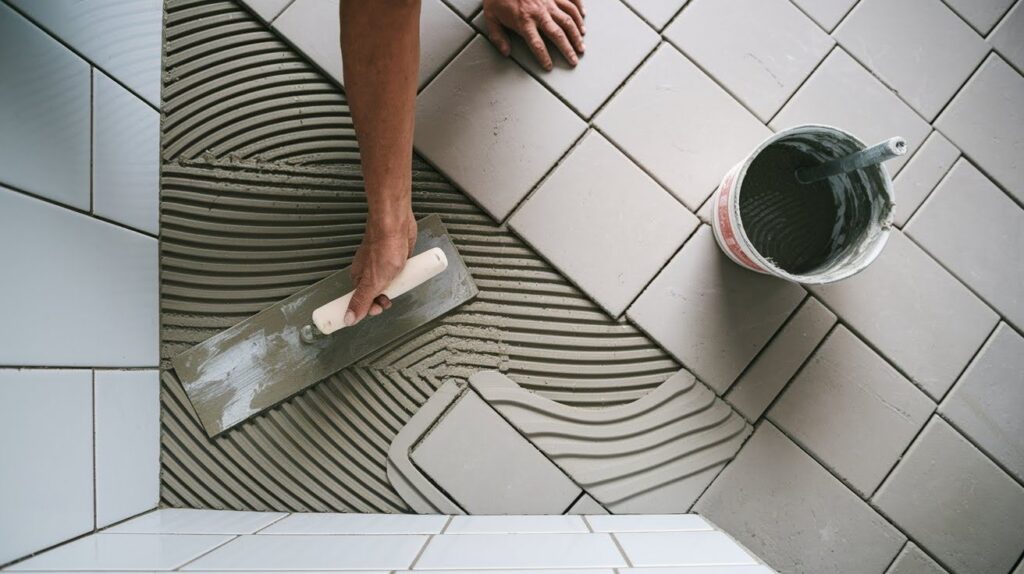
Choose slip-resistant tile for safety.
Back-butter tiles near the perimeter to maintain a smooth slope. Work in small sections and keep grout lines consistent.
Grout and seal for a finished appearance.
Step 8: Add Accessibility and Safety Features
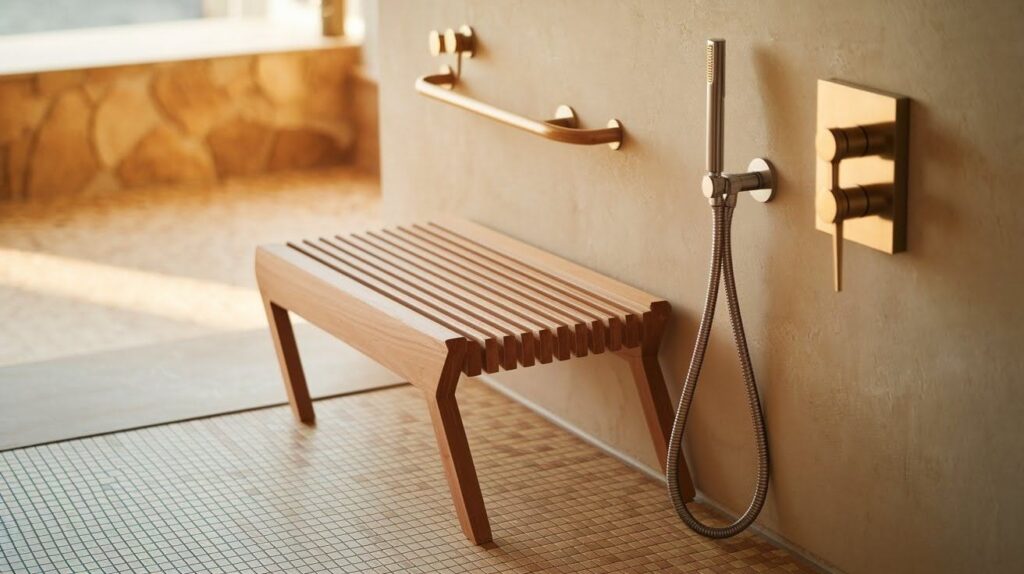
Install a thermostatic shower valve to prevent dangerous temperature spikes. Add a fold-down bench or permanent shower seat for convenience.
Mount a handheld showerhead with an adjustable height rail. Apply non-slip treatments and install grab bars in stud locations. Your curbless shower is now complete.
Maintenance Tips
- Check grout lines monthly for cracks or gaps. Small problems become big headaches fast.
- Inspect waterproofing around the drain area regularly. Look for loose edges or peeling membrane.
- Clean glass doors and panels weekly with a squeegee. Soap scum builds up quickly in barrier-free designs.
- Rinse your floor with a handheld spray after every shower. This removes soap residue and prevents corner buildup.
- Schedule monthly deep cleaning sessions. Consistent care keeps everything looking new and functioning properly.
Final Thoughts
After building dozens of these showers, I can tell you one thing: curbless designs change everything.
You get style that never goes out of fashion. Safety that protects your family. Convenience that makes daily routines easier.
Your bathroom layout and budget will guide your choice. Tight budget? Prefab systems work great and save precious time. Want something completely custom? Go with mud bed construction for total control.
I’ve seen homeowners struggle with this decision. Here’s my advice: start simple if you’re new to tile work. You can always get fancy on your next project.
The best shower is the one you finish. Choose the method that matches your skill level. Your back will thank you later.
Frequently Asked Questions
What is the minimum slope required for a curbless shower?
Your shower floor needs a minimum 1/4 inch slope per foot toward the drain. This ensures proper water drainage and prevents pooling that could cause mold or structural damage.
Can I install a curbless shower on a concrete slab?
Yes, but it requires raising the bathroom floor or recessing the drain into the concrete. You’ll need professional help to cut into the slab and ensure proper drainage without compromising the foundation.
How much does it cost to build a curbless shower?
Expect to spend $3,000-$8,000 for a complete installation depending on size and materials. Prefab systems cost less than custom mud beds, while high-end tiles and fixtures increase the total price.
Do curbless showers leak more than traditional ones?
Not when built correctly with proper waterproofing and slope. The key is quality installation with continuous membrane coverage and sealed joints around all penetrations.
What size should a curbless shower be?
Plan for at least 36 inches wide by 36 inches deep for comfortable use. Larger spaces work better since you need room for proper slope and to prevent water from splashing outside the shower area.