
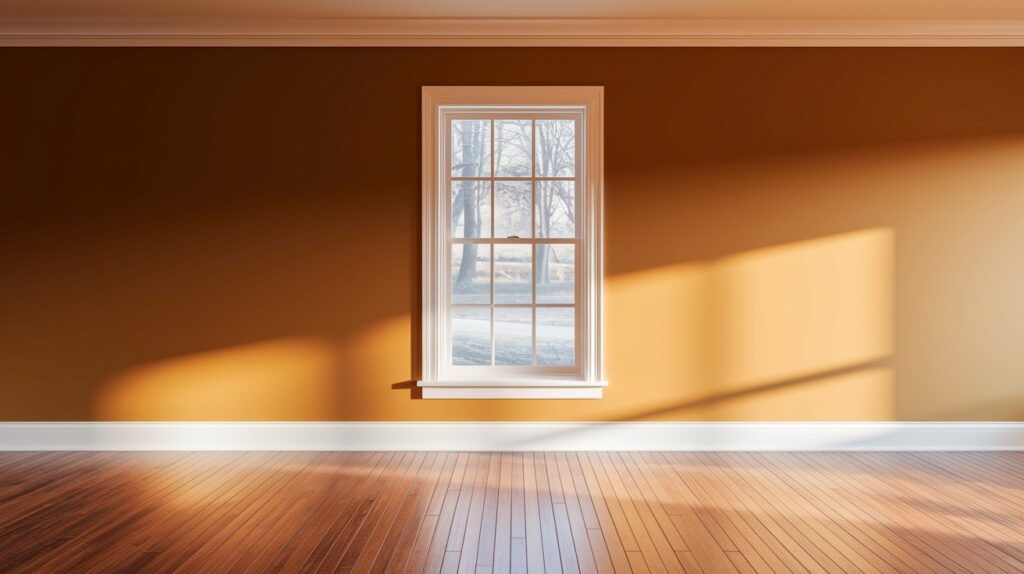
Windows bring light and life to our homes. But the space around them? Often wasted.
I’ve seen countless rooms where awkward gaps sit empty beside beautiful windows. What a missed opportunity.
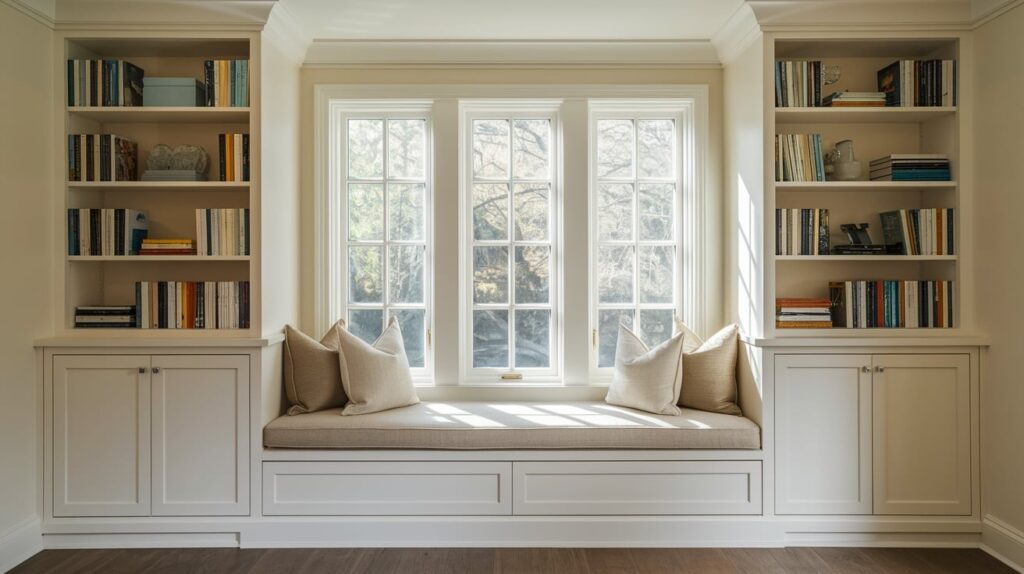
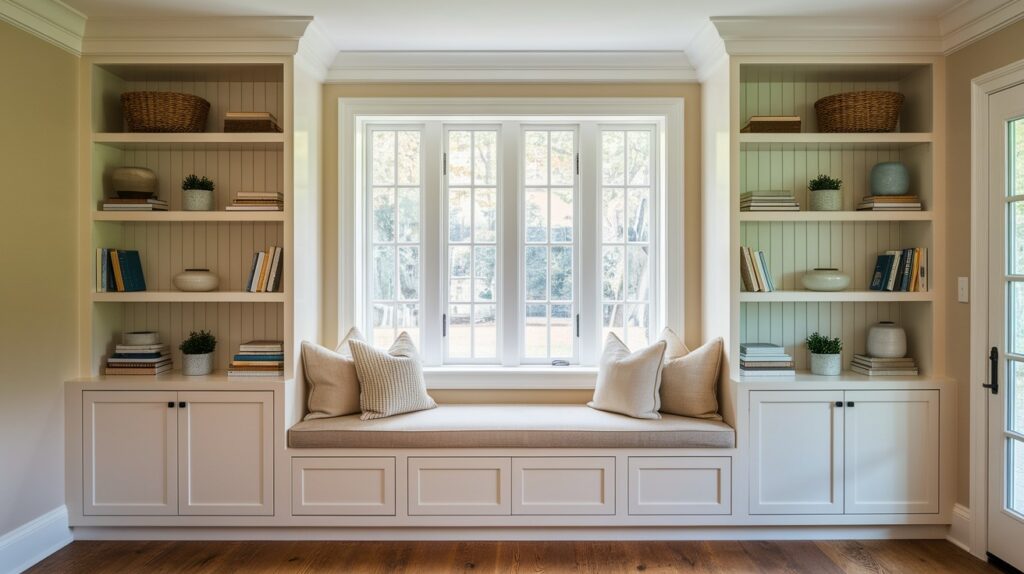
Built-ins around windows solve this problem brilliantly. They give you extra storage without eating up floor space. They create cozy reading spots. And they make any room look more expensive and thoughtful.
Think about it. You get organized storage AND a focal point that draws the eye.
This guide walks you through everything. From measuring your space to picking materials. From DIY basics to when you need a pro. By the end, you’ll know exactly how to transform that underused window area into something both beautiful and useful.
Ready to make every square inch count?
Why Built-Ins Around a Window Are a Game Changer
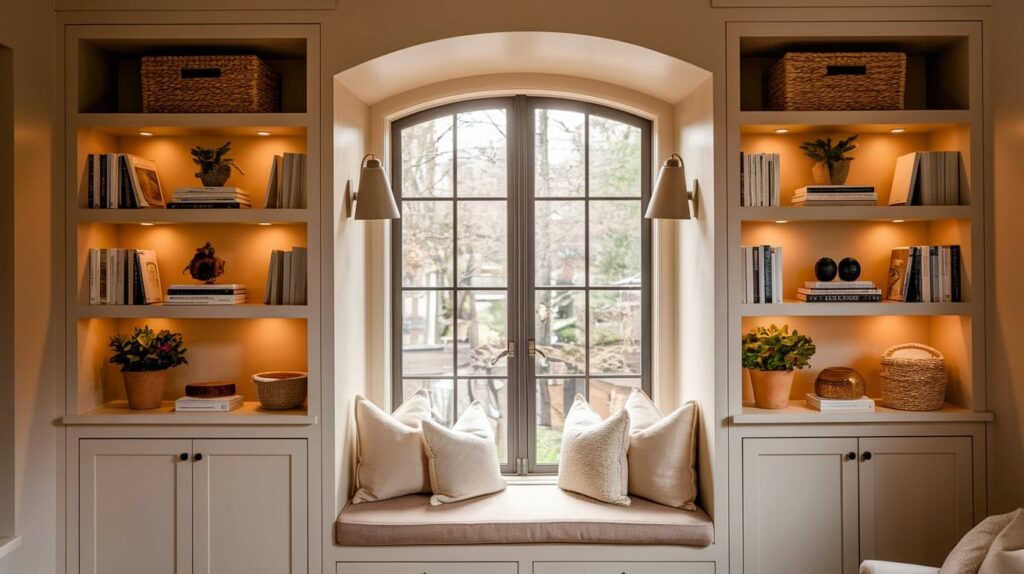
Small homes need smart solutions. Built-ins around windows create storage without sacrificing floor space. You can fit books, games, and decorative items in spots that would otherwise stay empty. Every vertical inch becomes useful.
Plain walls look boring. Built-ins create depth and visual appeal. They make rooms feel more expensive. More custom. Like someone thought about the design.
Even simple shelves can transform a basic room into something special. The window becomes a focal point instead of just another opening in the wall.
Perfect for storing blankets, books, or seasonal items. The seating doubles as extra space when guests come over. It’s like getting two pieces of furniture in the footprint of one.
How to Design Built-Ins Around a Window
Create functional storage and seating around your windows with this complete step-by-step guide. Learn to plan, design, and build custom-built-ins that maximize space while adding style to any room.
Step 1 – Evaluate Your Space
Start with measurements. You need exact numbers for width, height, and depth around your window.
Measure the window frame itself. Then measure the wall space on each side. Don’t forget to measure floor-to-ceiling height.
Check how much natural light comes through. You don’t want to block precious sunlight with your design.
Look for obstacles. Radiators, electrical outlets, and air vents all affect your plans. Note where they sit before you start designing.
Examine the existing trim and molding. Your built-ins should match or complement what’s already there.
Step 2 – Decide on the Built-In Style
Think about what you need most. Storage? Seating? Display space? A work area?
Bookshelves work great for displaying collections and storing items. Cabinets hide clutter behind closed doors. Bench seating creates a cozy reading nook.
Full wall units make the biggest impact but cost more.
Match your home’s style. Modern homes look great with clean lines and minimal trim. Farmhouse style calls for more decorative elements. Traditional homes need classic proportions and detailed molding.
Don’t fight your home’s natural style. Work with it.
Step 3 – Choose the Right Materials

Wood remains the most popular choice. Pine costs less but dents easily. Oak and maple last longer but cost more.
Plywood with hardwood veneer gives you durability at a reasonable price. MDF works well if you plan to paint everything.
Consider your finish carefully. Paint hides imperfections and costs less. Stain shows off wood grain but requires better materials.
Don’t skip the trim work. Crown molding and baseboards make built-ins look professional and finished.
Step 4 – Plan for Storage and Display
Mix open and closed storage. Open shelves show off books and decorative items. Closed cabinets hide the messy stuff.
Plan for different-sized items. Books need different shelf heights than picture frames or storage baskets.
Add hidden drawers in unexpected places. The bottom of a window seat. Behind cabinet doors. These surprise storage spots keep clutter under control.
Think vertically. Floor-to-ceiling units maximize storage in small rooms.
Step 5 – Add Seating
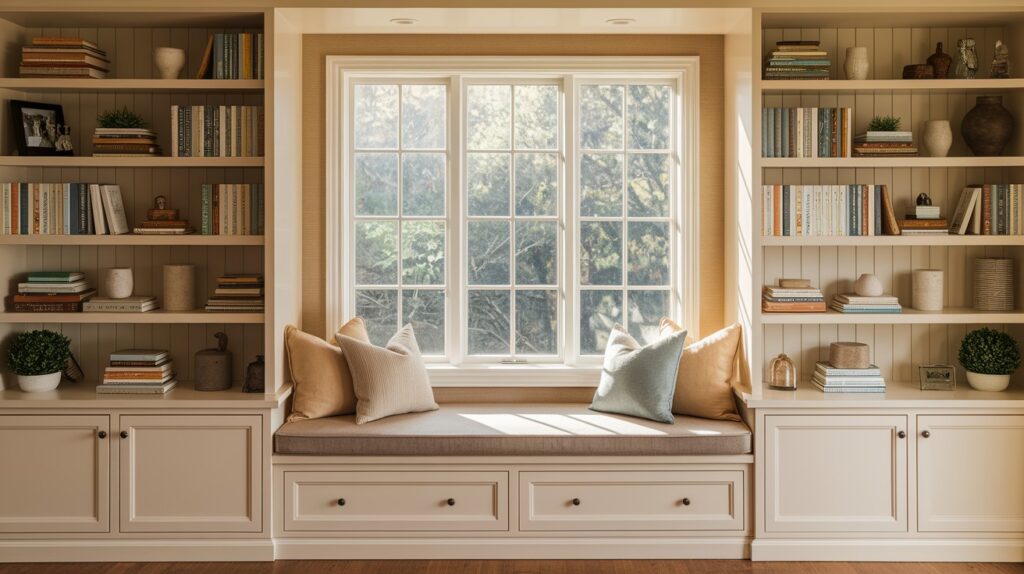
Window seats create instant charm. They work especially well with bay windows or wide window sills.
Build storage underneath the seat. Hinged tops give you access to hidden compartments. Perfect for storing blankets, pillows, or out-of-season items.
Add cushions for comfort. Choose fabric that complements your room’s colors.
Make sure the seat height feels comfortable. Standard seat height runs 16-18 inches from the floor.
Step 6 – Lighting and Accessories
Good lighting makes built-ins shine. Literally.
Add sconces on either side of the window. Or install recessed lights above the shelves. Under-shelf LED strips create a warm glow for evening reading.
Style your shelves thoughtfully. Mix books with plants, baskets, and personal items. Group items in odd numbers. Leave some breathing room.
Don’t overcrowd the shelves. The space looks intentional and clean.
Popular Built-In Ideas for Different Rooms
Window Seats with Storage Drawers: Perfect for bedrooms, family rooms, and breakfast nooks. The seat provides extra seating while drawers underneath store linens, toys, or seasonal items.
Add comfortable cushions and throw pillows. Create a cozy reading corner that everyone will love.
Floor-to-Ceiling Shelves Around the Window: Maximizes storage in small spaces. Great for home offices, family rooms, or anywhere you need lots of book storage.
Frame the window beautifully while creating dramatic vertical lines that make rooms feel taller.
Built-In Desks and Workspaces Under Windows: Takes advantage of natural light for homework or office work. Add shelves above for supplies and reference books.
Perfect for kids’ rooms or home offices where space is tight.
Cozy Reading Nooks with Overhead Cabinets: Combining seating, storage, and display in one compact design. Overhead cabinets store items you don’t use daily.
Styling Tips for Built-Ins Around Windows
- Place light-colored books on the shelves closest to the windows
- Use clear glass containers and vases
- Add small plants that thrive in natural light
- Keep decorative items low-profile near the window
- Choose mirrors to reflect more light around the room
- Avoid heavy, dark objects that create shadows
- Use white or light-colored storage baskets
- Position artwork away from direct sunlight to prevent fading
- Select translucent window treatments when possible
Conclusion
Built-ins around windows transform wasted space into functional, beautiful storage. They make rooms feel more custom and expensive without breaking the budget.
Start by evaluating your space and deciding what you need most. Choose materials and styles that match your home’s character.
Don’t try to do everything at once. Pick one window and create something amazing there first. You can always expand later.
The key is planning carefully and being realistic about your skills. Simple designs often work better than complex ones.
Your window deserves better than space around it. With some planning and effort, you can create storage and seating that serves your family for years to come.
Time to turn that overlooked window area into your new favorite spot.
Frequently Asked Questions
Do built-ins increase home value?
Yes, quality built-ins typically add 5-15% to home value. They’re seen as permanent improvements that enhance both function and visual appeal, making homes more attractive to potential buyers.
Can I add built-ins around any type of window?
Most windows accommodate built-ins, but casement windows that swing outward need special planning. Bay windows and large picture windows work exceptionally well for built-in projects.
What’s the best material for built-ins?
Plywood with hardwood veneer offers the best value, combining durability with affordability. MDF works well for painted finishes, while solid wood provides premium quality at a higher cost.
How long does it take to build window built-ins?
Simple DIY projects take 2-4 weekends, while complex designs may require 3-6 weeks. Professional installations typically complete in 3-7 days, depending on size and complexity.
Should I include lighting in my window built-ins?
Lighting significantly enhances both function and ambiance. LED strip lights under shelves or small sconces create perfect task lighting for reading while highlighting your decorative displays beautifully.