
I understand. You want backyard privacy but contractor quotes are killing your budget.
Here’s the truth: building a DIY privacy fence doesn’t require thousands of dollars or professional skills. I’ve walked friends through this exact project, so I know you can handle it too.
This guide covers everything you need: affordable wood options, seven budget-friendly fence designs, real project costs, step-by-step building instructions, and long-term maintenance tips.
You’ll learn which materials last longest for less money, how to plan smartly from the start, and which expensive mistakes to avoid.
Let’s build your fence the right way without breaking the bank.
Understanding DIY Privacy Fence Basics
Building a privacy fence yourself cuts costs by 50% or more versus hiring contractors. Most homeowners complete a basic fence in 2-3 weekends with simple tools.
This guide covers materials, designs, costs, and installation methods for building a fence that lasts without overspending.
You don’t need advanced carpentry skills or expensive equipment to get professional results. With proper planning and the right approach, even first-time builders can create a sturdy, attractive fence.
The satisfaction of completing this project yourself makes it even more rewarding.
Planning Your DIY Privacy Fence (Without Overspending)

Smart planning saves money and prevents expensive mistakes.
Measuring Your Space Accurately: Measure fence line length with stakes and string. Note slopes. Sketch measurements to prevent waste and calculate costs.
Checking Local Codes & HOA Rules: Call your building department first. Most areas limit fences to 6-8 feet. Permits cost $50-$150. Check HOA rules before building.
Choosing the Right Fence Height for Maximum Privacy: A 6-foot fence blocks most views and costs less. For second-story coverage, consider 7-8 feet with stronger posts.
Understanding Material Costs Before You Start: Pressure-treated lumber costs $2-$4 per linear foot. Cedar runs $5-$8. Shop three stores and add 10% extra for mistakes.
Budget-Friendly Materials for a DIY Privacy Fence

Choose wood that balances upfront costs with longevity.
Pressure-treated pine costs least, handles weather well, and lasts 15-20 years. Available everywhere. Stain any color.
Cedar looks better and naturally resists rot. Reddish tone ages to silver-gray. Lasts 20-30 years.
Untreated pine costs less but needs immediate sealing. Great for custom colors. Lasts 10-15 years with upkeep.
Composite costs 20-30% more but never needs staining. Won’t rot or warp. Lasts 25-30 years.
Free pallets or salvaged wood cost almost nothing. Weathered look with character. Check for damage first.
Use 3-inch exterior screws. Post bases cost $5-$15 each. Buy galvanized hardware. Budget $50-$150 total.
7 Affordable DIY Privacy Fence Designs You Can Build
Seven designs offering real privacy without complex techniques or expensive materials.
1. Horizontal Slat Fence

Alternating 1×6 and 1×2 boards create modern lines with clean spacing between each slat.
This design goes up fast and requires minimal cutting, making it perfect for DIY builders who want a contemporary look without complicated measurements.
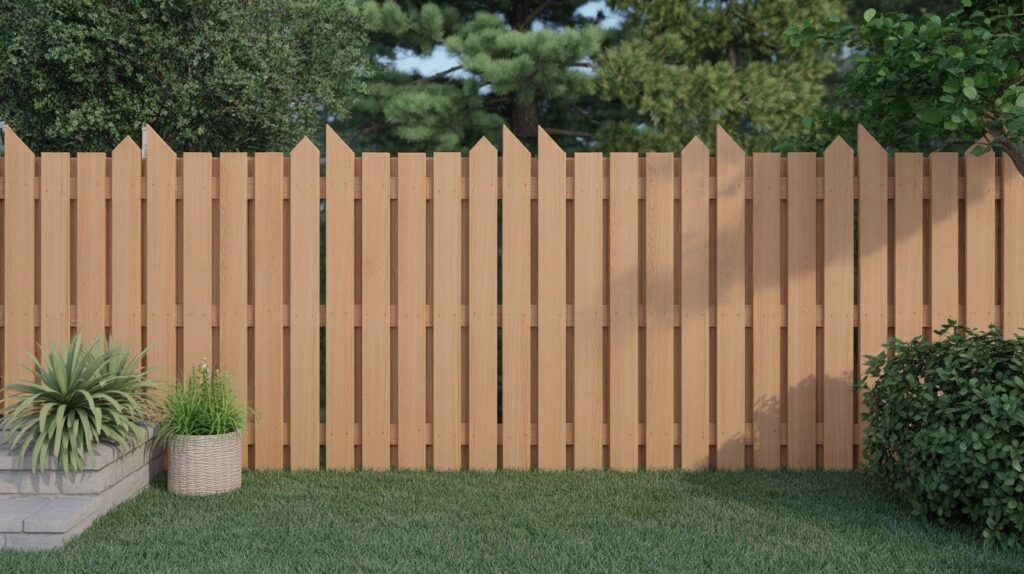
2. Shadowbox Fence

Staggered pickets block views from both sides without using extra wood compared to solid fences.
The gaps between boards reduce wind damage and prevent the fence from acting like a sail during storms.
3. Vertical Board-on-Board Fence
Overlapping boards block all sightlines completely while creating an attractive appearance on both sides.
This double-sided design eliminates the “good side vs. bad side” problem that comes with traditional fences.
4. Fence-Top Privacy Extension

Add 1-2 feet of height to existing fences using lattice panels or additional boards.
This upgrade costs under $200 for most yards and doesn’t require tearing down your current fence.
5. Simple Privacy Screen Panel
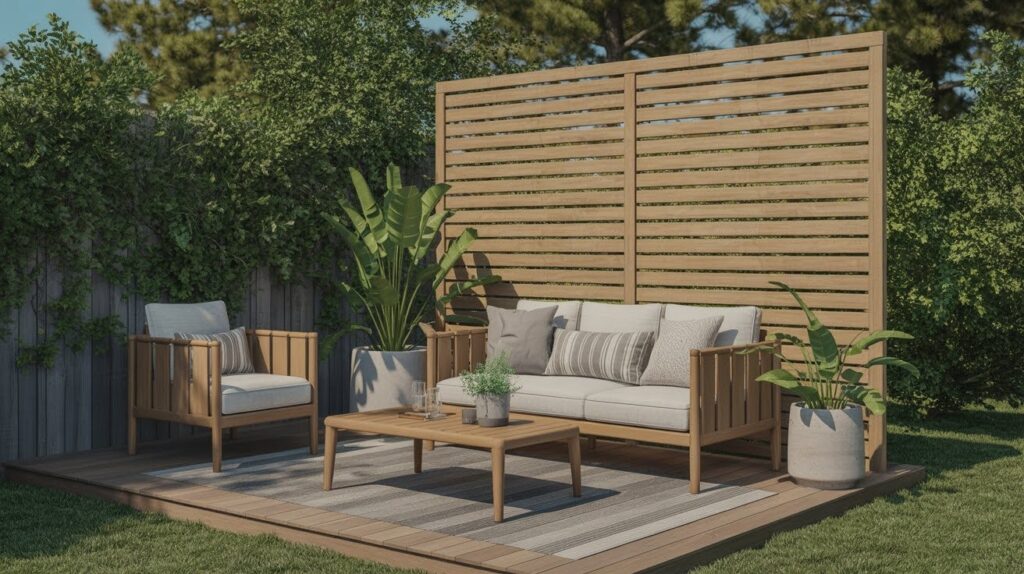
Freestanding panels create privacy on decks and patios without permanent installation.
No digging post holes or permits needed since these units simply sit in place with weighted bases.
6. Reclaimed Wood Panel Fence

Salvaged lumber from old barns or pallets creates rustic fence panels with character and texture.
Material costs stay almost free if you source wood locally, though you’ll spend time cleaning and prepping boards.
7. No-Dig Panel Fence

Prebuilt fence panels attach to metal spikes that pound directly into the ground.
The entire fence installs in hours instead of days with no concrete or digging required.
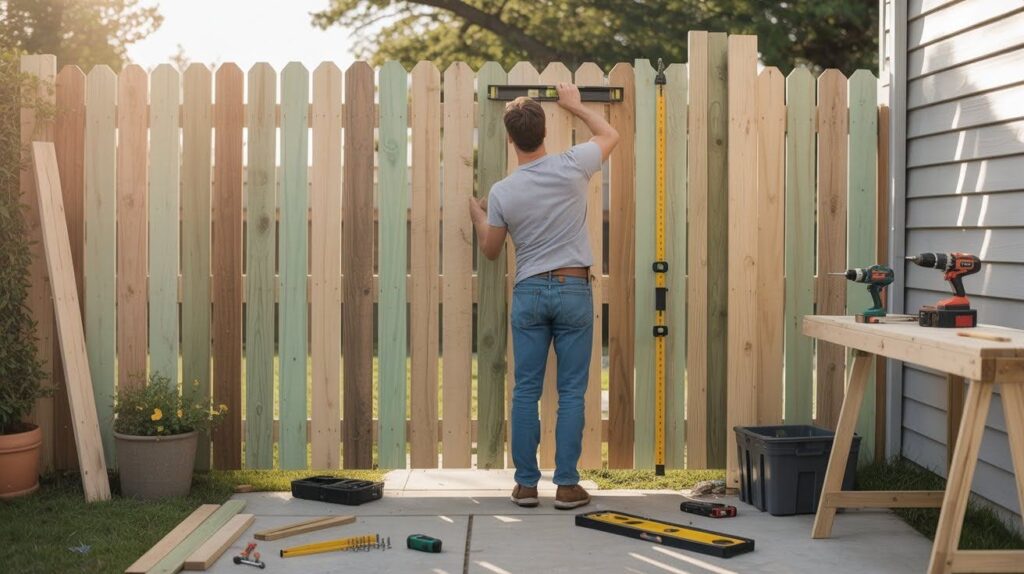
Step-by-Step Guide: How to Build a DIY Privacy Fence on a Budget
Six steps to build a solid, professional-looking fence within budget.
Step 1: Gather Tools & Materials

Rent expensive tools like post hole diggers or circular saws instead of buying them. Shop at three different stores to compare prices and look for seasonal sales on lumber.
Buy all your materials at once to avoid price increases and ensure wood from the same batch matches in color.
Step 2: Pre-Stain Boards

Stain all boards before installation while they’re flat on sawhorses. This approach is much easier than staining an installed fence and ensures every surface gets covered.
Let boards dry completely for 24-48 hours, which protects the wood from moisture damage from day one.
Step 3: Install Posts
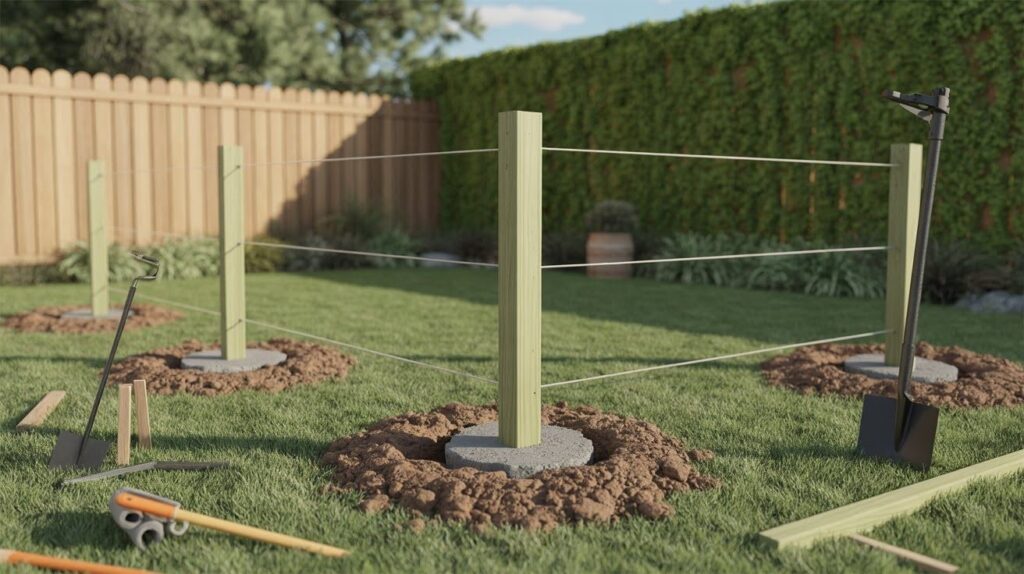
Mark post locations every 6-8 feet along your fence line using stakes and string. Dig holes 2 feet deep for stability or use no-dig metal bases for faster installation.
Set each post perfectly level and plumb, then let concrete cure for 24-48 hours before adding weight.
Step 4: Attach Rails
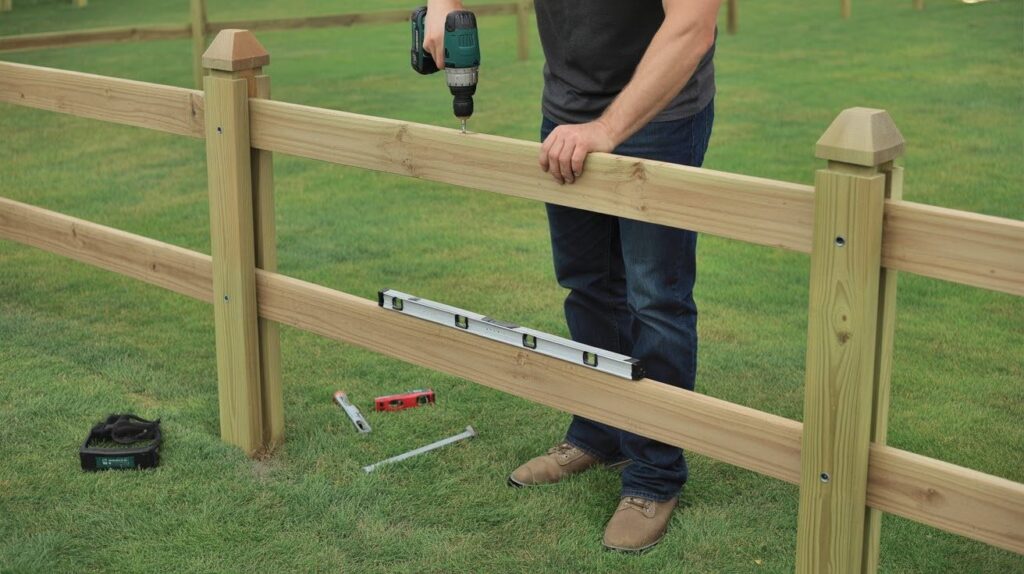
Connect horizontal rails between posts using 3-inch exterior screws for a solid hold. Add a middle rail for fences taller than 6 feet to prevent board warping.
Use a level to keep all rails perfectly horizontal so your finished fence looks professional.
Step 5: Install Boards

Cut a small spacer piece to maintain uniform gaps between all boards as you work. Attach the first board perfectly plumb using a level, then the rest will follow naturally.
Drive two screws through each board into every rail connection point for maximum strength.
Step 6: Finishing Touches

Install top rails or decorative post caps to protect wood end grain from rain damage. Trim any boards that extend past the top rail for clean, straight lines.
Add inexpensive solar lights to post tops for nighttime ambiance, then walk the fence line tightening any loose screws and touching up bare spots with extra stain.
Cost Breakdown: How Much a DIY Privacy Fence Really Costs

Exact costs help you budget and find savings.
Wood Type Pricing Comparison
- Pressure-treated: $2-$4/foot ($200-$400 for 100 feet).
- Cedar: $5-$8/foot ($500-$800).
- Reclaimed: Free-$1/foot.
- Composite: $7-$12/foot ($700-$1,200).
Hardware & Stain Costs
- Screws: $15-$30.
- Post bases/concrete: $50-$200.
- Stain: $25-$50/gallon (need 2-3).
- Extras: $30-$50.
Realistic Total Budget Estimates
- 50-foot fence: $300-$600 (pressure-treated) or $500-$900 (cedar).
- 100-foot: $600-$1,200 or $1,000-$1,800.
- 200-foot: $1,200-$2,400 or $2,000-$3,600.
Where to Save and Where to Spend
Save with pressure-treated over cedar. Spend on quality hardware and posts.
Buy stains on sale. Skip decoratives initially.
Staining, Sealing, and Long-Term Maintenance

Proper finishing keeps your budget fence looking great for years.
Best Budget-Friendly Stains & Sealers
Water-based stains: $25-$35/gallon, easy cleanup.
Oil-based: $35-$50, deeper penetration.
Clear sealers: $20-$30. Get UV protection.
How to Make Low-Cost Wood Last for Years
Reapply stains every 2-3 years. Trim plants away from the fence base.
Fix loose boards immediately. Rinse with hose each spring.
Common Mistakes to Avoid
Don’t skip sealing board ends. Avoid indoor screws that rust.
Leave gaps between boards. Always check the level and plumb.
Creative Upgrades That Are Still Budget-Friendly

Small additions personalize your fence without major costs.
Solar Lights Along the Panels: Mount solar lights on posts for automatic nighttime lighting. Cost $3-$10 each, no wiring needed.
Hanging Planters or Vertical Gardens: Attach planter boxes to fence boards. Fill with flowers or herbs. Planters cost $5-$15 each.
Modern Fence Caps or Trim: Add 2×4 cap boards for a finished look at $1-$2/foot. Post caps cost $3-$8 each, preventing water damage.
Conclusion
Three years ago, I constructed my first DIY privacy fence without any previous experience. My boards may not have been perfectly straight, but you know what? I think it still looks amazing, and I saved $2,500.
The best part was standing behind my fence after a long day of working on it, and knowing that I built it myself. You can do this. Get a solid plan, pick your materials with a budget in mind, and take your time with each step.
When you finish your fence, come back and tell me how it went. I would love to hear which design you chose!
Frequently Asked Questions
How long does it take to build a DIY privacy fence?
Most people finish a 100-foot fence in 2-3 weekends. Pre-staining and no-dig posts speed things up.
Do I need concrete for fence posts?
Concrete provides the strongest installation. No-dig bases or gravel work for temporary fences. Choose based on fence longevity.
Can I build a fence on a slope?
Yes, use stepped panels or racked designs. Stepped panels look cleaner and build easier. Adjust post heights for level top.
What’s the best time of year to build a fence?
Late spring or early fall offers ideal weather. Avoid frozen ground in winter. Wood costs less in late fall.
How do I make my fence more private without rebuilding?
Add lattice toppers, fabric panels, or climbing vines. Plant tall shrubs for natural screening. Costs $50-$200.