
After three decades fixing homes, I’ve learned that woodpecker holes aren’t just cosmetic problems, they’re urgent repair needs.
These openings create direct pathways for water infiltration, leading to rot, mold, and compromised insulation. I’ve seen small holes turn into major structural issues costing thousands in repairs.
What makes it worse? These holes invite carpenter ants, wasps, and other pests seeking shelter. Quick action prevents extensive damage.
From my experience, addressing woodpecker damage immediately saves both money and your home’s structural integrity.
Don’t wait for those innocent-looking holes can become costly nightmares.
Why Woodpeckers Peck at Houses
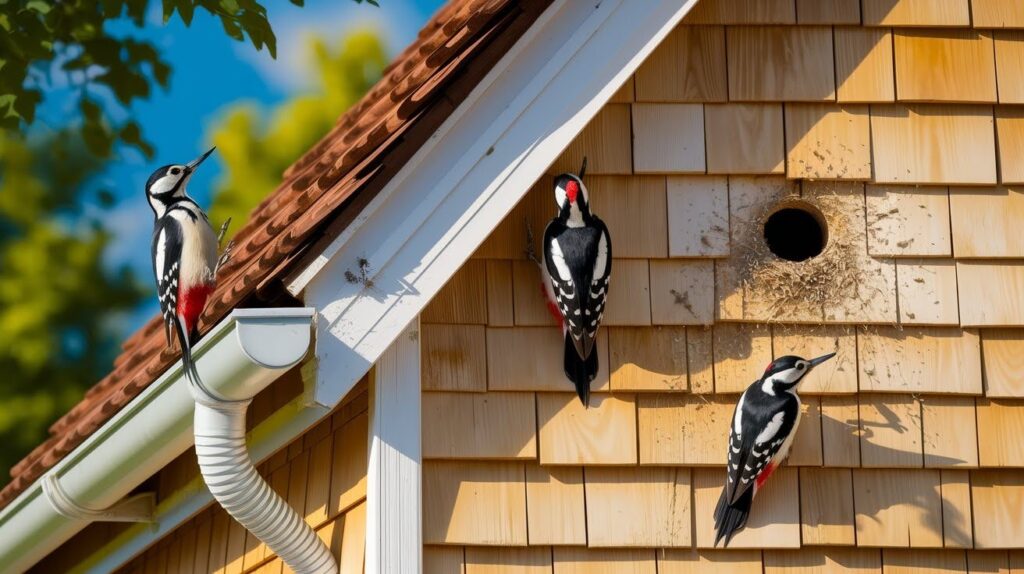
Understanding woodpecker behavior helps homeowners address the root cause of damage. These birds target houses for four main reasons, and recognizing their motivations can guide your prevention strategy.
Territorial drumming: represents the most common cause. Male woodpeckers create loud, rhythmic sounds to attract mates and establish territory.
Your home’s metal gutters, siding, or trim provide the perfect acoustic surfaces for broadcasting their presence across the neighborhood.
Nesting and roosting needs: drive woodpeckers to create cavities in wooden surfaces. They prefer soft wood like cedar or pine siding, where excavating becomes easier.
These holes serve as safe spaces for raising young or shelter during harsh weather.
Insect hunting: motivates woodpeckers to probe your home’s exterior. If carpenter ants, termites, or other insects inhabit your siding, woodpeckers will methodically search for these protein-rich meals.
Their persistent pecking often indicates an underlying pest problem.
Step-by-Step Guide to Fixing Woodpecker Holes
Learn practical methods to repair woodpecker damage on your home’s siding, trim, and eaves. This guide covers assessment, materials needed, and effective techniques to restore and protect your property.
Step 1 – Assess the Damage
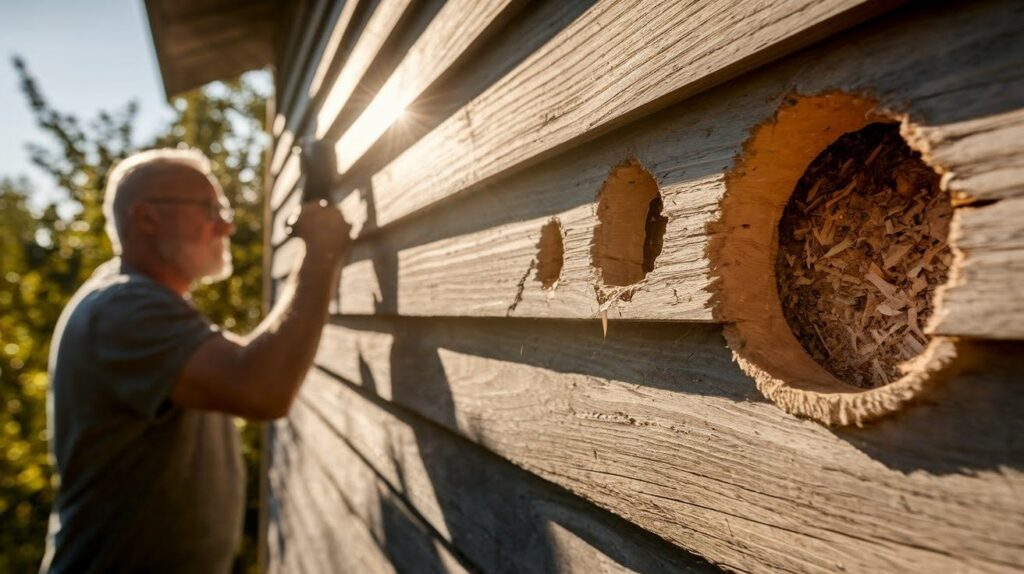
Before starting repairs, determine what you’re dealing with since damage types require different approaches.
Small holes under an inch in diameter only affect the outer siding, while large nesting holes reach 2-4 inches wide and penetrate deep into your home’s structure.
Use a flashlight to check for active nests, eggs, or baby birds before sealing anything, as disturbing nests violates federal law. Look for signs of insect problems like ant trails or wood shavings around damaged areas.
Step 2 – Gather Materials and Tools
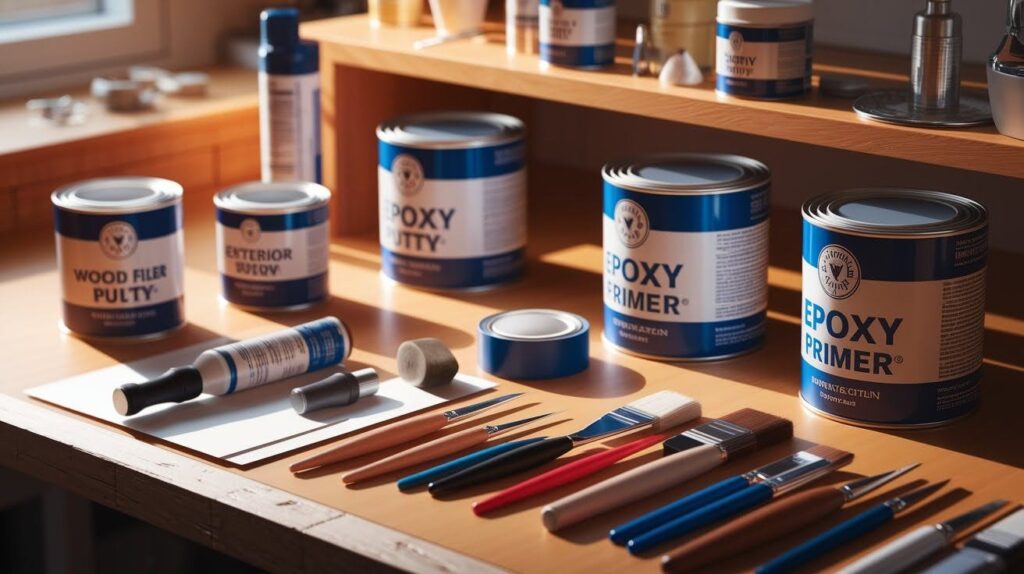
Having the right supplies ready makes repairs faster and more effective. For small holes, use wood filler or epoxy putty for deeper cavities.
Choose exterior-grade products that withstand weather conditions. Severe damage requires replacement siding or trim boards with matching color and texture.
You’ll need high-quality exterior primer, matching paint, and weatherproof sealant to protect repairs. Consider adding deterrent products like reflective tape or predator decoys to prevent future damage.
Gather basic tools, including a putty knife, sandpaper, and brushes, before starting.
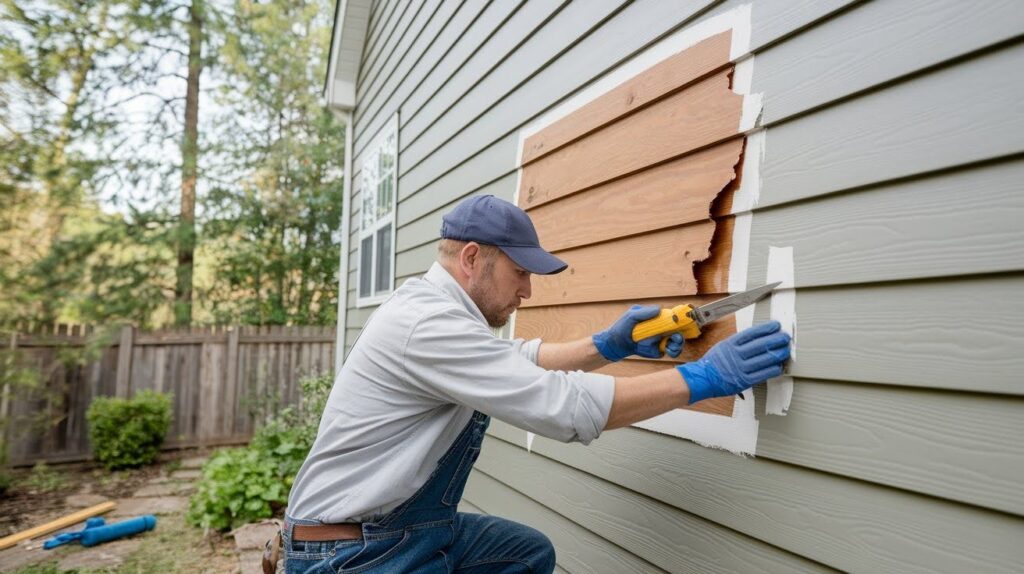
Step 3 – Repair Small to Medium Holes
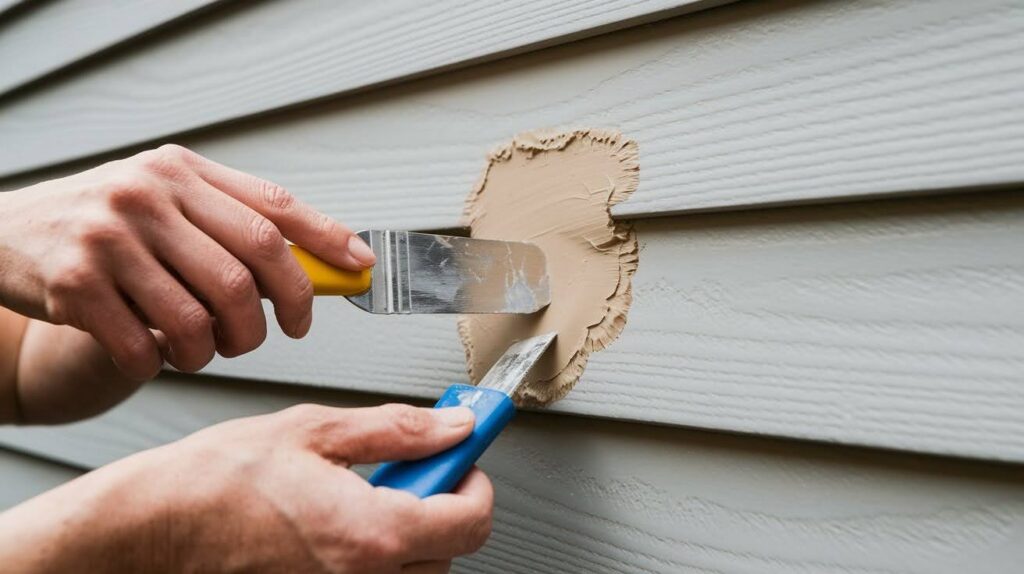
Clean debris from each hole using a small brush or compressed air, removing loose wood pieces and dirt. Apply wood filler or epoxy putty slightly above surface level, pressing firmly to eliminate air pockets.
For deeper holes, build up material in layers, allowing each to dry completely.
Sand-filled areas are smoothed with fine-grit sandpaper until flush with the surrounding surface. Prime repaired spots with exterior primer, then apply matching paint in thin, even coats.
Finish with weatherproof sealant around repair edges to prevent moisture infiltration.
Step 4 – Repairing Large or Nesting Holes
Large holes require extensive repair work. Cut away all damaged wood until you reach solid material to prevent rot from spreading.
For smaller holes, create a slightly larger wood patch, then trim it to fit and secure it with screws or adhesive. For extensive damage, replace the entire board section with matching materials.
Prime all new wood with exterior primer, then apply matching paint in thin coats. Seal joints with exterior caulk to prevent water infiltration.
Step 5 – Prevent Future Woodpecker Damage

Install bird netting or hardware cloth over damaged areas, securing tightly to prevent gaps.
Use reflective deterrents like tape or balloons near problem spots, moving them regularly since birds adapt to stationary objects.
Apply pest treatments to eliminate carpenter ants or termites that attract woodpeckers.
Consider upgrading to durable materials like fiber cement or vinyl siding during renovations for long-term protection.
What NOT to Do
- Don’t use sticky repellents: These adhesive products trap birds, causing injury or death, and violate wildlife protection laws in most areas.
- Don’t seal holes with birds inside: Federal law protects most bird species during nesting season, making it illegal to disturb occupied nests. Wait until birds naturally abandon the area.
- Don’t rely only on fake owls or decoys: Birds quickly recognize static objects as harmless and adapt to them. These work better as part of a multi-step strategy rather than standalone solutions.
- Don’t ignore underlying pest problems: Sealing holes without treating insect infestations means woodpeckers will return to the same spots seeking food sources.
- Don’t use temporary patches for permanent repairs: Duct tape or plastic coverings may seem convenient, but they fail quickly and allow moisture damage to worsen over time.
Conclusion
After decades of helping homeowners with woodpecker damage, I’ve learned that successful repairs require both immediate action and long-term thinking.
Fixing existing holes properly prevents water damage and structural issues, but the real victory comes from stopping future attacks.
The most effective approach pairs thorough repairs with smart deterrence strategies. I’ve seen too many clients repair holes only to have woodpeckers return within months.
The homeowners who succeed long-term understand that addressing underlying causes – like insect problems and installing physical barriers creates lasting protection.
Remember, every hole you repair quickly saves hundreds in potential damage later. Use quality repairs alongside consistent prevention methods, and you’ll finally win the battle against these persistent birds.
Your home’s integrity depends on this dual approach working together.
Frequently Asked Questions
How long does it take to repair woodpecker holes?
Small holes take 1-2 hours, including drying time, while large nesting holes may require a full day. Weather conditions and hole size determine the actual timeline for complete repairs.
Can I repair woodpecker holes myself, or do I need a professional?
Most homeowners can handle small to medium holes with basic tools and materials. Large structural damage or holes near electrical areas should be handled by experienced contractors.
What’s the best time of year to repair woodpecker damage?
Late fall through early spring works best when birds aren’t actively nesting. Avoid repairs during breeding season (spring through summer) to comply with wildlife protection laws.
How much does it cost to fix woodpecker holes?
Small repairs cost $20-50 in materials, while large holes requiring siding replacement can reach $200-500. Professional repairs typically add $100-300 in labor costs.
Will woodpeckers return to the same spots after repairs?
Yes, if underlying attractants remain present. Treat insect problems and install deterrents to prevent birds from targeting previously damaged areas again.