
Thinking about a broom finish concrete patio but not sure where to start? You’re in the right place. I know what works and what doesn’t. That’s why I created this complete guide just for you.
You’ll learn exactly what broom finish is and how it’s done. I’ll show you how it compares to other concrete finishes. You’ll get the real pros and cons that other guides won’t tell you. Should you DIY or hire a contractor? I’ll help you decide based on your situation. You’ll get tested design ideas to make your patio special.
Most importantly, you’ll avoid the costly mistakes that trip up other homeowners. I’ll share maintenance secrets that keep your patio looking great for decades.
By the end, you’ll know if broom finish concrete is right for your home. Let’s solve your patio problems together.
What Is a Broom Finish and How Is It Done?
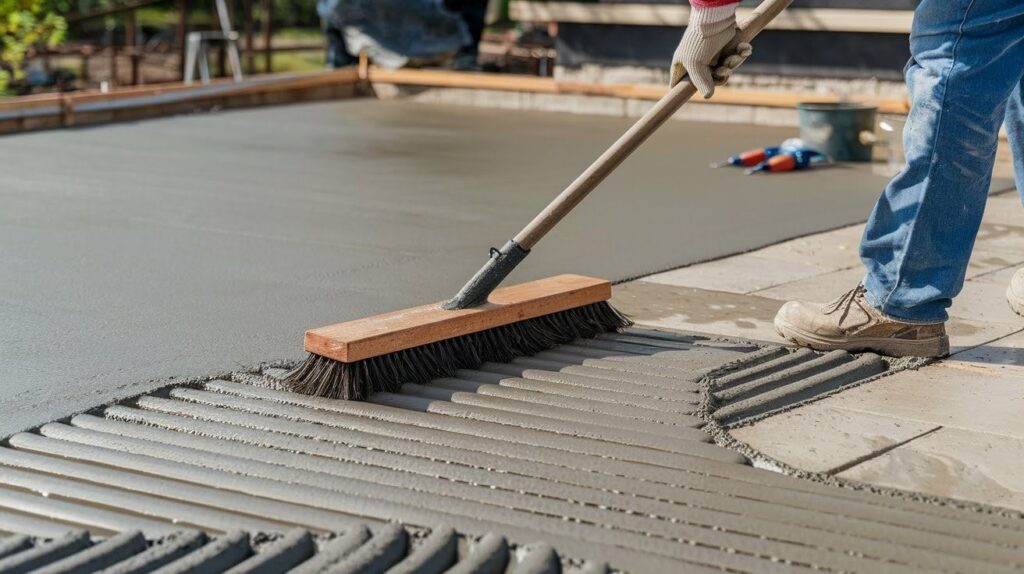
A broom finish creates texture on wet concrete using a special broom. The result? Non-slip surface lines that run across your patio.
Here’s how the process works:
The Basic Steps
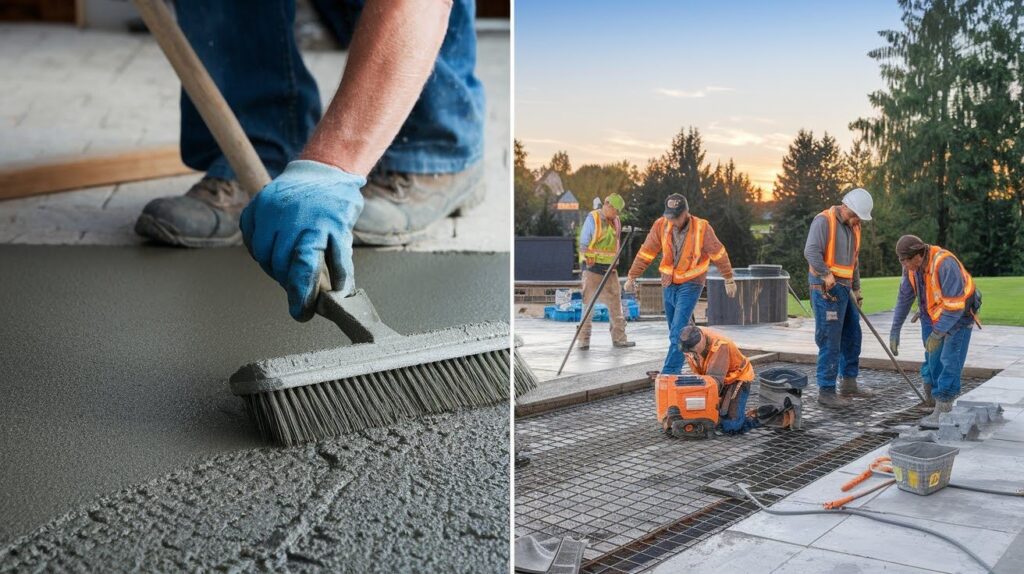
- Pour the concrete – Workers spread fresh concrete evenly
- Level the surface – They use screeds to make it flat
- Float the concrete – This brings cream to the top
- Wait for the right moment – Concrete must be firm but not hard
- Drag the broom – One smooth pull creates the texture
Timing matters most. Pull the broom too early? The lines fill back in. Wait too long? The broom won’t create clean lines.
Tools You Need
- Concrete broom (soft bristles work best)
- Float (bull float for larger areas)
- Screed board
- Edging tools
The broom itself makes all the difference. Soft bristles create fine lines. Stiff bristles make deeper grooves.
Here’s a tip: Always pull the broom in one direction. Never push and pull back and forth.
Broom Finish vs Other Concrete Finishes
How does broom finish stack up against other options? Let me break it down for you.
|
Finish Type |
Cost |
Safety |
Maintenance |
Installation Time |
Appearance |
|
Broom Finish |
$6-12/sq ft |
Excellent grip |
Easy – soap & water |
1 day |
Simple, functional |
|
Smooth Finish |
$6-10/sq ft |
Slippery when wet |
Shows every stain |
1 day |
Sleek, modern |
|
Stamped Concrete |
$12-25/sq ft |
Good grip |
Needs sealing |
2-3 days |
Decorative patterns |
|
Exposed Aggregate |
$10-18/sq ft |
Very good grip |
Hard to clean |
2 days |
Natural stone look |
|
Polished Concrete |
$15-30/sq ft |
Very slippery |
Regular buffing |
3-5 days |
High-end shine |
Why Most People Choose Broom Finish
Broom finish gives you the best balance of safety and cost. You get excellent traction without paying premium prices.
Smooth concrete looks nice but becomes dangerous when wet. Stamped concrete costs 2-3 times more and can crack along pattern lines.
My recommendation? Broom finish offers the best value for most homeowners.
Pros and Cons of a Broom Finish Concrete Patio
Let me give you the straight facts about broom finish patios.
The Good Stuff
Safety comes first. The textured surface prevents slips and falls. This matters especially around pools or in rainy climates.
Your wallet will thank you. Broom finish costs 30-50% less than decorative alternatives. You get professional results without the premium price.
Maintenance stays simple. Sweep it clean. Hose it down. That’s about it for regular care.
Installation happens fast. Most contractors can finish a standard patio in one day. No waiting for special materials or complex procedures.
It matches any style. Broom finish works with modern homes. It fits traditional designs too.
The Not-So-Good
Limited visual appeal. You won’t get the wow factor of stamped or stained concrete. It looks functional, not fancy.
Lines collect debris. Leaves and dirt can settle in the texture grooves. Regular sweeping becomes important.
Color options are basic. Standard gray concrete or simple color additions. No complex patterns or multiple colors.
Repair challenges exist. Fixing damaged sections means matching the broom pattern. This takes skill to do well.
Real Talk
I’ve installed hundreds of broom finish patios. Most customers love them. They appreciate the safety and low cost.
But some wish they’d spent more on decorative finishes. Consider your priorities carefully.
DIY vs Hiring a Contractor: What’s Best for Your Broom Finish Patio?
Should you tackle this project yourself? It depends on your situation.
When DIY Makes Sense
- Small patio (under 200 square feet)
- You have concrete experience
- Perfect weather conditions
- You own the tools
- No time pressure
DIY costs: $4-7 per square foot for materials only.
But remember – concrete doesn’t wait. Once poured, you have limited time to get the broom finish right. Mistakes mean starting over.
When to Hire a Professional
- Large patio (over 200 square feet)
- No concrete experience
- Unpredictable weather
- You want guaranteed results
Professional costs: $6-12 per square foot including labor, materials, and warranty.
Contractors know exactly when to apply the broom finish. They have quality tools and insurance protection.
My Recommendation
Go professional for patios over 300 square feet. The cost difference shrinks on larger projects, and you get better results.
DIY works for small areas like a 10×10 patio. Just practice the broom technique first.
Design Ideas and Enhancements
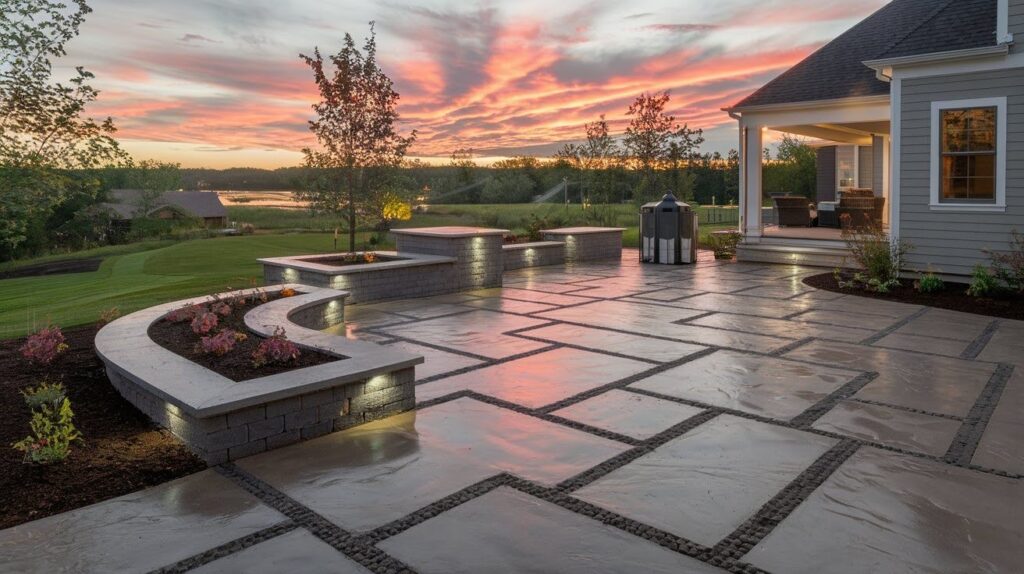
Broom finish doesn’t mean boring. You have options to make your patio special.
Color Enhancements
Integral color mixes directly into concrete. Popular choices include charcoal gray, sandstone tan, brick red, and desert brown.
Color hardener applies to the surface. It creates richer, more durable colors than integral options.
Pattern Variations
Standard broom finish runs lines in one direction.
But you can try crosshatch patterns with lines running two directions, curved lines that follow the patio’s shape, or border treatments with different patterns around edges.
Combining Finishes
Mix textures for visual interest. Try smooth borders with broom finish centers. Or alternate broom sections with exposed aggregate strips.
Stamped edges add style. Keep costs down with broom finish in main areas. Use stamped concrete only for borders.
Decorative Scoring
Control joints prevent random cracking.
Make them decorative by creating geometric patterns, following landscape lines, or dividing large areas into sections.
Lighting Integration
Plan electrical during installation. Running conduit under fresh concrete costs less than cutting later.
You can add low-voltage LED strips in expansion joints, recessed lights in patio surface, or post lights at corners.
Landscape Integration
Blend with surroundings. Choose colors that complement your home and yard.
Plan drainage carefully. Slope the patio away from your house. Direct water toward planted areas when possible.
Create smooth transitions. Broom finish works well with natural stone borders, brick edging, planted areas, and gravel pathways.
Maintenance Tips and Long-Term Care
Proper maintenance keeps your broom finish patio looking good for decades.
- Weekly cleaning – Sweep regularly to remove debris from texture lines. Spot clean stains quickly before they set in.
- Monthly deep cleaning – Pressure wash with moderate pressure (1500-2000 PSI). Mix dish soap with warm water for tough stains.
- Seasonal care – Check for winter damage in spring, apply sealer in summer if needed, remove leaves promptly in fall, and use concrete-safe ice melt in winter.
- Long-term protection – Seal every 3-5 years to protect against water, freeze-thaw damage, and stains. This extends your patio’s lifespan significantly.
- Handle repairs quickly – Fill small cracks with concrete crack filler. Call professionals for cracks wider than 1/4 inch or major damage.
Annual maintenance costs run about $20-50 for DIY cleaning, with sealing every few years costing $200-400.
Common Mistakes to Avoid
Learn from others’ mistakes. These errors happen frequently with broom finish patios.
- Wrong timing and technique – Applying the broom too early makes lines disappear. Too late makes the surface too hard. Keep steady pressure and never go back over areas you’ve already broomed.
- Poor planning and preparation – Skipping soil prep causes settling. Ignoring drainage creates water problems. Forgetting expansion joints leads to random cracks every 8-10 feet.
- Material and weather errors – Wrong concrete mix ratios cause weak or unworkable concrete. Hot weather rushes the process while cold weather slows it down. Windy conditions dry surfaces too quickly.
- Maintenance mistakes – Using harsh chemicals damages concrete. Pressure washing at too high PSI erodes the surface. Ignoring small cracks lets them become major repairs.
- Design and cost errors – Making patios too small creates regret later. Going too cheap on installation costs more to fix. Light colors show dirt easily while dark colors show dust and pollen.
Get references and check contractor credentials carefully. Standard 4-inch thick concrete works for most residential patios.
Conclusion
You now have everything you need to decide about a broom finish concrete patio.
This finish offers real value for most homeowners. The safety benefits alone make it worth considering. You won’t slip and fall like you might on smooth concrete. The cost stays reasonable compared to fancy alternatives. Maintenance won’t eat up your weekends or your budget. Most people love their broom finish patios years later.
But it’s not right for everyone. If you want something that really stands out, consider other options. Your patio should match your needs and style.
Ready to move forward? Contact three licensed contractors for quotes. Ask to see their recent work. Check those references carefully.
Take your time with this decision. A good patio lasts decades. Choose wisely and you’ll enjoy outdoor living for years to come.
Frequently Asked Questions
How long does a broom finish concrete patio last?
A properly installed broom finish patio lasts 25-30 years with basic maintenance. Regular sealing every 3-5 years helps it reach full lifespan.
Can I add color to broom finish concrete?
Yes, you can add integral color during mixing or apply color hardener to the surface. Both options work well with broom texture and won’t affect the non-slip properties.
How much does a broom finish patio cost per square foot?
Professional installation typically costs $6-12 per square foot including materials and labor. DIY projects run about $4-7 per square foot for materials only.
Is broom finish concrete slippery when wet?
No, broom finish creates texture specifically designed to prevent slipping. The grooves provide excellent traction even in wet conditions.
How often should I clean my broom finish patio?
Weekly sweeping removes debris from texture lines. Monthly pressure washing keeps it looking fresh and prevents stain buildup.