
That old chain link fence might look like an eyesore, but it doesn’t have to stay that way. A fresh coat of paint can transform your property’s curb appeal while protecting the metal from rust and weather damage.
Many homeowners skip this simple upgrade because they think it’s too complicated or time-consuming. The truth is, painting a chain link fence is straightforward when you know the right techniques.
This guide walks you through the complete process, from choosing the right paint to applying the final coat. You’ll learn the same methods professional painters use, broken down into simple steps that work for beginners.
By the end, you’ll have the confidence and know-how to tackle this project yourself. Your fence will look fresh, your yard will get an instant boost, and you’ll save money by doing it right the first time.
How to Paint a Chain Link Fence
Painting a chain link fence involves cleaning, priming, and applying paint to transform a basic metal barrier into an attractive property boundary. Proper preparation and technique ensure even coverage and long-lasting results.
Materials You’ll Need
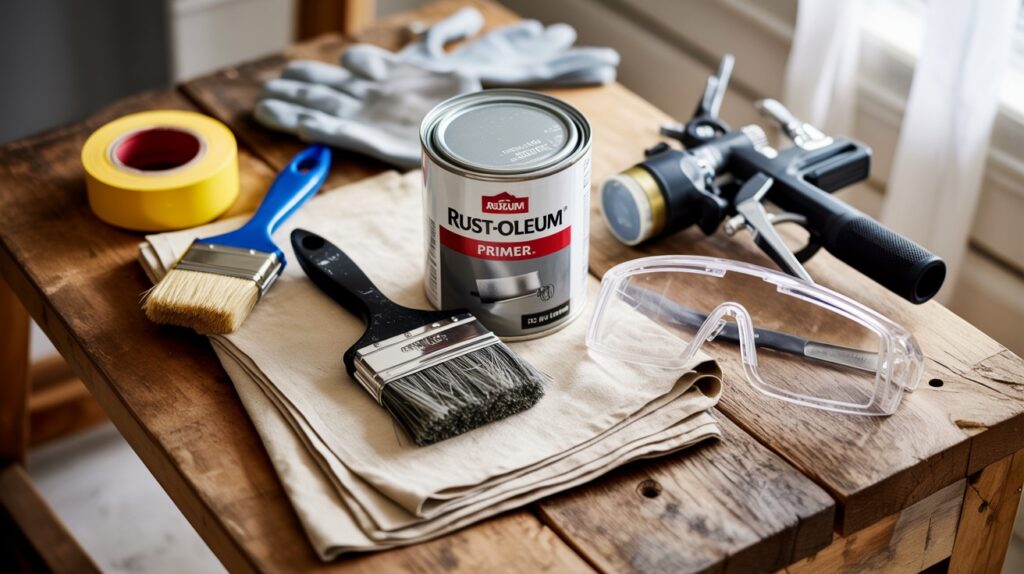
Obtaining the right materials upfront saves you trips to the hardware store during the project. Most items are basic painting supplies you might already have.
- Metal paint
- Primer
- Wire brush
- Drop cloths
- Painter’s tape
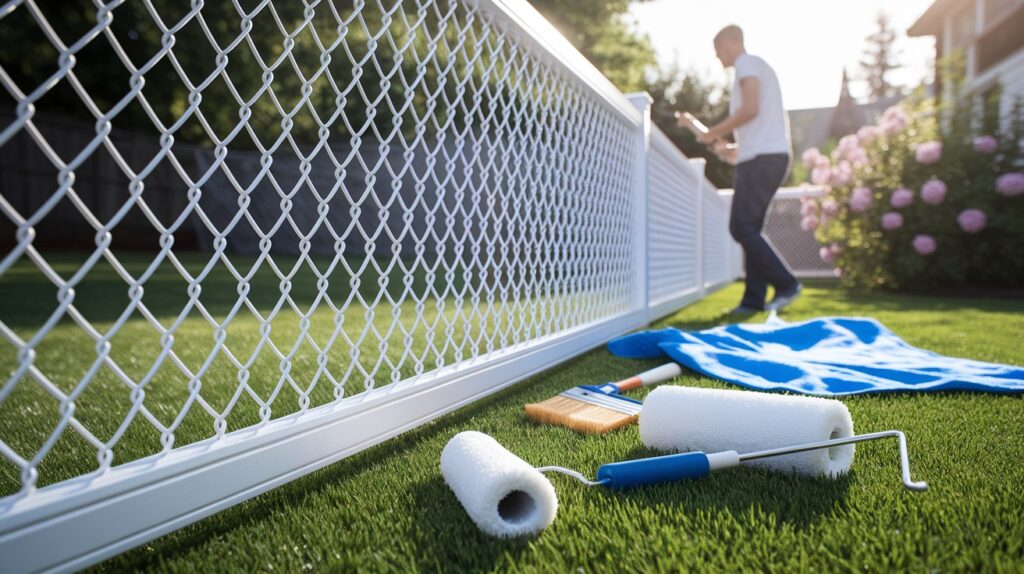
- Brush or sprayer
- Gloves and safety glasses
Step 1: Prep the Fence
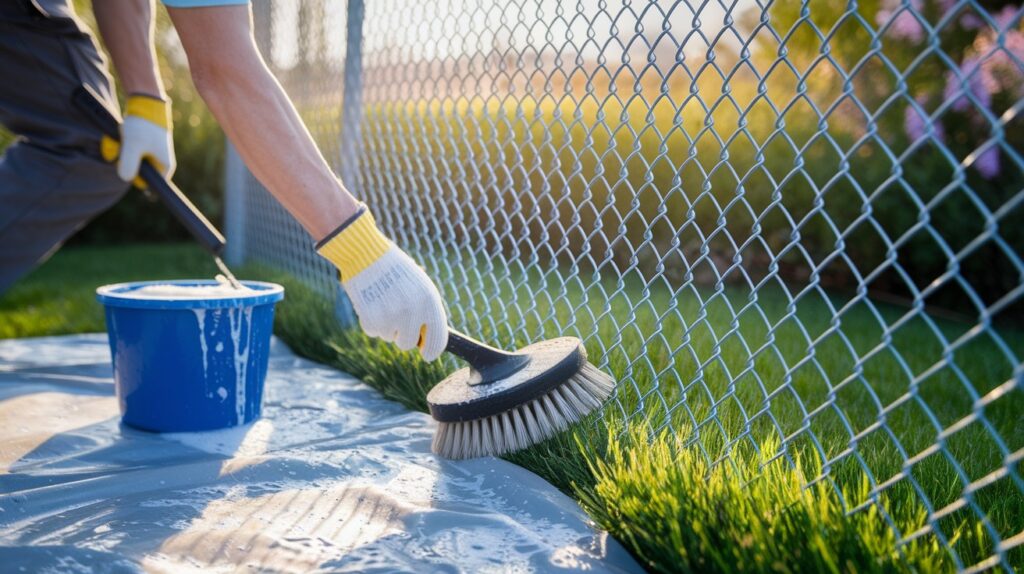
Your fence needs a good scrub first. Think of it like washing your car before waxing it.
Grab a stiff wire brush and start scrubbing. Focus on areas where you see flaking paint or orange rust spots. Remove anything loose or crumbly.
Wire brush not cutting it? Try a pressure washer instead. Set the pressure to medium – around 1,500 PSI works well. Hold the nozzle about 12 inches away and work from top to bottom.
Rough patches need extra attention. Get some 80-grit sandpaper and smooth out any bumps or sharp edges. You’re not making it perfect – just removing the worst spots.
Your fence must be completely dry before you paint. We’re talking bone dry, not just surface dry.
How long should you wait:
- After pressure washing: 24-48 hours
- After wire brushing: 2-4 hours
- In humid weather, add extra time
Test a small area with your hand. If it feels even slightly damp, wait longer.
Step 2: Protect the Surroundings
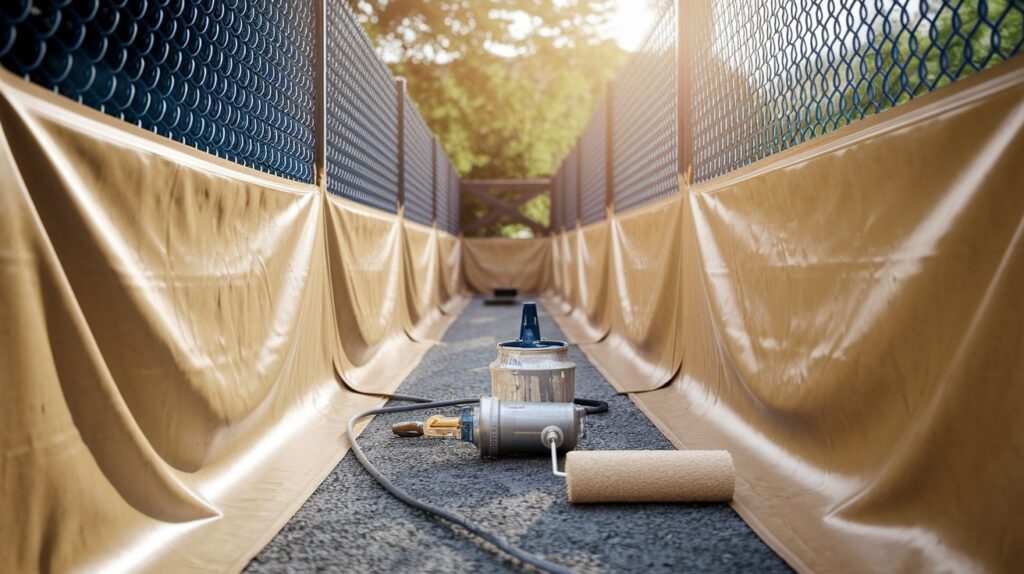
Paint gets everywhere. I learned this the hard way on my first fence project.
Start with drop cloths. Lay them out in a 3-foot strip along both sides of your fence. Canvas drop cloths work better than plastic, but they don’t blow around.
Use painter’s tape to cover anything you don’t want painted:
- Fence posts
- House siding close to the fence
- Concrete foundations
- Electrical boxes
Press the tape edges down firmly. Loose tape lets paint seep underneath.
Move potted plants out of the way. For planted flowers or shrubs, drape them with old sheets or plastic bags to protect them from the elements. Don’t forget about outdoor furniture – paint mist travels further than you think.
Pro tip: Take photos before you start. This helps you remember where everything goes during cleanup.
Step 3: Apply Primer
Not every fence needs primer. But skipping it when you need it causes problems later.
Use primer when you see:
- Shiny bare metal showing through
- Rust spots you couldn’t scrub off
- Old paint that’s a different color
Skip primer if your fence already has good paint that’s similar to your new color.
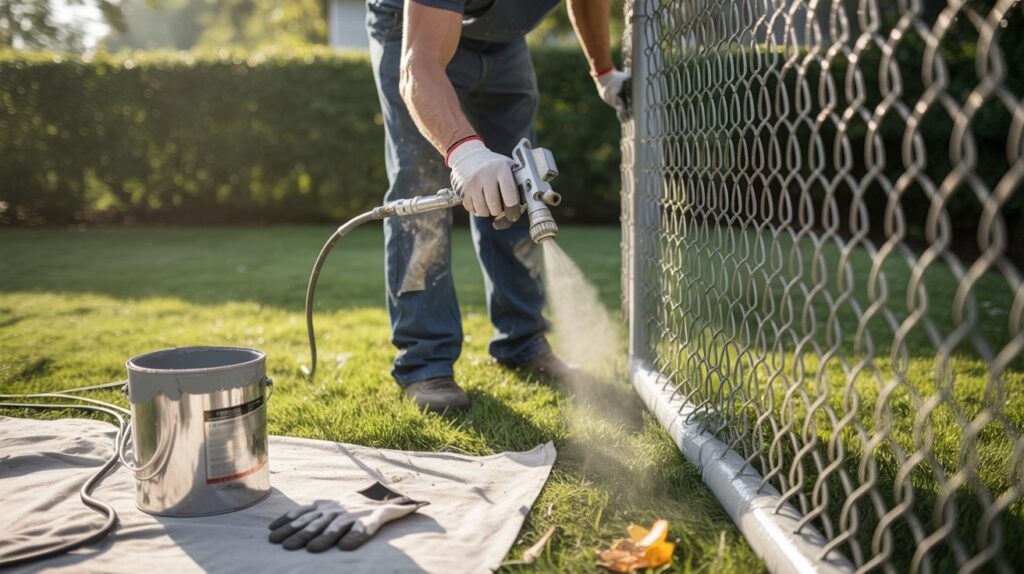
Spray primer works best on chain link. All those intersecting wires are tough to cover with a brush. No sprayer? Use a 2-inch angled brush instead.
For spraying: Hold the can 8-10 inches from the fence. Move in steady, overlapping passes. Keep the can moving to avoid drip marks.
For brushing: Work the primer into all the wire intersections. Don’t just brush over the surface.
Apply thin coats only. Thick primer takes forever to dry and often runs.
Most primers need 2-4 hours to dry in good weather. Touch a hidden spot – it should feel dry, not tacky.
Step 4: Paint the Fence
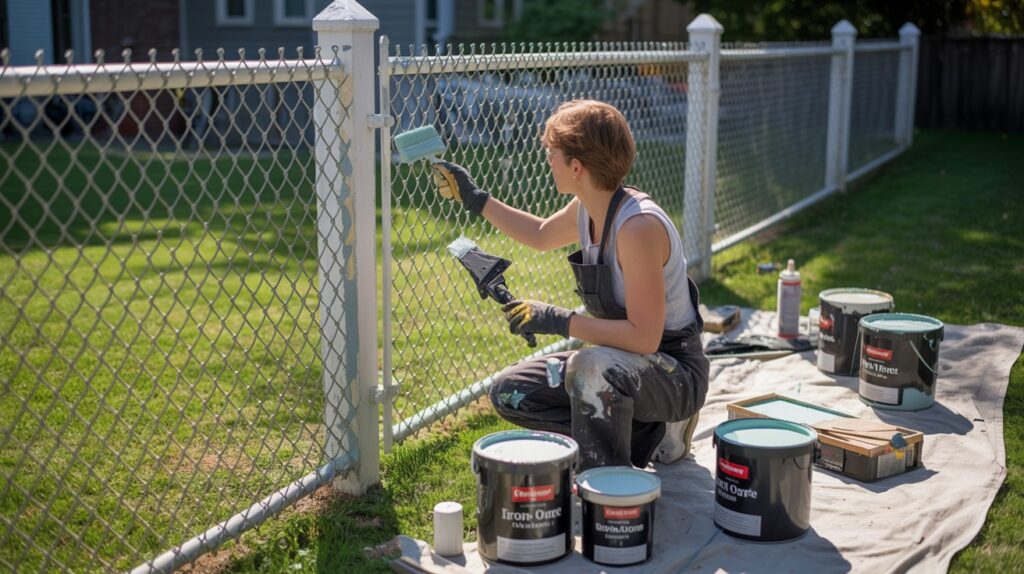
Tool choice makes a huge difference here.
Brush painting gives you the most control, but it’s the slowest method. Roller painting works only on flat sections. Spray painting covers ground fast but needs practice and uses more paint.
My recommendation: Start with a 2-inch angled brush for your first fence.
Paint from top to bottom. Always. Paint naturally flows downward due to gravity. Paint both sides as you go – don’t come back later for the other side.
Paint a 4-foot section on both sides before moving to the next section.
Perfect painting weather:
- Temperature between 50-80°F
- Humidity under 70%
- No wind
- No rain expected for 24 hours
Two thin coats always beat one thick coat. Thick paint runs and looks amateur. Thin coats dry evenly and look professional.
Wait for the first coat to dry completely – usually 4-6 hours. Touch an inconspicuous spot to test. It should feel dry, not sticky.
Step 5: Final Touches & Clean-Up
Step back and inspect your work. Look for missed spots and thin areas.
Common problem areas:
- Wire intersections
- Bottom edge near the ground
- Areas behind fence posts
- Spots where branches rubbed against the fence
Use a small artist’s brush for touch-ups. Don’t repaint entire sections – just dab the missed spots.
Remove the tape while the paint is still slightly tacky. Pull at a 45-degree angle, not straight up. Go slowly.
Fold drop cloths paint-side in to avoid tracking paint through your yard.
Clean your brushes immediately. For water-based paint, rinse with warm water until it runs clear. For oil-based paint, use mineral spirits first, then soap and water.
Don’t pour leftover paint down drains or throw cans in regular trash. Most communities have hazardous waste collection days.
Store leftover paint upside down with a clean rim and a tight lid. Label the can with the date and location used.
Maintenance Tips for a Long-Lasting Finish
- Inspect your fence twice a year for chips or rust spots
- Touch up small areas immediately to prevent spreading
- Repaint every 5-7 years, depending on weather exposure
- Clean with mild soap and water once a year
- Trim plants that rub against the fence
- Fix any loose or damaged sections quickly
- Apply rust converter to new rust spots before they spread
Common Mistakes to Avoid
- Painting over rust or dirt
- Using the wrong paint type
- Skipping primer when needed
- Painting in bad weather
- Applying thick coats
- Not letting coats dry completely
- Forgetting to protect the surroundings
Conclusion
Painting a chain link fence requires the right materials, proper preparation, and correct technique. Choose quality exterior metal paint, clean and prime the surface thoroughly, and apply thin, even coats using a sprayer or brush.
Two coats will give you professional-looking results that protect your fence for years. The process is more straightforward than many homeowners expect.
With basic tools and patience, you can transform an old, rusty fence into an attractive boundary that adds value to your property.
Ready to start your fence painting project? Take before and after photos to track your progress.
Don’t hesitate to share your results or ask questions in the comments below. Your experience could help other homeowners tackle this rewarding DIY project with confidence.
Frequently Asked Questions
1. What type of paint should I use on a chain link fence?
Use exterior metal paint or acrylic latex paint designed for galvanized surfaces. Apply rust-inhibiting primer first if rust is present.
2. Do I need to prepare the fence before painting?
Yes. Clean with a wire brush, remove rust and debris, wash with soapy water, and let dry completely. Prime bare metal areas.
3. What’s the best way to apply paint to chain link fencing?
Use a spray gun for best results, or apply with a synthetic brush/small roller. Work systematically from top to bottom in thin, even coats.
4. How many coats of paint do I need?
Two coats are typically required. Allow the first coat to dry completely before applying the second coat for uniform coverage.
5. When is the best time to paint a chain link fence?
Paint in mild weather (50-85°F), low humidity, no direct sunlight or wind. Avoid painting when rain is expected within 24 hours.