
Your mailbox is the first thing visitors see when they pull up to your home. A rustic mailbox post can transform your entryway from plain to welcoming in just one weekend.
Rustic designs add warmth and character that modern mailboxes simply can’t match. They tell a story and make your home feel approachable.
You don’t need to be a master carpenter or spend hundreds of dollars. With the right materials and some basic tools, you can create something beautiful that fits your style.
This guide walks you through 9 practical rustic mailbox post ideas. Each one includes step-by-step instructions and material lists. You’ll find options for every skill level and budget.
Your neighbors will wonder where you found such a charming mailbox post. The answer? You built it yourself.
Rustic Mailbox Post Ideas That Work
Enhance your curb appeal with these charming country-style mailbox post designs. From weathered wood and stone to repurposed farm materials, these creative ideas blend functionality with vintage charm, perfect for rural and farmhouse-style homes.
1. Classic Wooden Post with Copper Accents
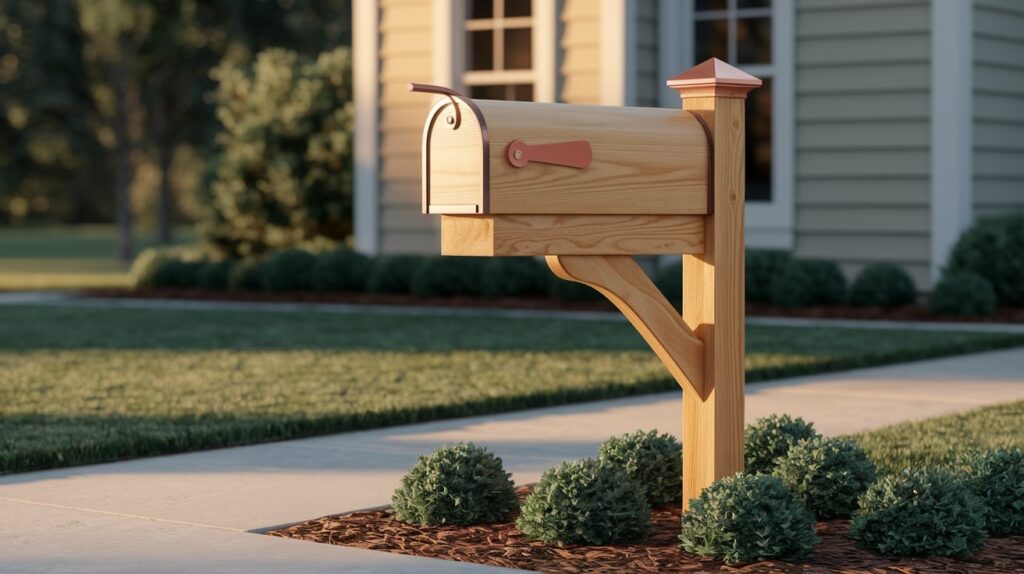
Picture walking up to a home with a rich, honey-stained cedar post topped with gleaming copper details. This combo never goes out of style.
The copper develops a natural patina over time. That weathered green look adds even more character.
Perfect for: Farmhouse or country-style homes
Wood options: Cedar, pine, or oak
Copper elements: Brackets, caps, or decorative bands
Pro tip: Apply marine-grade polyurethane every two years. I learned this the hard way after my first post started cracking.
2. Log Cabin-Style Mailbox Post
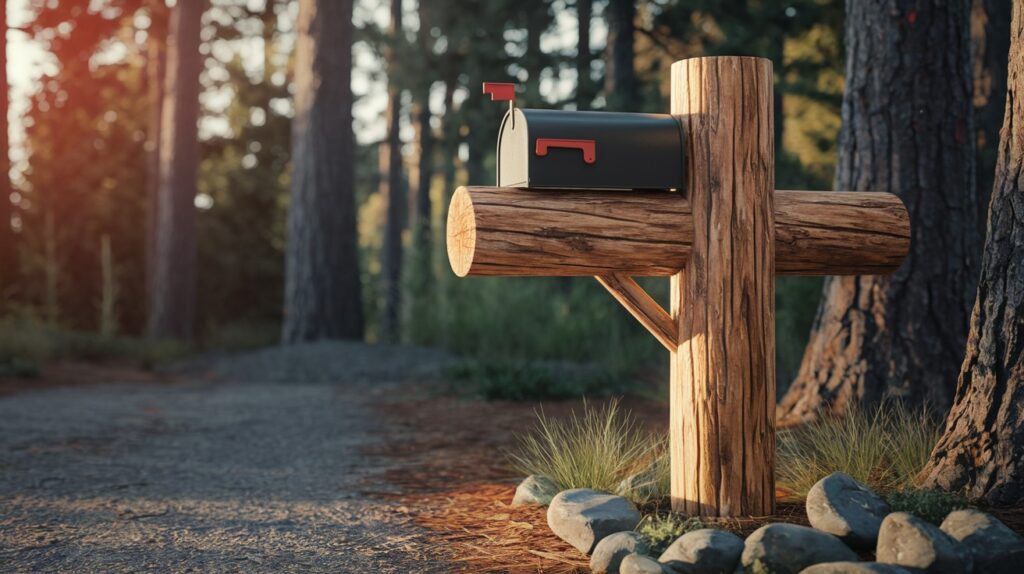
Want that authentic backwoods feel?
A thick log post does the job. You can use a real split log or buy faux log panels that look surprisingly real.
The rough texture catches shadows beautifully. Your mailbox becomes a mini sculpture.
Best locations: Cabins, woodland properties, or rustic suburban homes
Real logs: Check local sawmills or tree removal services
Faux options: Home improvement stores carry realistic panels
Set the log deep. At least 2 feet underground in concrete.
3. Reclaimed Barn Wood Mailbox Post
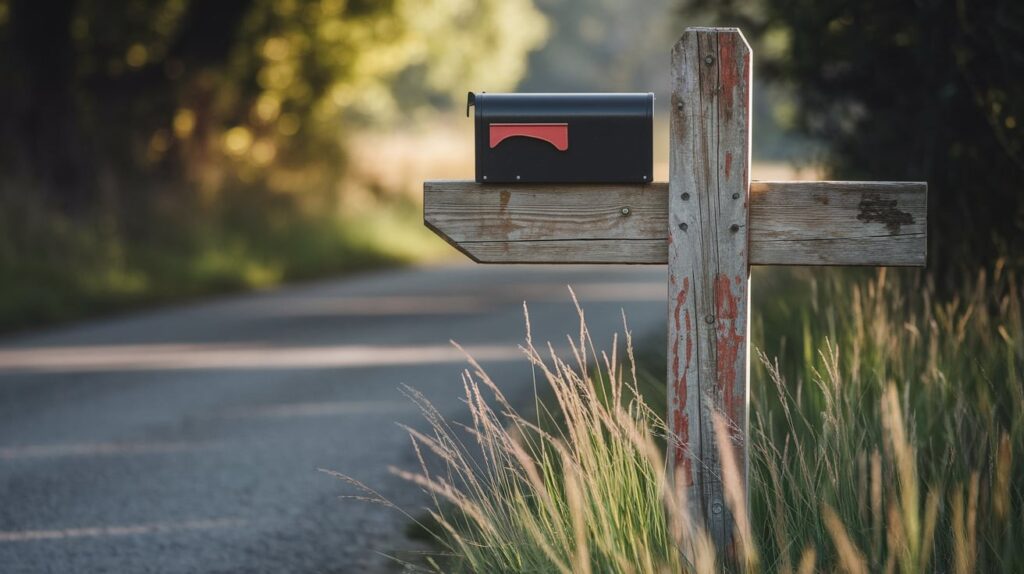
Every piece of barn wood has lived a life.
Nail holes, weathered edges, and faded paint tell stories. You’re not just building a mailbox post. You’re preserving history.
Plus, it’s eco-friendly. Win-win.
Where to find barn wood:
- Demolition companies
- Craigslist or Facebook Marketplace
- Specialty reclaimed wood dealers
- Local farmers
Installation tip: Check for old nails with a metal detector first. Trust me on this one.
The wood might already be weatherproof, but add a clear coat anyway. You want this post to last another 50 years.
4. Stone Base with Wooden Post
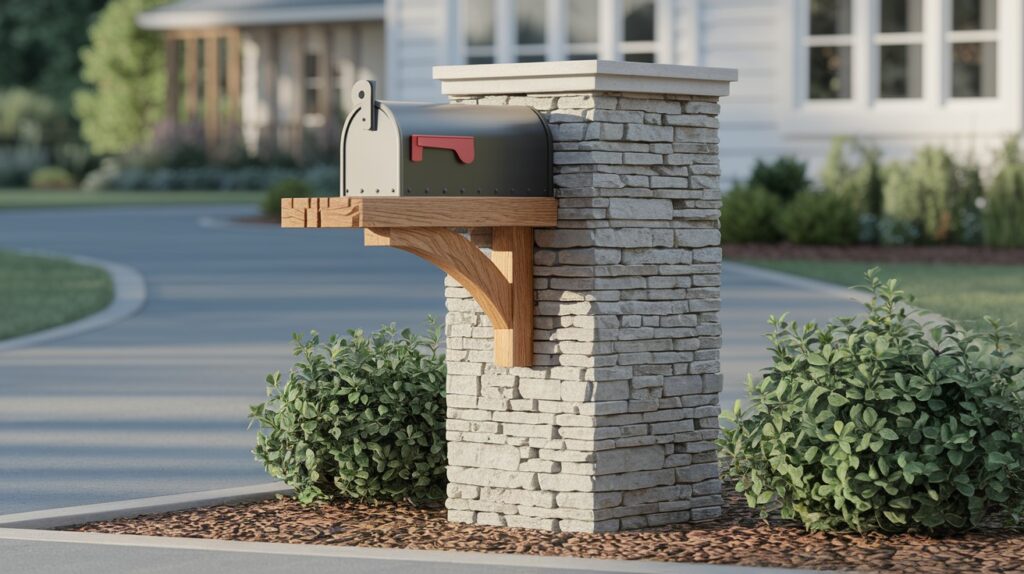
This design gives you the best of both worlds.
Stone looks permanent and classy. Wood adds warmth and rustic charm. Together, they create something special.
The stone base also solves a big problem. It lifts your wooden post off the ground, where moisture causes rot.
Stone choices:
- Fieldstone for natural appeal
- Brick for classic farmhouse vibes
- Concrete blocks
Design tip: Match your stone to existing hardscaping. Look at your walkway, patio, or garden walls for inspiration.
5. Wagon Wheel Mailbox Stand
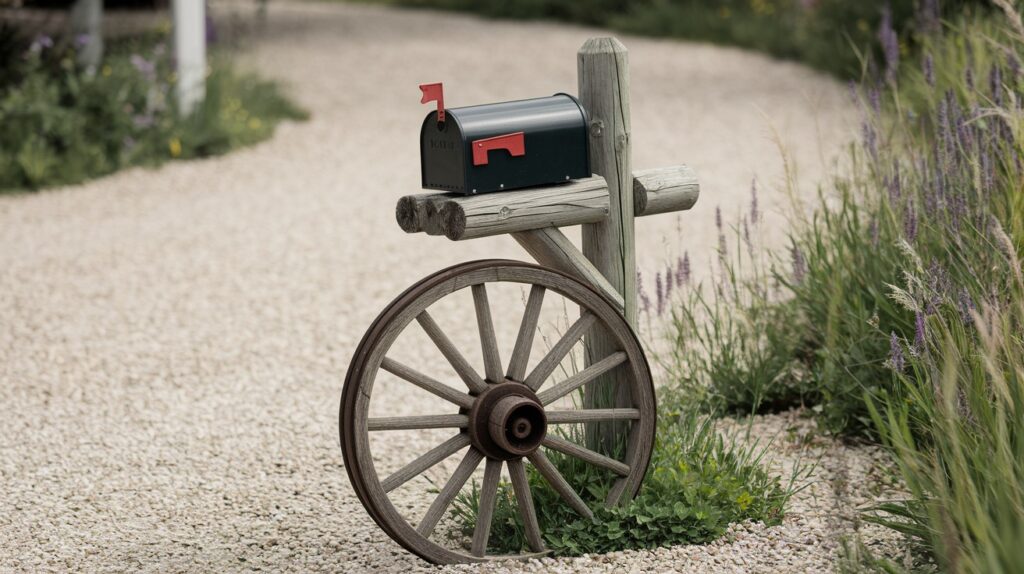
Here’s where rustic meets creative.
An old wagon wheel makes a stunning base for your mailbox. It screams country charm without saying a word.
But here’s the thing about wagon wheels. Most decorative ones aren’t built to hold weight or weather.
How to make it work:
- Reinforce with metal brackets
- Seal all wood surfaces
- Mount the mailbox to a separate post that goes through the wheel
Weatherproofing: Use marine varnish, not regular wood stain. The wheel will face rain, snow, and UV rays year-round.
Stability trick: Bury a concrete footer behind the wheel for extra support.
6. Branch-Style or Driftwood Mailbox Post

Nature creates the most interesting shapes.
A twisted branch or piece of weathered driftwood makes your mailbox look like art. No two will ever be the same.
Great for: Beach houses, lake cabins, or homes with natural landscaping
But natural wood comes with challenges.
Pest prevention:
- Inspect for insect holes
- Apply borate treatment to kill bugs
- Seal all surfaces completely
Stability issues: Crooked posts need extra bracing. Use hidden metal supports or guy wires if needed.
The organic look is worth the extra effort.
7. Fence Post Mailbox Combo
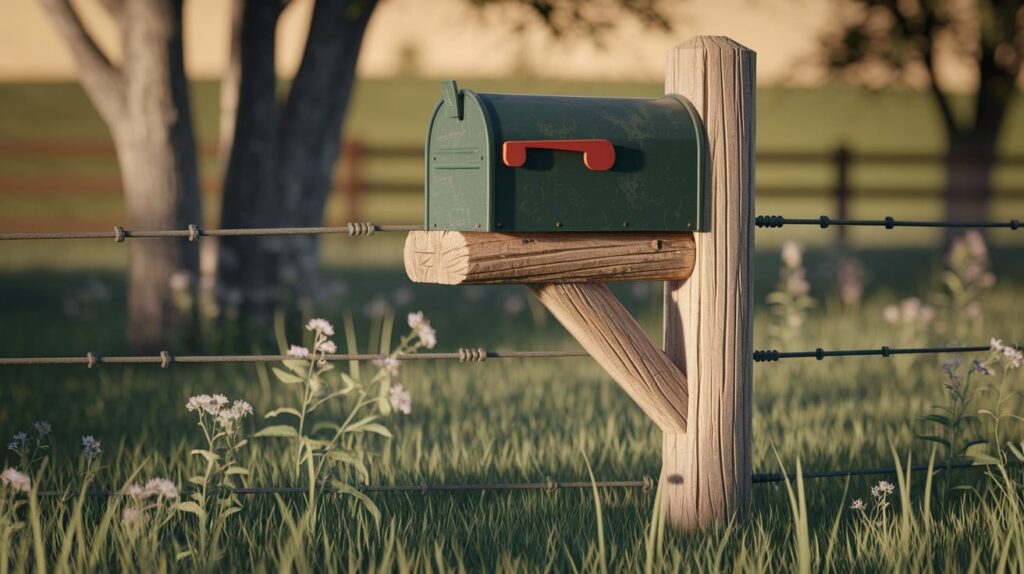
Why stop at just a mailbox post?
Connect it to a rustic fence section. This defines your property line while creating a unified look.
Split-rail fencing works perfectly. So do rustic pickets or even a low stone wall.
Design consistency: Use the same wood stain or paint on both the mailbox post and fence. Small details like this make your whole property look planned.
DIY shortcut: Install the mailbox post first. Add fence sections later when you have time.
This approach lets you spread out the work and cost.
8. Galvanized Pipe and Wood Hybrid Post
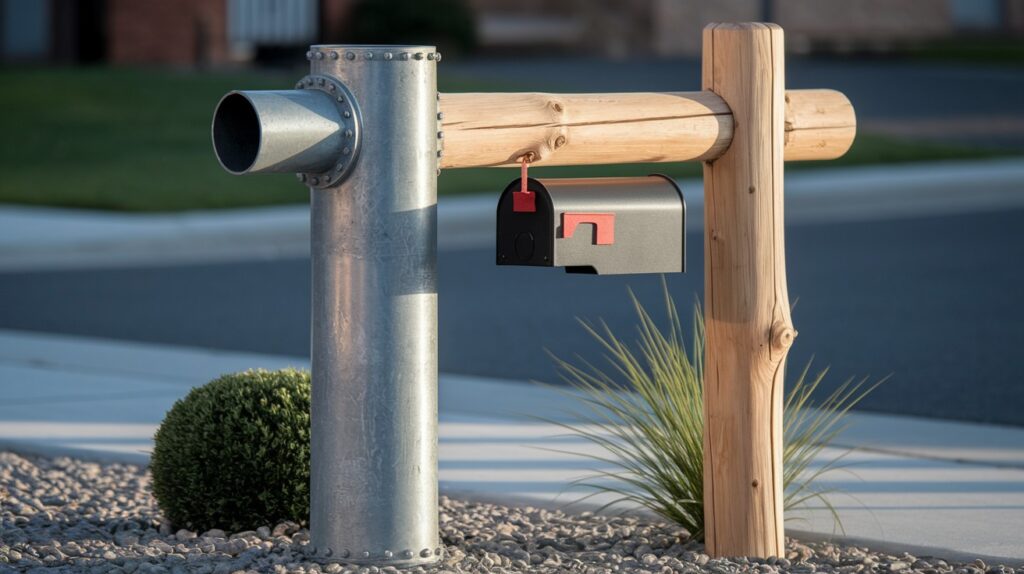
Industrial meets farmhouse in this unique design.
The metal pipe provides the structure. Wood adds the rustic warmth. The contrast makes both materials pop.
Materials needed:
- 4-inch galvanized steel pipe
- Cedar or pine boards
- Metal brackets
- Concrete for setting
Assembly tip: Paint the pipe with metal primer first. Raw galvanized steel can react with some wood stains and cause discoloration.
This style works great for modern farmhouse homes. It bridges the gap between sleek and rustic.
9. Decorative Carved Post with Rustic Stain

Personal touches make all the difference.
Carve your family name, house numbers, or decorative motifs into the post. Then finish with a rustic stain that highlights the carved details.
Stain colors that work:
- Dark walnut for dramatic contrast
- Weathered gray for aged appeal
- Honey oak for warmth
Carving options:
- Router with letter templates
- Hand-carving tools
- Local woodworker
Final finish: Use matte polyurethane instead of glossy. The flat finish looks more authentic and hides fingerprints better.
Your mailbox post becomes a welcome sign and address marker all in one.
Tips for Maintaining Your Rustic Mailbox Post
Weatherproofing Essentials
- Use marine-grade polyurethane or exterior wood stain
- Apply two thin coats instead of one thick coat
- Seal the bottom of the post extra well
- Treat wood with borate for termite protection
- Clean and paint metal parts every 2-3 years
Seasonal Maintenance Checklist
|
Season |
Key Tasks |
|
Spring |
Inspect for winter damage • Clean and touch up finish • Tighten loose hardware |
|
Summer |
Apply fresh stain if needed • Trim nearby vegetation • Check for insect damage |
|
Fall |
Clear debris from base • Apply winter protection coat • Secure decorations |
|
Winter |
Remove ice buildup gently • Avoid salt near wooden posts • Check for storm damage |
Bonus Décor Ideas
- Small planter boxes with drainage holes
- Solar lanterns on decorative brackets
- Carved wood or wrought iron house numbers
- Simple seasonal wreaths or ribbons
- Weather-resistant materials only
Conclusion
Your rustic mailbox post can transform your home’s first impression. These 9 ideas give you options for every skill level and budget.
Start with the design that matches your home’s style. A classic wooden post works for most properties. Stone bases add durability. Reclaimed barn wood tells a story.
The key to success is proper weatherproofing. Use quality sealants and follow the seasonal maintenance schedule. Your post will look great for years.
Small touches make big differences. Add a planter box or solar lantern for extra charm. Keep decorations simple and weather-resistant.
Building your rustic mailbox post saves money and creates something unique. Your neighbors will notice the upgrade. More importantly, you’ll smile every time you check the mail.
Take your time, use good materials, and enjoy the process. Your entryway deserves something special.
Frequently Asked Questions
How deep should I bury my mailbox post?
Bury your post at least 2 feet deep in concrete. For heavy posts or windy areas, go 3 feet deep. The concrete should extend 6 inches above ground level to prevent water from pooling around the wood.
What type of wood lasts longest for outdoor mailbox posts?
Cedar and redwood naturally resist rot and insects. Pressure-treated pine costs less but needs more maintenance. Avoid regular pine or oak without treatment as they rot quickly outdoors.
Can I install a rustic mailbox post myself?
Yes, most designs are DIY-friendly. You need basic tools like a post-hole digger, level, and drill. The trickiest part is getting the post perfectly straight while the concrete sets. Take your time with this step.
How often should I re-stain my wooden mailbox post?
Re-stain every 2-3 years in most climates. Posts in sunny or wet locations may need annual touch-ups. Check the finish each spring and fall. If water soaks in instead of beading up, it’s time to re-stain.
Do rustic mailbox posts meet postal service requirements?
Yes, as long as your mailbox is 41-45 inches high and 6-8 inches from the curb. The post style doesn’t matter to postal workers. Check with your local postmaster if you have specific questions about placement.